Hello, readers! It’s back to your regularly scheduled program of nail art tutorials on tuesdays here at Adventures In Acetone! I’m glad to be getting back into the normal schedule here.
Here is a sneak peek of today’s tutorial. You can find step by step pictures and instructions further down in this post:

Today’s tutorial is another design from my Zoo Animal manicure a year and a half ago. It’s the elephant design on my thumb below:

Let’s get started!
The things needed for this tutorial:
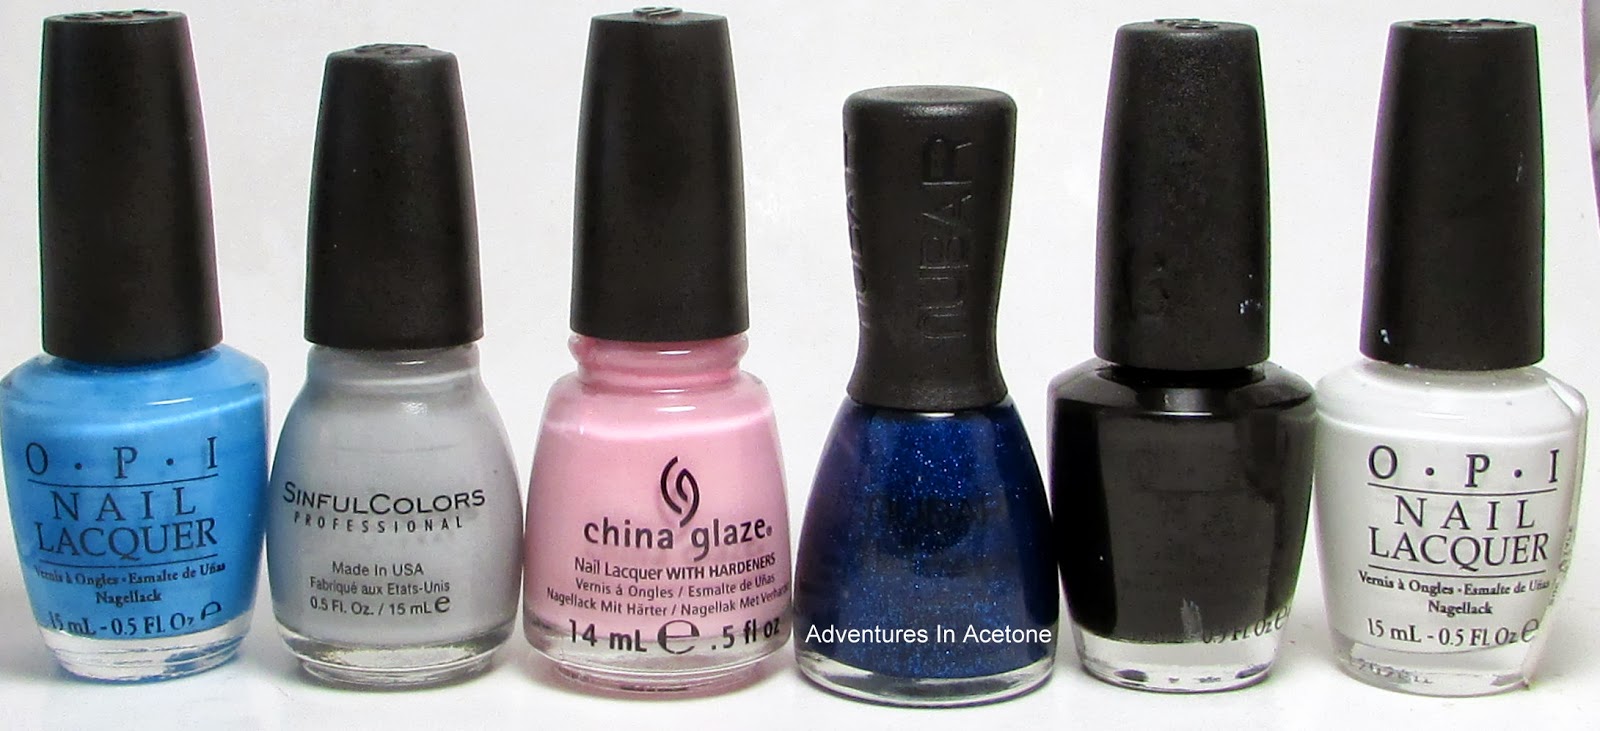
OPI No Room For The Blues, Sinful Colors Cool Gray, China Glaze Something Sweet, Nubar Night Sparkle, OPI Black Onyx, OPI Alpine Snow.
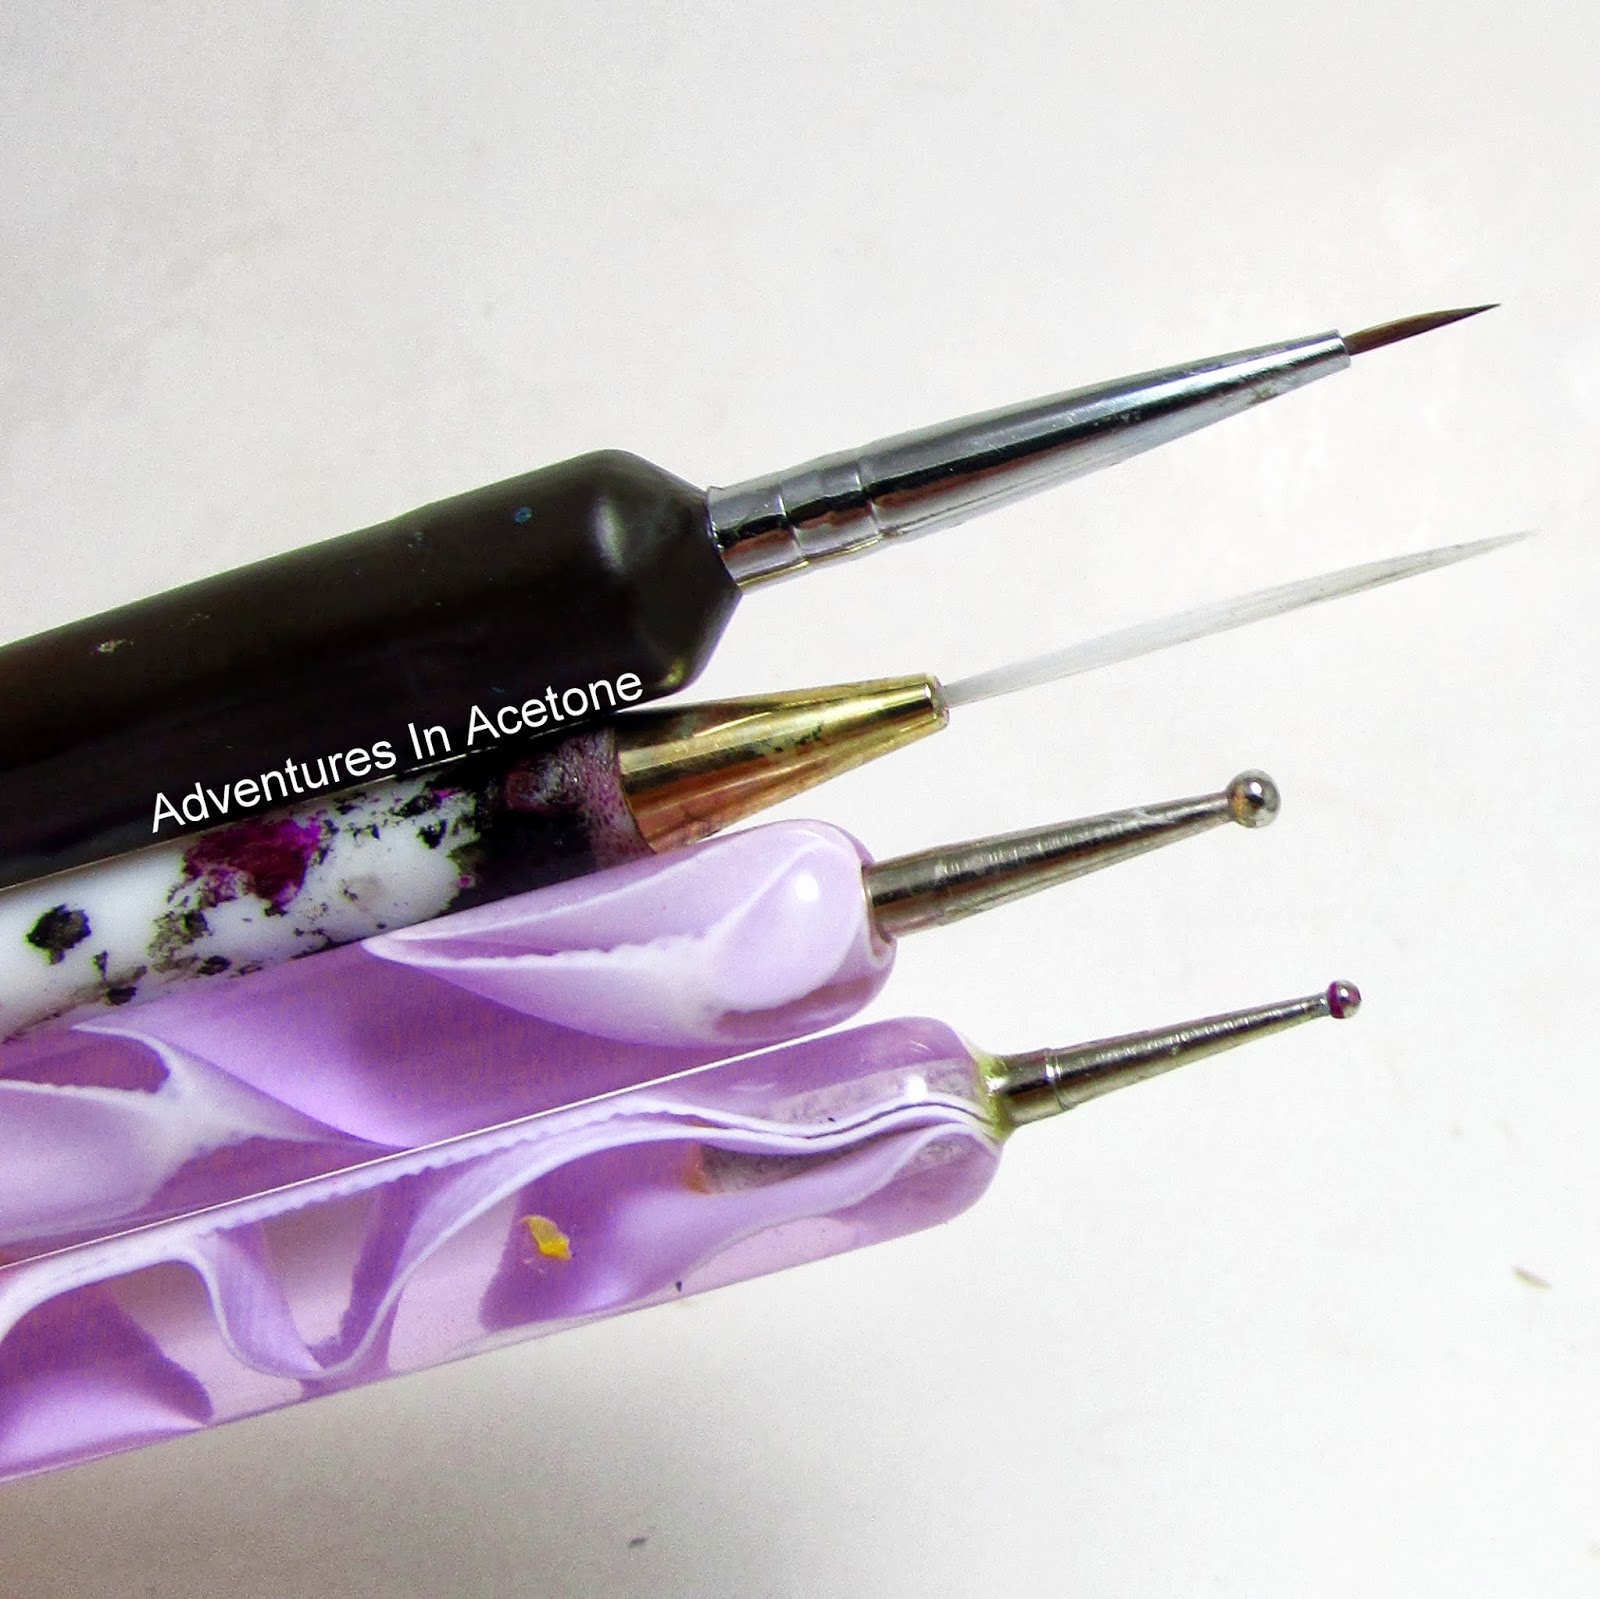
Detail brush, striper brush, two sizes of dotting tools.
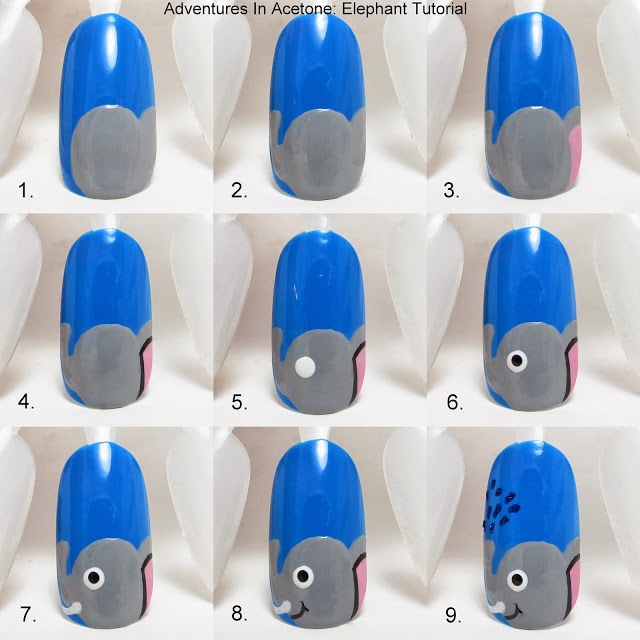
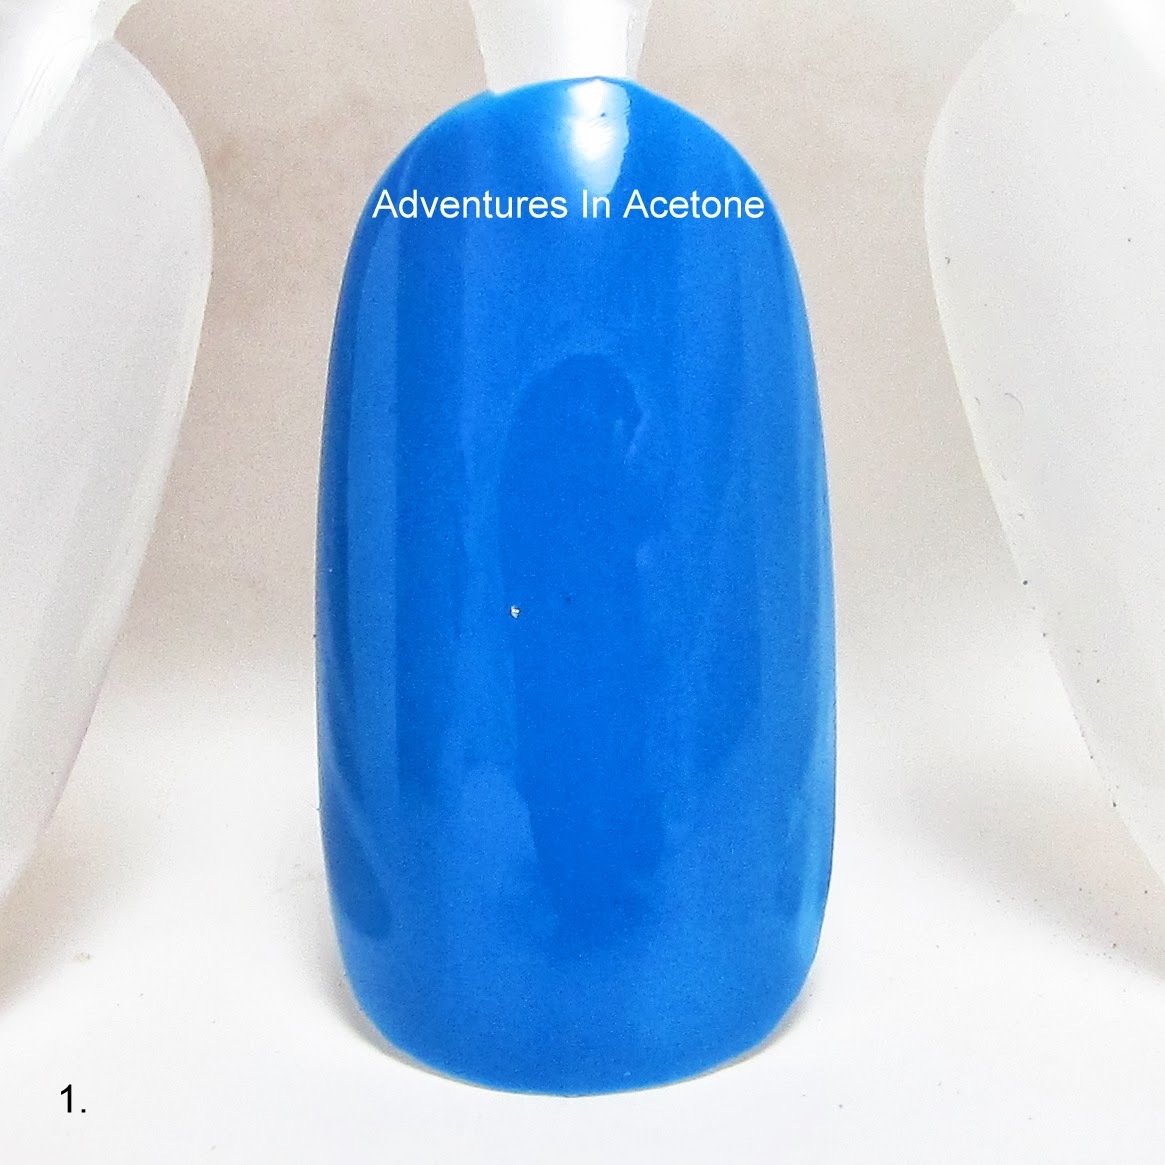
Step 1) After applying base coat, paint 2 coats of OPI No Room For The Blues and let dry.
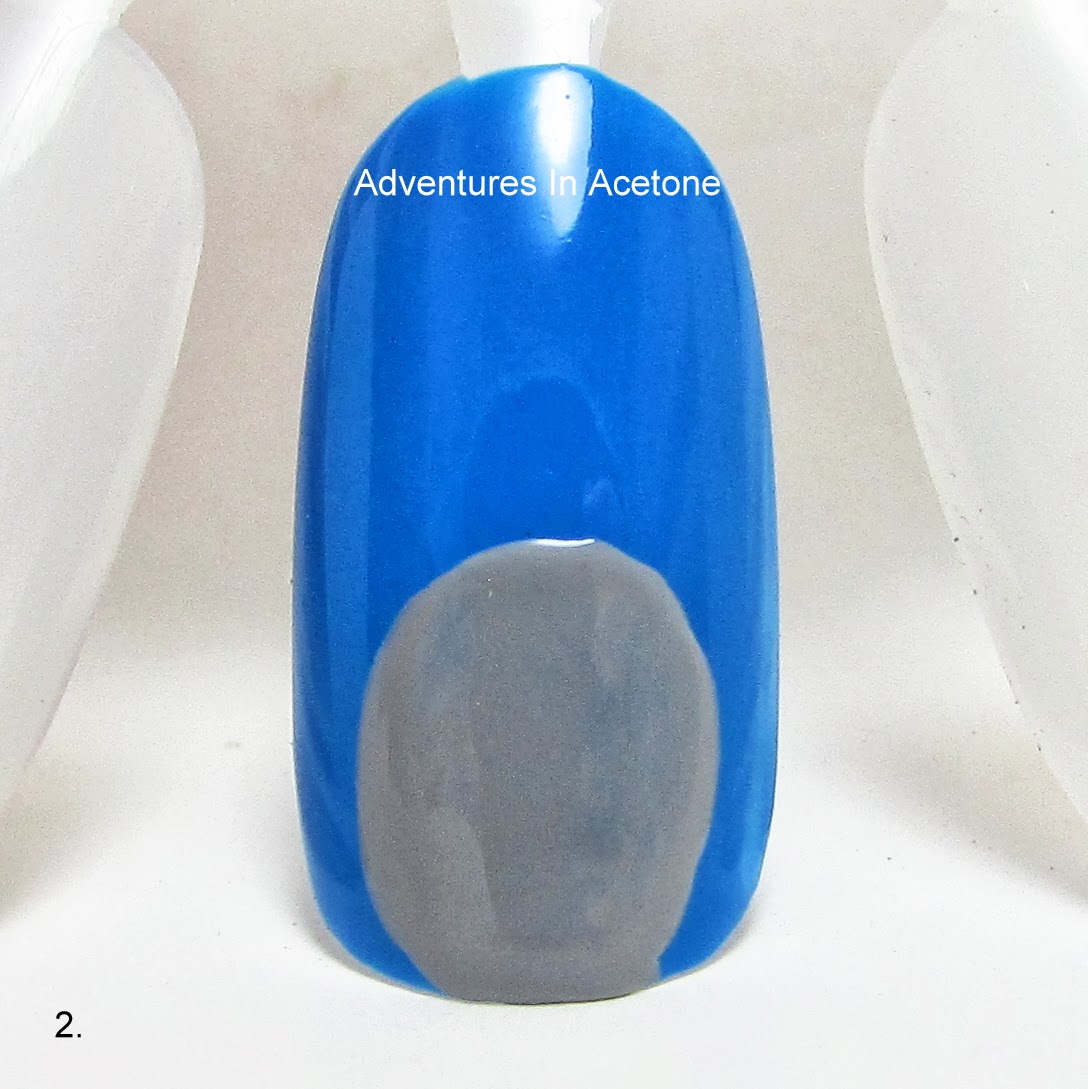
Step 2) Using Sinful Colors Cool Gray, paint an oval onto the bottom half of the nail.
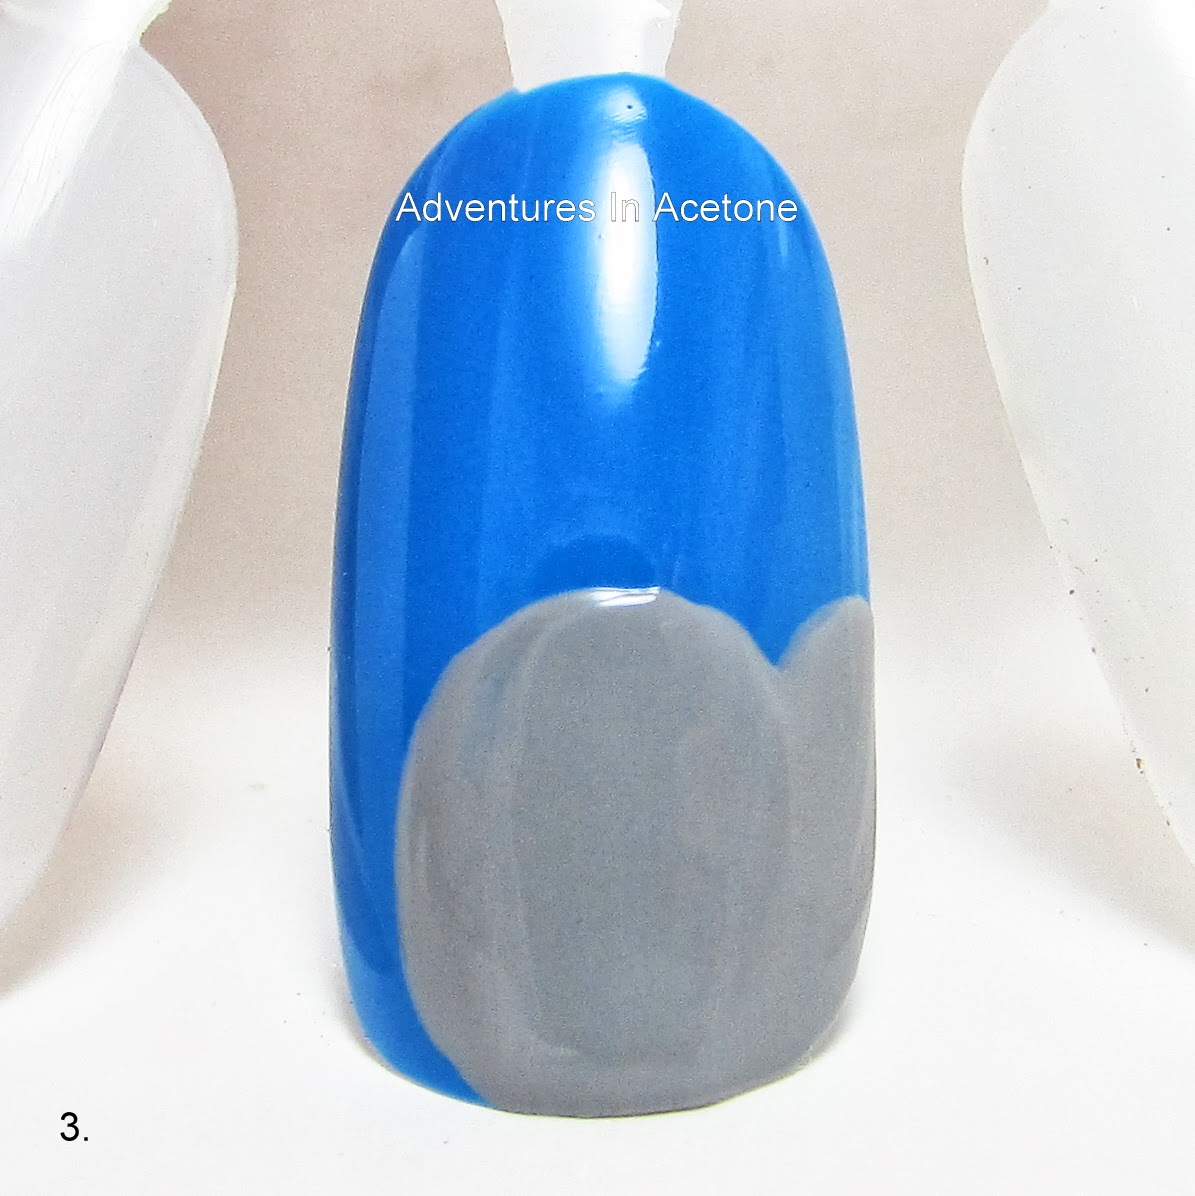
Step 3) Paint a third of an oval on the right side of the head for the big elephant ear with Sinful Colors Cool Gray. You’ll want this to go to the edge of the nail to appear that the ear continues on past the nail.
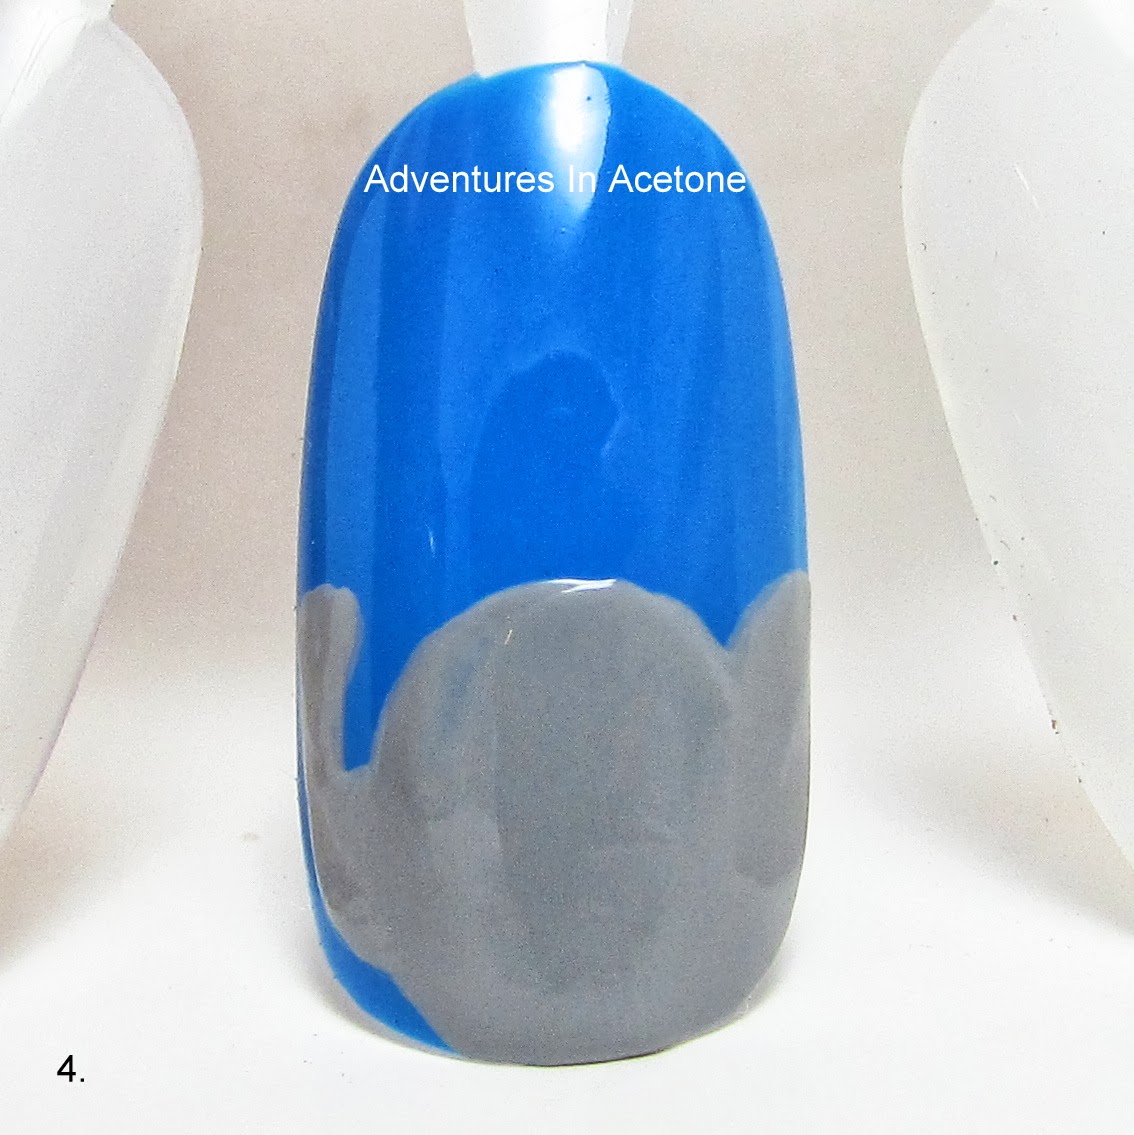
Step 4) Use your detail brush and draw an elephant trunk shape on the left side of the head. You will want this pointing upward for the water spray at the end of this tutorial.
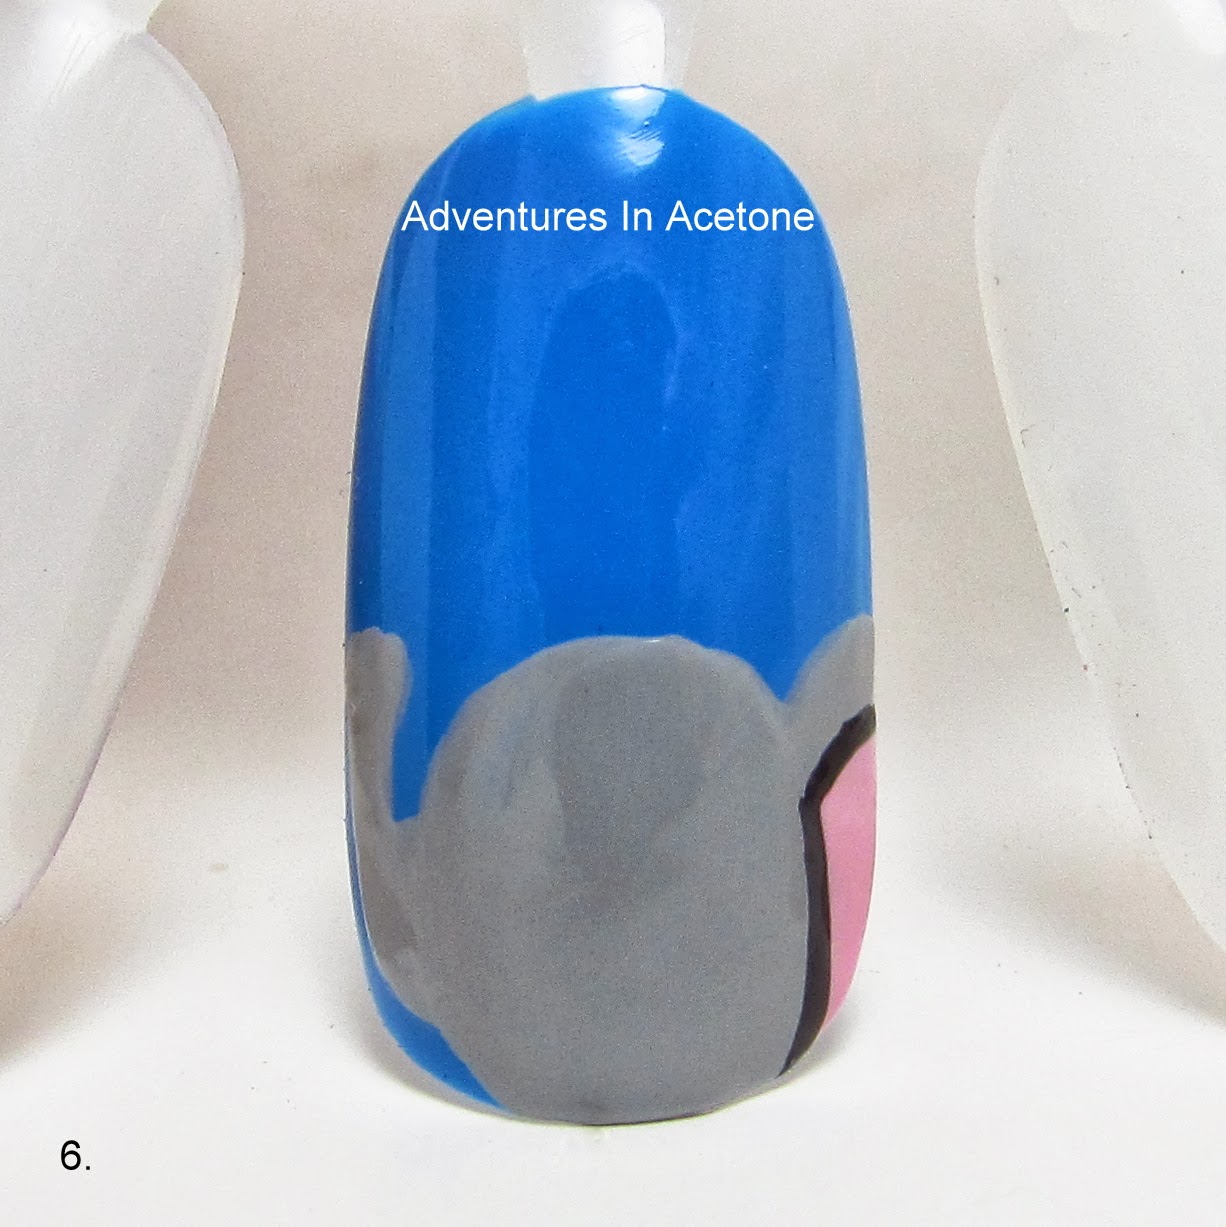
Step 5) Use China Glaze Something Sweet and your detail brush to paint the “inside” of the big ear. Again, this should extend to the edge of the nail.

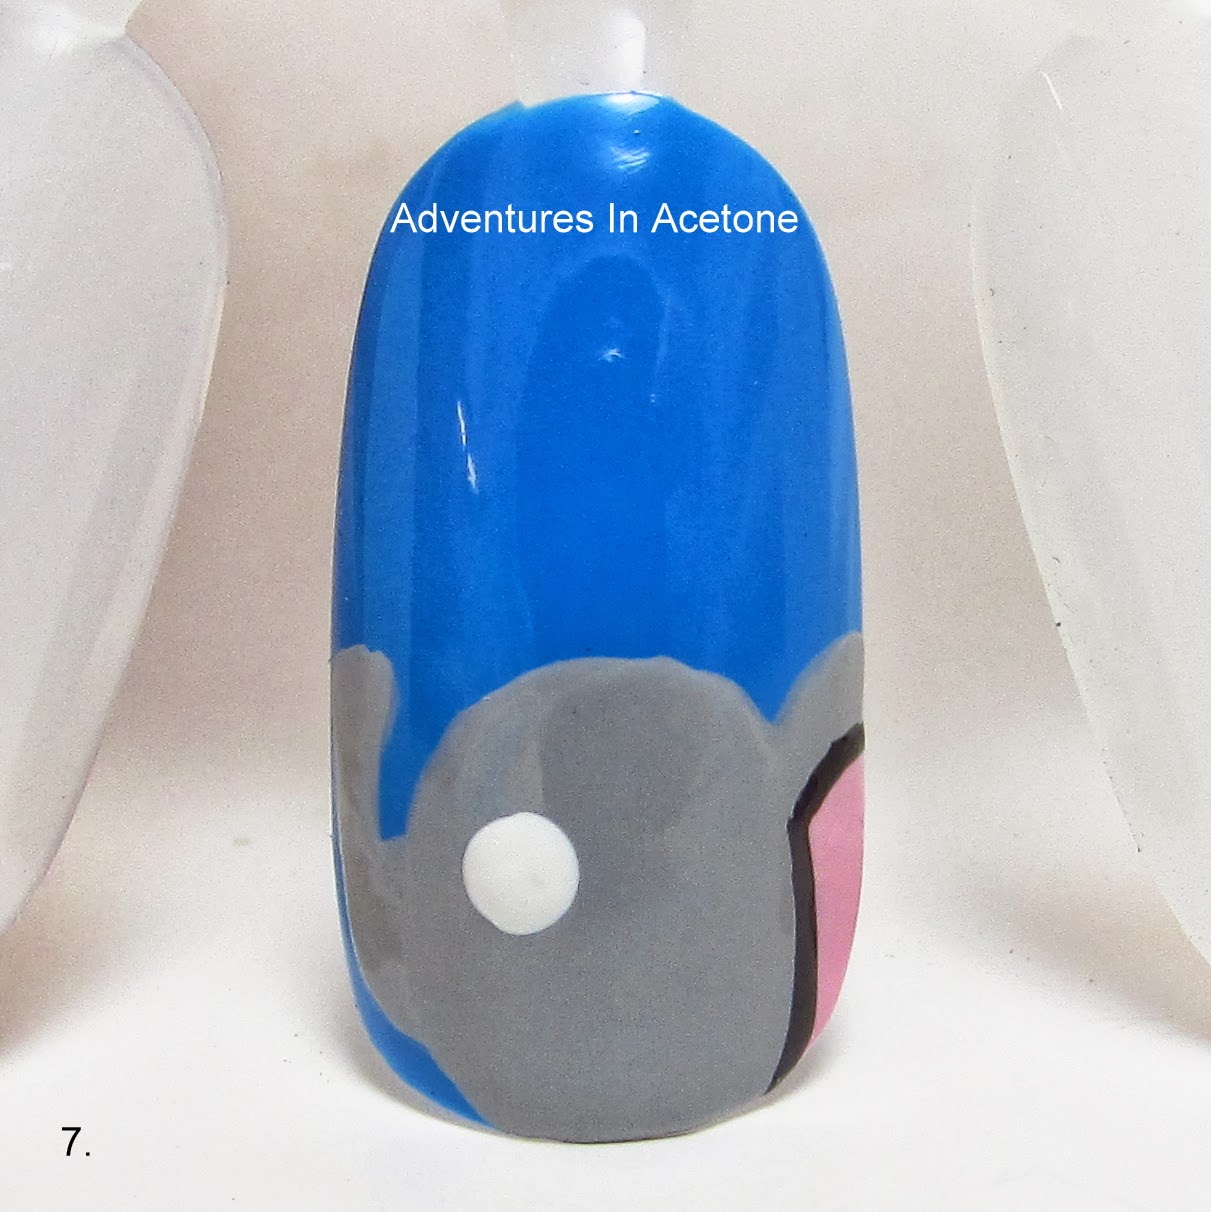
Step 6) Use your striper brush and OPI Black Onyx to draw the outline of the inner ear shape.
Step 7) Use the bigger dotting tool and OPI Alpine Snow to make a dot for the eye.
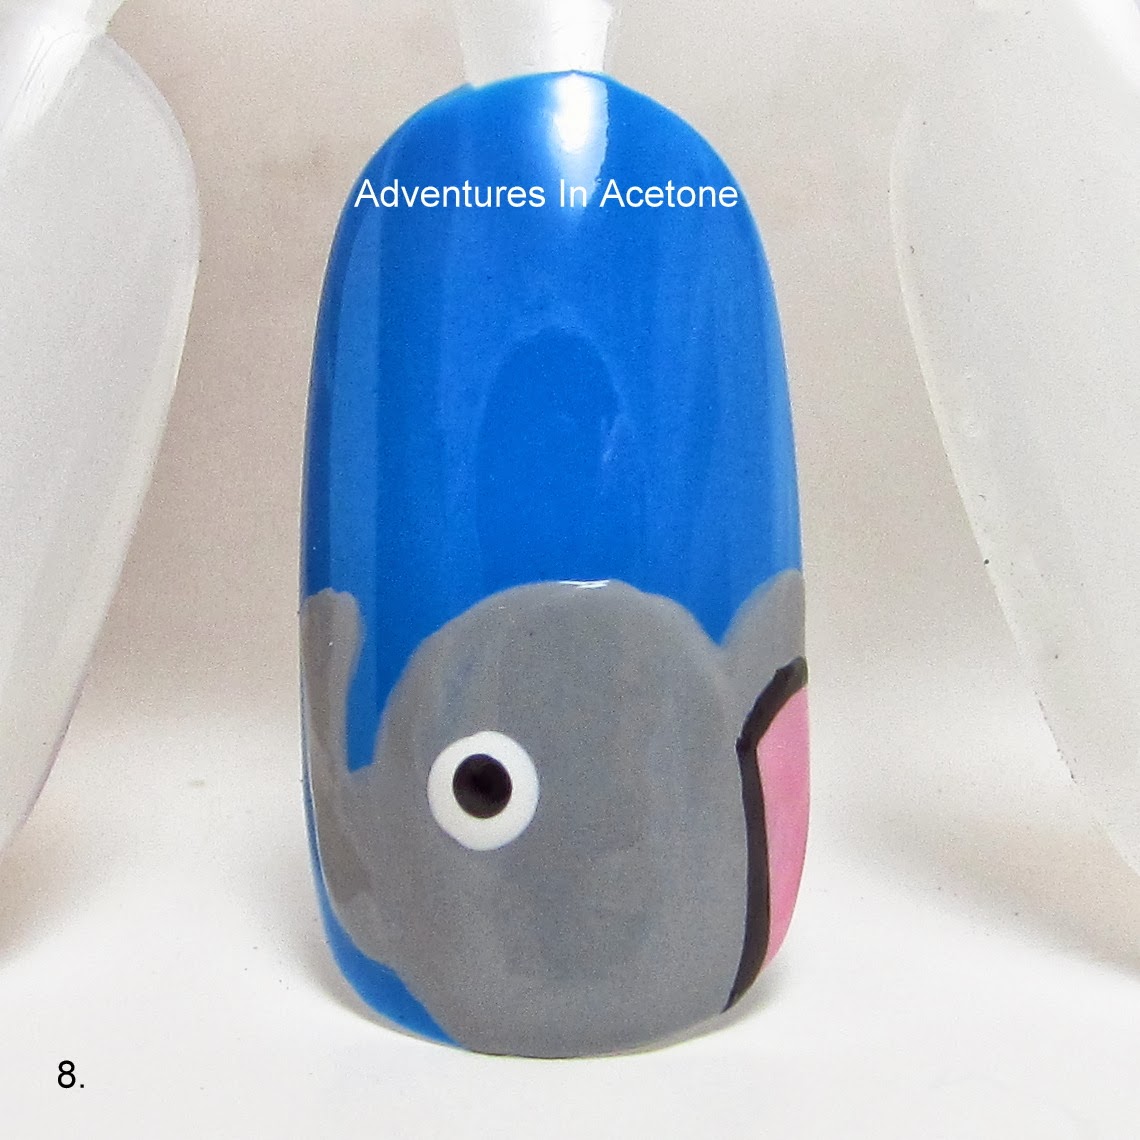
Step 8) Use the smaller dotting tool and OPI Black Onyx to make a smaller dot inside of the eye.
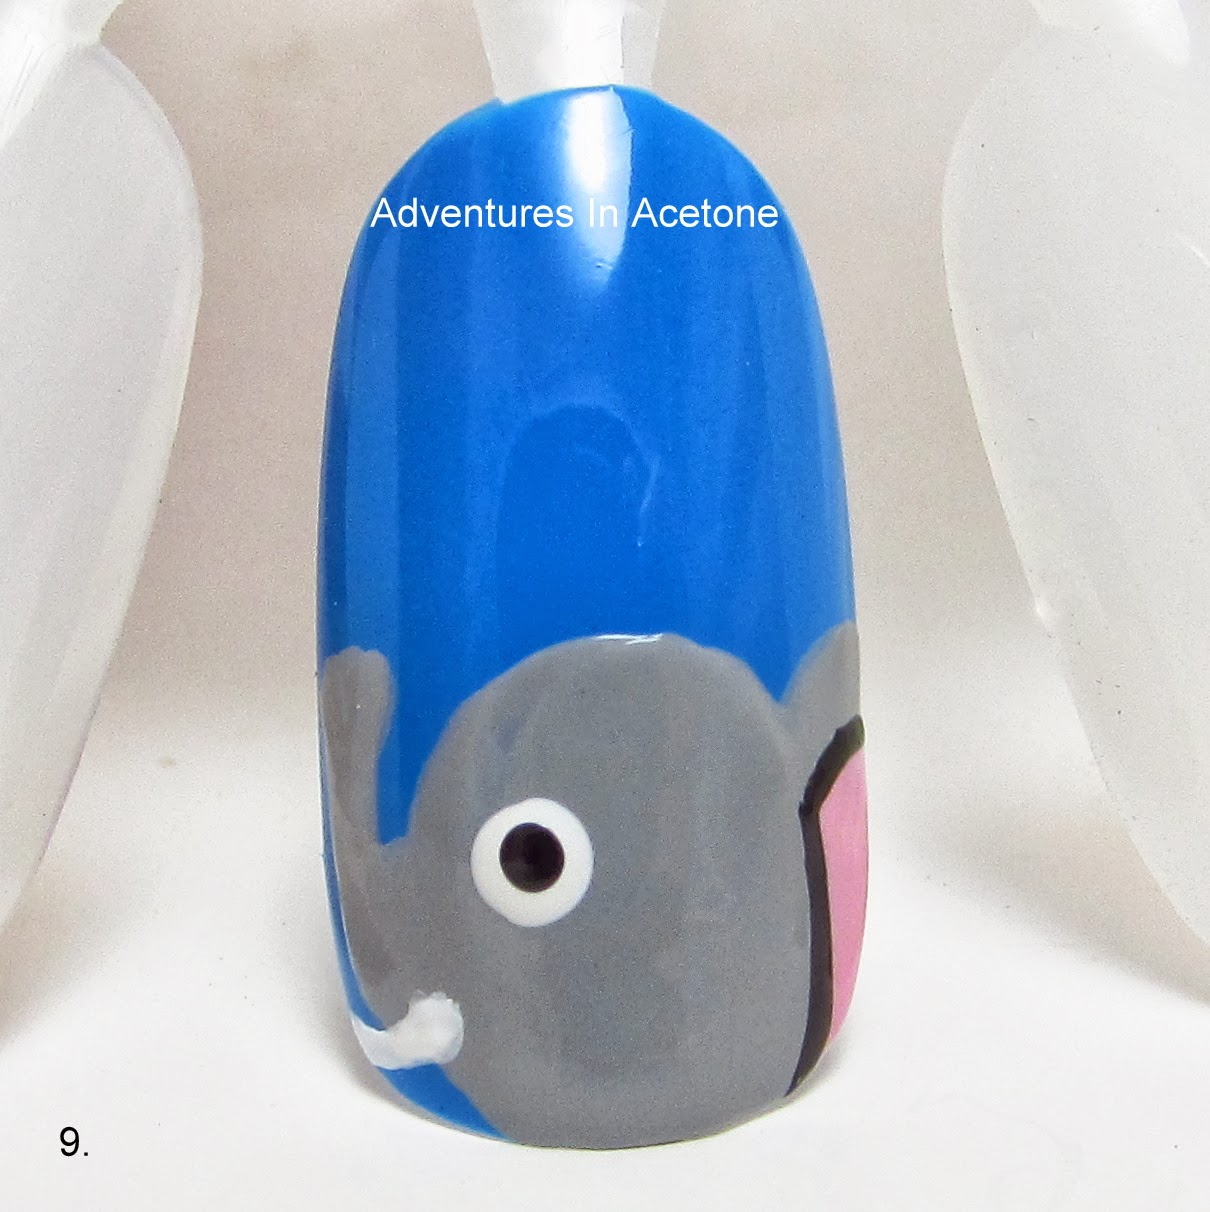
Step 9) Use your detail brush and OPI Alpine Snow to make a curved line under the trunk for the tusk.
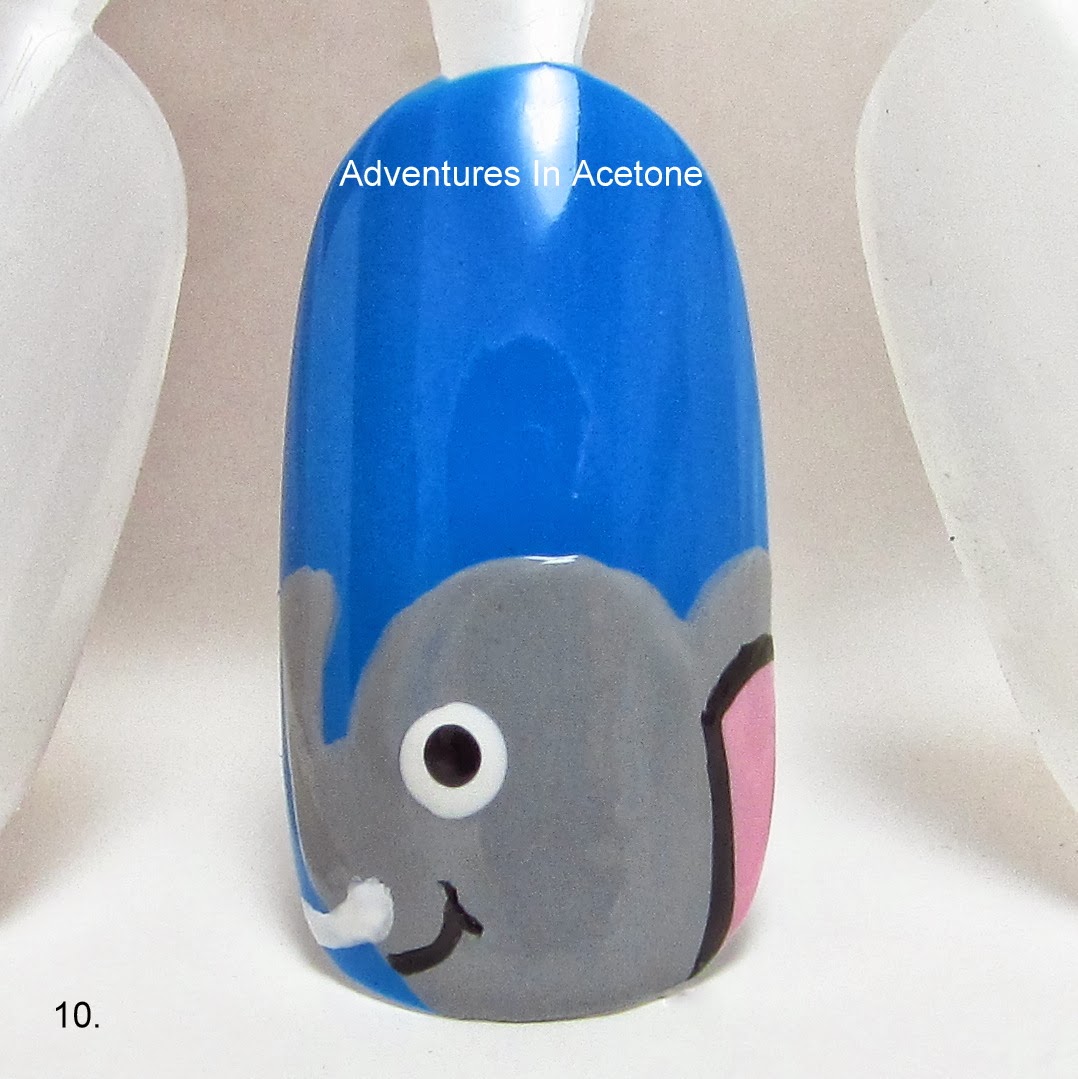
Step 10) Use the striper brush and OPI Black Onyx to draw a cute little curved mouth for the elephant.
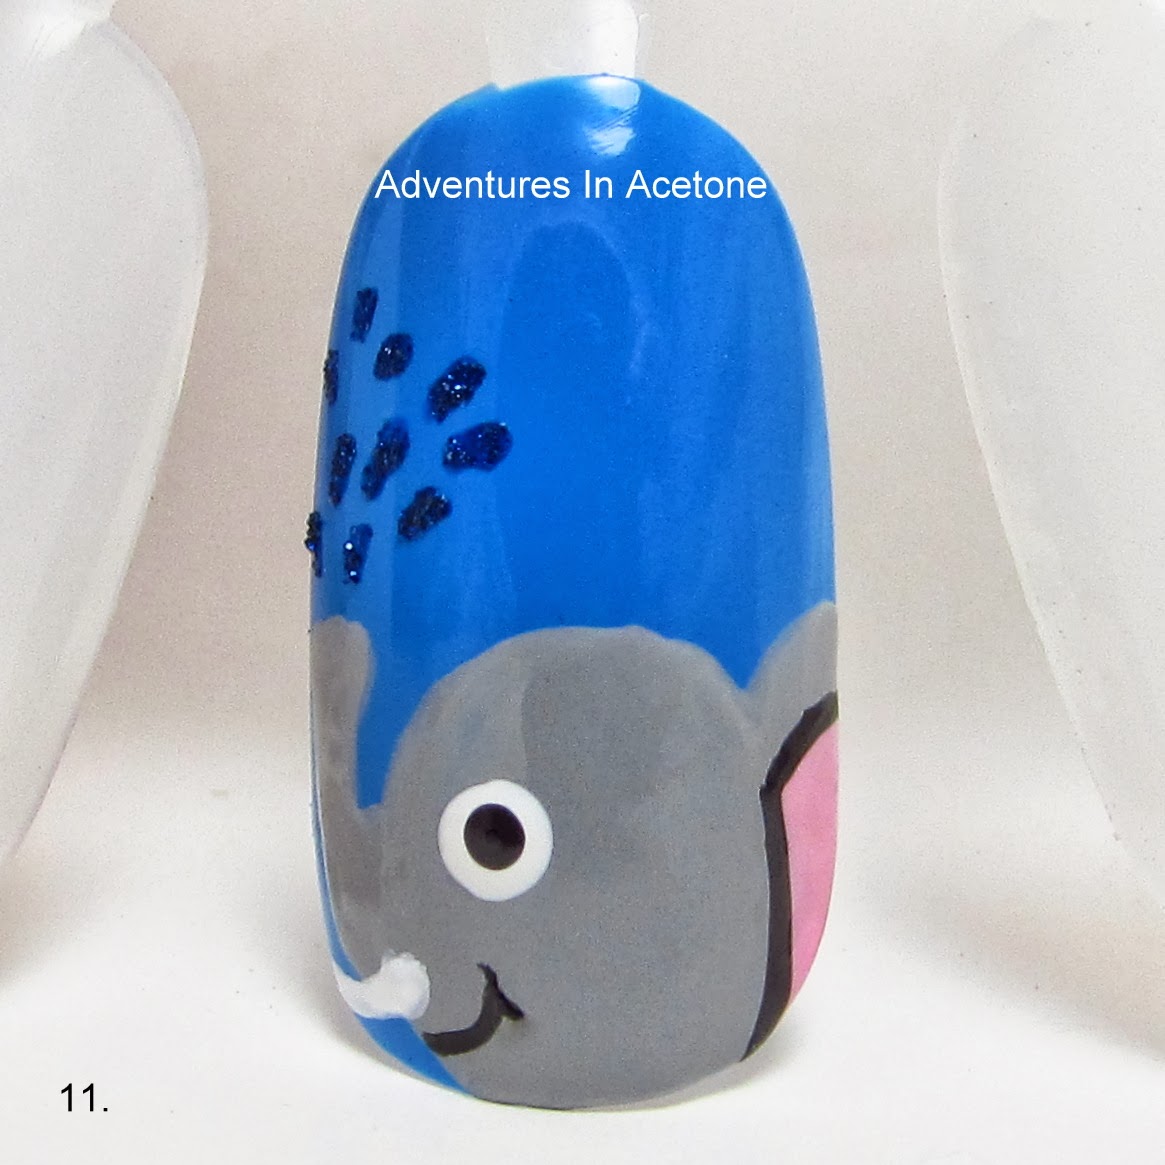
Step 11) The final step is adding some cute water spray drops. I used my detail brush and Nubar Night Sparkle to dab little drop dots upward out of the trunk.
Don’t forget to add a thick, quick drying top coat to protect and seal in your design! I prefer Seche Vite, H K Girl Top Coat, or Poshe. Put a thick bead of top coat on the brush and gently spread it toward the tips and side, taking great care to not let the bristles touch the polish underneath. Thinner top coats can cause streaking or bleeding of the colors and the bristles drag lines through the design. YOU’RE DONE!
You can do this on each nail or even as an accent nail. Did this seem easy enough for you to recreate? I hope so, as you can see in the step by step instructions, it is made up of simple shapes!
What did you think of this Tutorial Tuesday design? Please let me know if you tried out my tutorial by posting your pic on either my Facebook Page or tag me in your instagram photo! You can find the icon links to both my facebook and instagram at the top right of the blog in teal!
Thank you so much for reading!
If you enjoyed this post, please Sign Up for email updates and you will have the latest news, reviews, nail art, and tutorials delivered right to your inbox! Never miss a post from Adventures In Acetone again. Thank you so much for reading.
– Let’s paint something amazing! –

Comments
Oh my goodness this is so cute! I love elephants! I am going to have to try this mani!
Such an adorable little guy! I must try this 🙂
Another wonderful tutorial, thank you!!
Absolutely darling! You rock at giving tutorials too. I'm not so great with directions, haha!
Absolutely adorable elephant, wonderful tutorials (: i shall try it 😉
I love your tutorials, they're always so easy to follow 🙂 http://maliberrymakeup.blogspot.co.uk x x x
Your designs are always so cute and super easy to follow. Thanks for putting these together and sharing with us 🙂
Very cute elephant!
adorable as always and i love the glittery water!