Press Sample
Good morning, readers! I am really excited for this new Digit-al Dozen Week! The theme is Gradient +, which means all of the manis will have a gradient with something added in. For my first mani, I’ve added polka dots! Possibly the most simple nail art addition to a gradient, it seemed like a good way to start the week.
Also, today’s post will be a review of Kiesque Liquid Palisade. A gradient’s best friend, it is like painters tape for your nails. It provides an easy-to-apply barrier that covers and protects cuticles from polish mishaps. Liquid Palisade now comes in a new bottle and there are two different brush options. I’ll be showing you the differences below and step by step pictures to show how you use it.
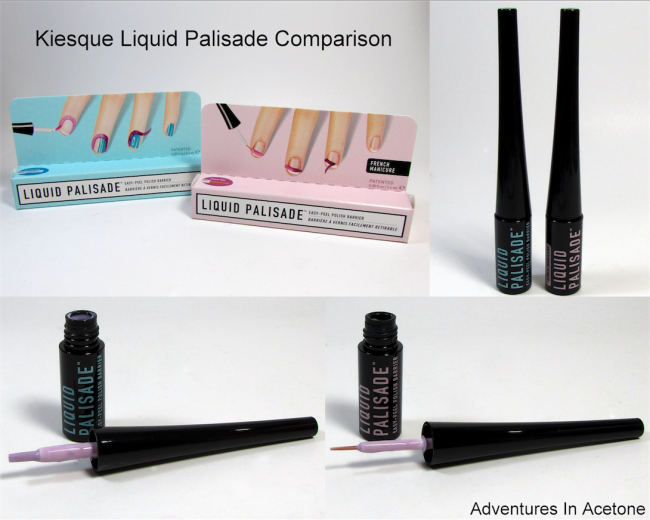
As you can see above, Kiesque Liquid Palisade is available in a regular, wider brush or the thinner French Manicure brush. Both come in a box and in this new bottle shape. (I used to have the older tube bottle and this one seemed a little more stable and I was able to gently dip the brush into it without knocking it over. That was an improvement from the previous bottle.) They are small bottles, only 0.08 fl oz/ 2.4ml each. The original tube was 0.35fl oz. The smaller bottles bring the original price of $22 down to $14, which is an easier price point to try a new-to-you product. The original, larger bottle is no longer available so you will have to choose between the two I am showing today. This contains natural rubber latex so please be aware for allergy purposes.
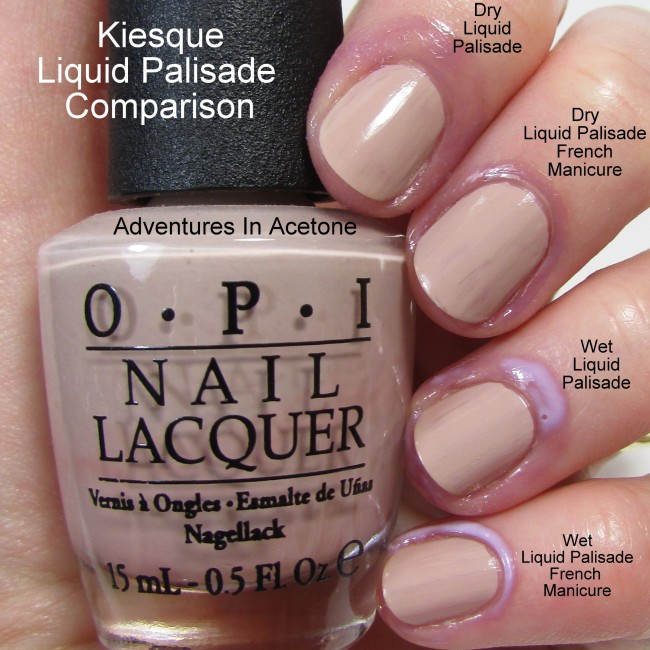
Below, you can see a comparison of how the product applies with the two different brushes. My index and ring fingers have the wider brush, while the middle and pinky have the thinner, French Manicure brush. You can also see that while the product is wet, it is a lighter purple and it dries to a darker, more translucent purple with a bit of shimmer when it’s ready to paint over. The index and middle are dry, the ring and pinky are just starting to dry. They don’t take very long to dry, and the color change is helpful so you know when it’s ok to start your nail art.
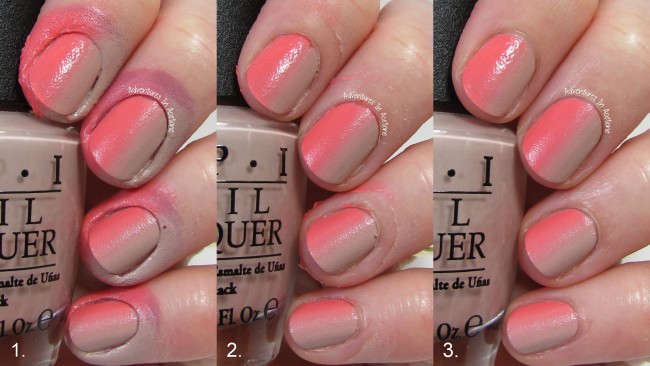
My favorite use of Kiesque Liquid Palisade is to help with gradient clean up. Sponging polish onto the nail for a gradient is MESSY. It gets all over the cuticles and skin around the nails and takes a good amount of work to clean it up. In comes Liquid Palisade. Below, you can see the steps along the way for a gradient using Liquid Palisade.
- Step 1: Paint the thicker brush Liquid Palisade around the nails and let dry to a darker purple color. Then, paint your two colors onto the sponge and dab on all of the nails over and over until it is opaque and blended.
- Step 2: Use tweezers to grab the edge of the Liquid Palisade and peel up. It is stretchy and should come up in one piece all around the nail. You are left with minimal cleanup, most of it being on the fingers and this can be prevented by painting outward with the Liquid Palisade more than I did.
- Step 3: Using acetone and a cleanup brush, easily wipe off the excess polish. Now you are ready for further nail art on top (as I will be showing you) or top coat.
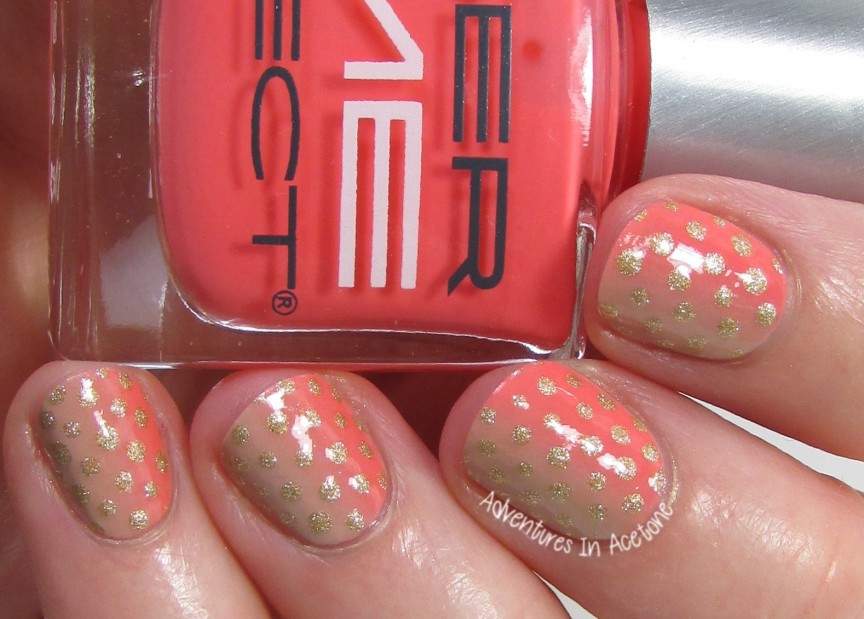
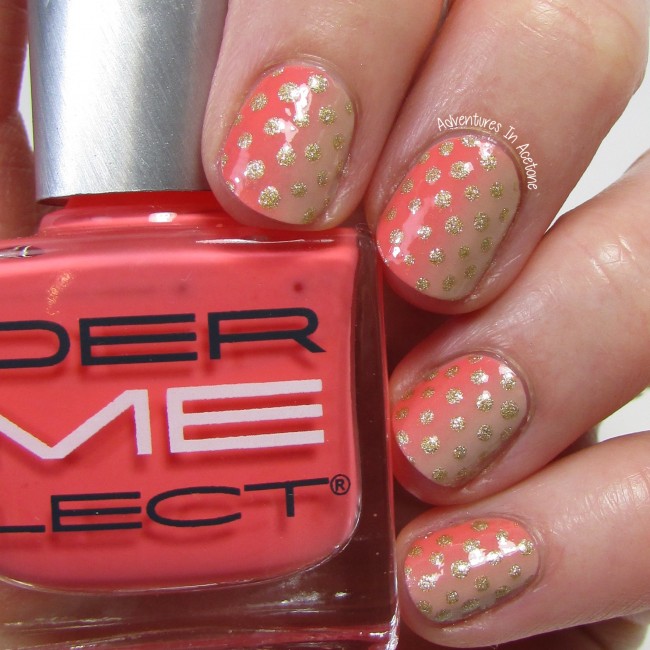
This is Digit-al Dozen Gradient + Week so of course I wanted to add something on top of this gradient: polka dots!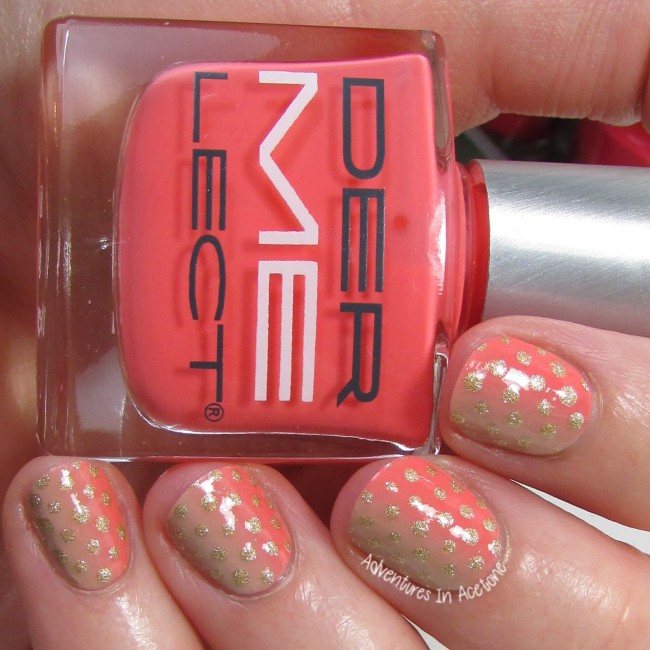
- Each nail started with a coat of OPI Do You Take Lei Away?
- While that was drying, I used the thicker brush version of Keisque Liquid Palisade to paint a protection around the nails to protect the cuticles from excess polish.
- For the gradient, I painted two lines side by side on a triangle makeup sponge of OPI Do You Take Lei Away? and Dermelect Explosive.
- Then, I dabbed the painted sponge onto the nails. I had to re-paint the sponge and dab a handful of times before I was happy with the blending and opacity of the gradient.
- When the gradient was finished, I used tweezers to peel off the Liquid Palisade and most of the excess polish.
- I used a cleanup brush and acetone to remove any other polish from the cuticles and skin.
- A small dotting tool was used to add polka dots to the nails with OPI Love.Angel.Music.Baby.
- I sealed them in with a coat of NYC Grand Central Station quick drying top coat.
What do you think of my first gradient mani of this Digit-al Dozen week? Have you tried Kiesque Liquid Palisade before? Which brush thickness would you use the most? The thinner brush works really well for nail art ON the nail so I can’t wait to try it out in that way. You can purchase Liquid Palisade at http://kiesque.com.
*The products in this post were sent for me to review with my honest opinion.
Check out what the other Digit-al Dozen ladies did for Day 1 below:
 Loading InLinkz ...
If you enjoyed this post, please Sign Up for email updates and you will have the latest news, reviews, nail art, and tutorials delivered right to your inbox! Never miss a post from Adventures In Acetone again. Thank you so much for reading.
– Let’s paint something amazing! –

Comments
This is such a cute look! Great color choices!