Good afternoon, readers! I’m so very far behind on Digit-al Dozen New & Improved Week! My daughter, Hailey, had a bad accident at soccer practice that involved a stick and her eyeball on Tuesday. After many hours at the ER and then the optometrist yesterday, we are so thankful to hear that there shouldn’t be any lasting damage to her eye and she only has a few corneal abrasions (scratches on her outer eyeball layer). While very painful the first day, she is pain free today and is back to school. That means that I get to try catching up with the rest of the Digit-al Dozen ladies. They’ve been fabulous this week and I’m finding new techniques for myself to try after looking at their manis!
For today’s new-to-me nail art technique, I’ve been inspired by a post by @emslittlecorner shared on the Girly Bits Cosmetics Instagram using the ÜberChic ÜberMat paired with vinyl stencils to make decals! I’ve had these mermaid scale Stick It! Nail Vinyls for months but didn’t have luck while trying them on my nails previously and had given up on them. After Em’s post, I thought they may work better on a flat surface and I was right! (Note: these were purchased a while ago before the brand switched to new vinyl so hopefully knowing my experience won’t deter you from trying them.)
- I began by peeling the Stick It! Mermaid Scale Vinyl from the backing and placing onto the ÜberMat.
- Then I painted a coat of Cupcake Polish Berry Good Looking over the vinyl stencil onto the mat.
- Before it dried, I used tweezers and peeled the vinyl off of the mat to reveal the scale pattern.
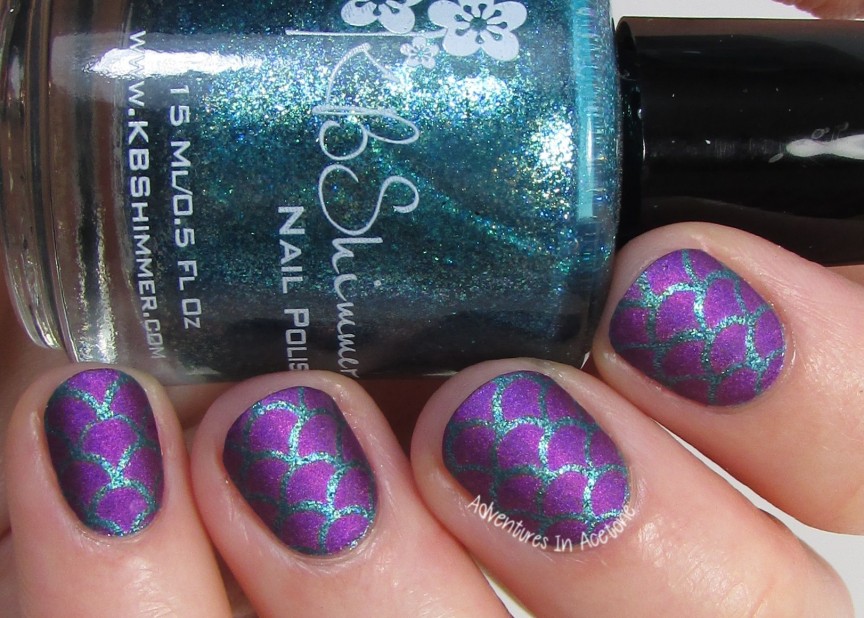
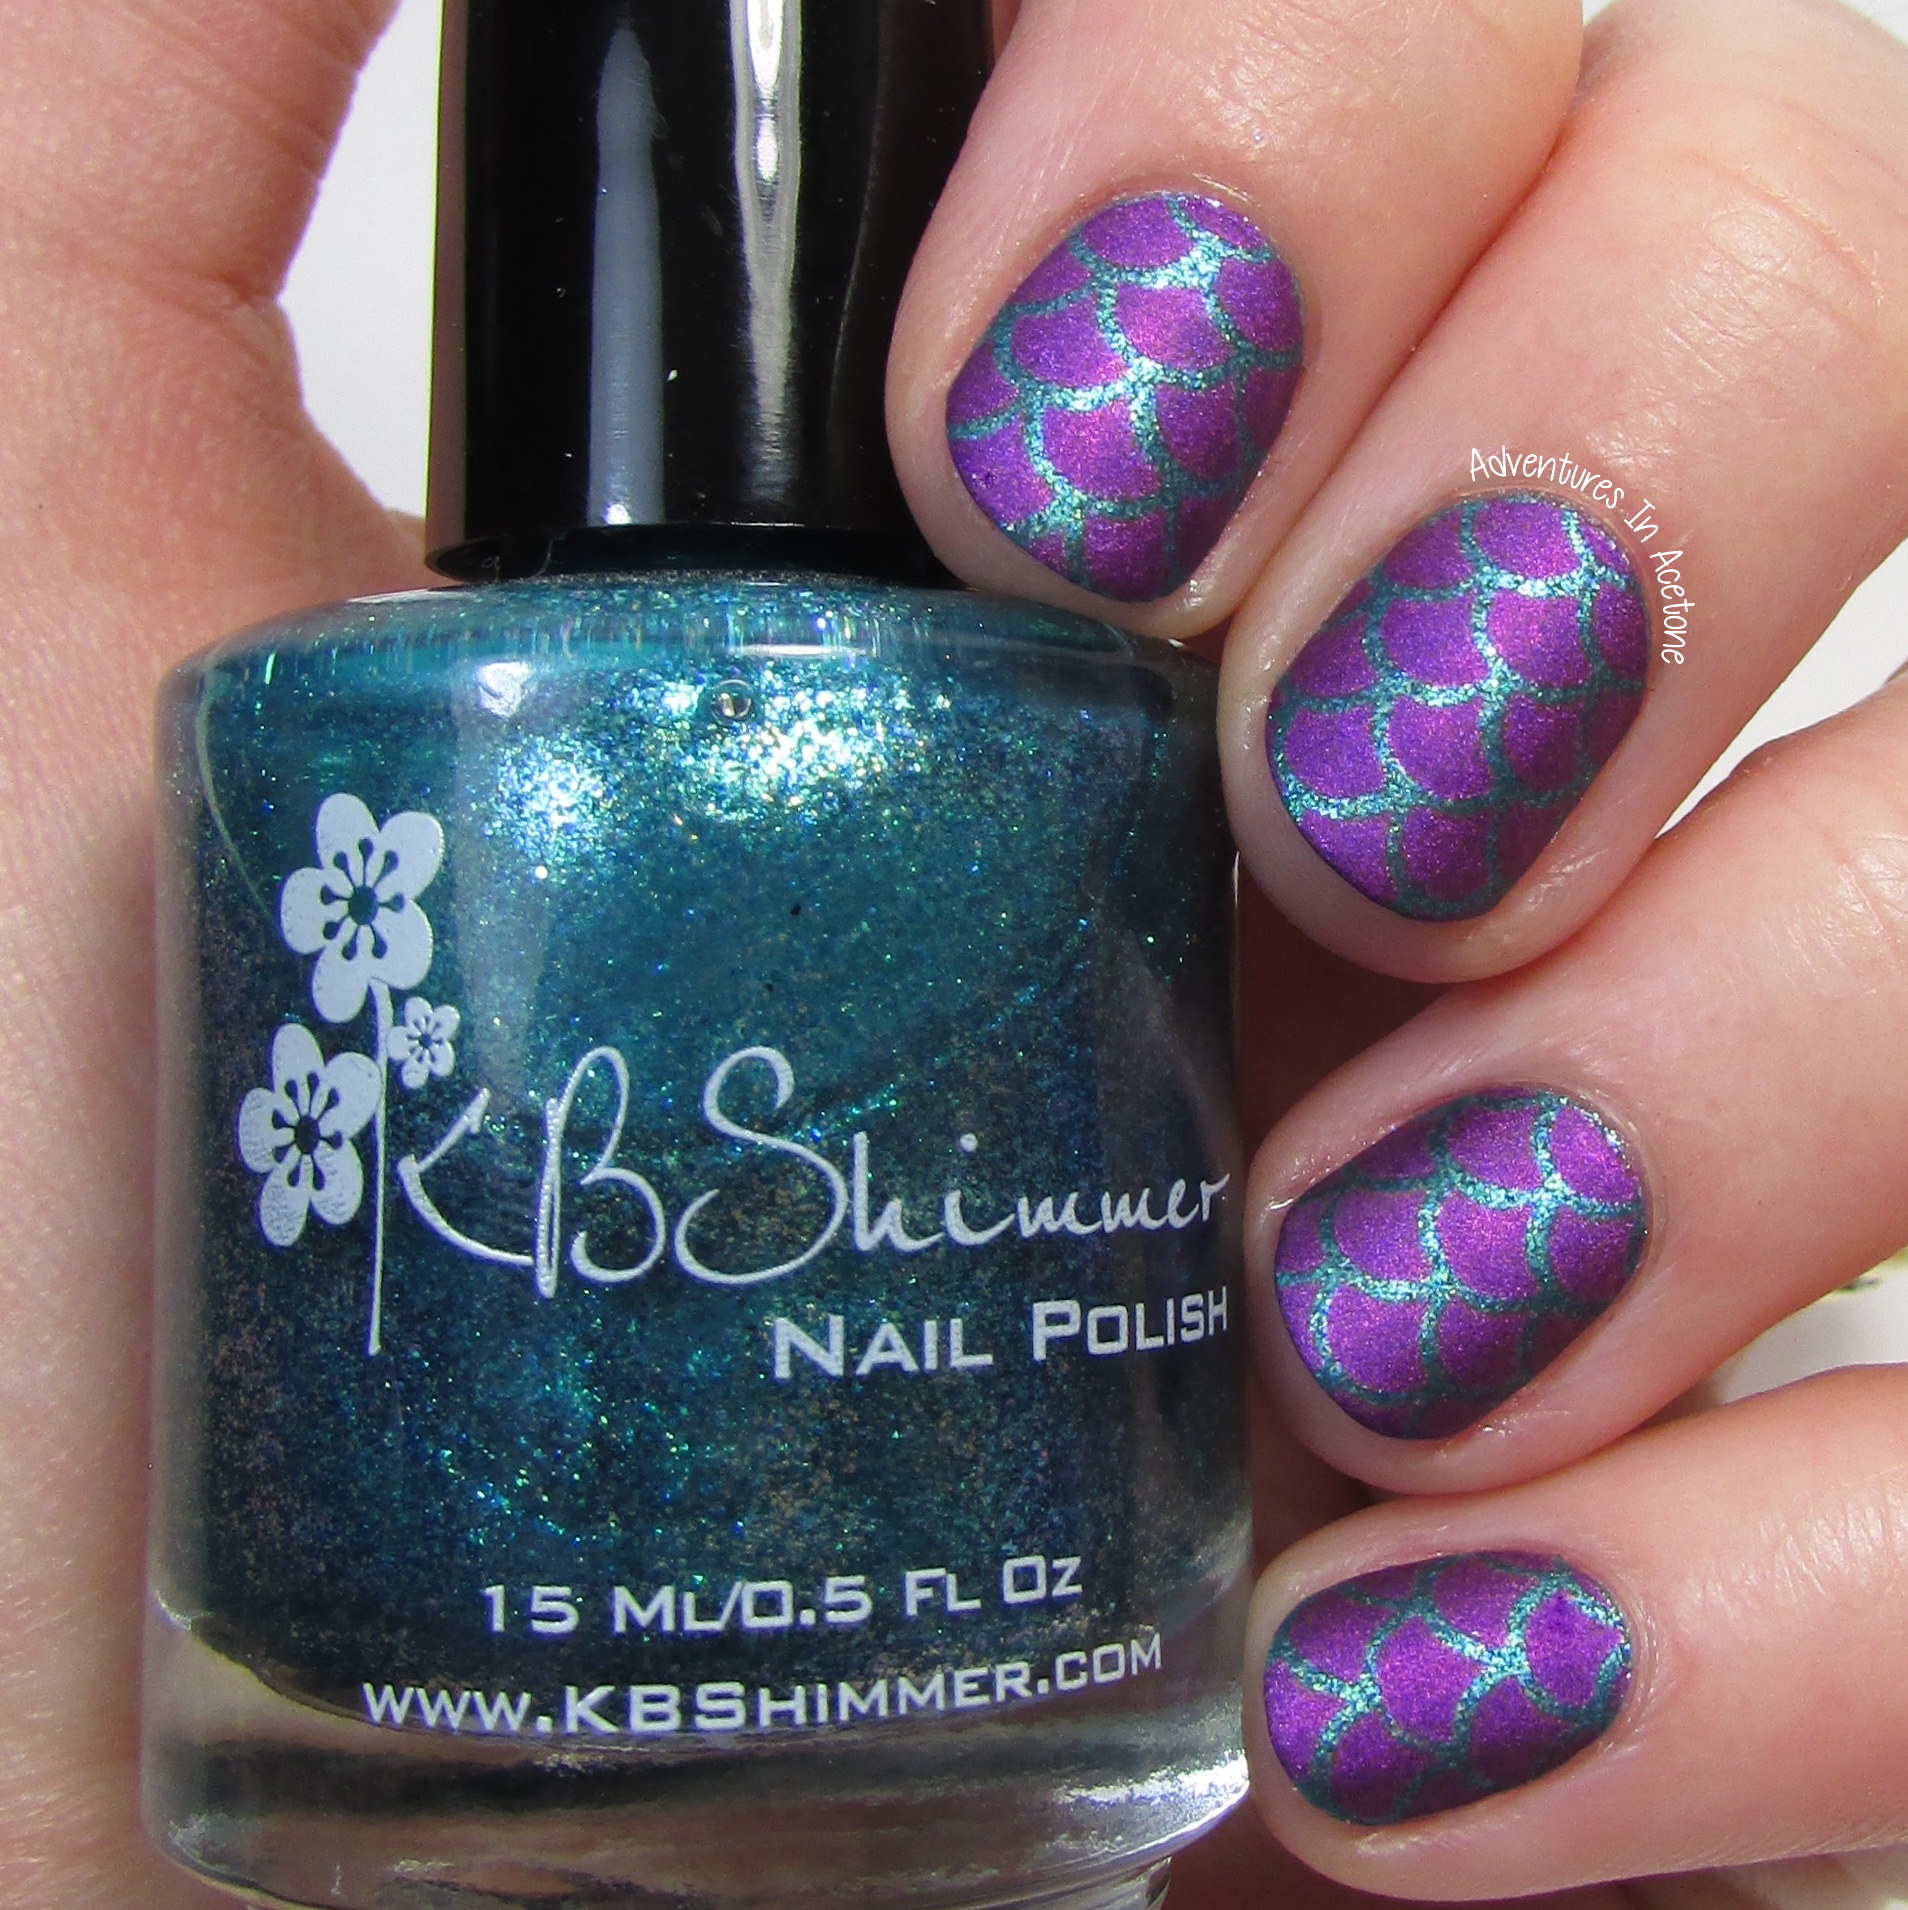
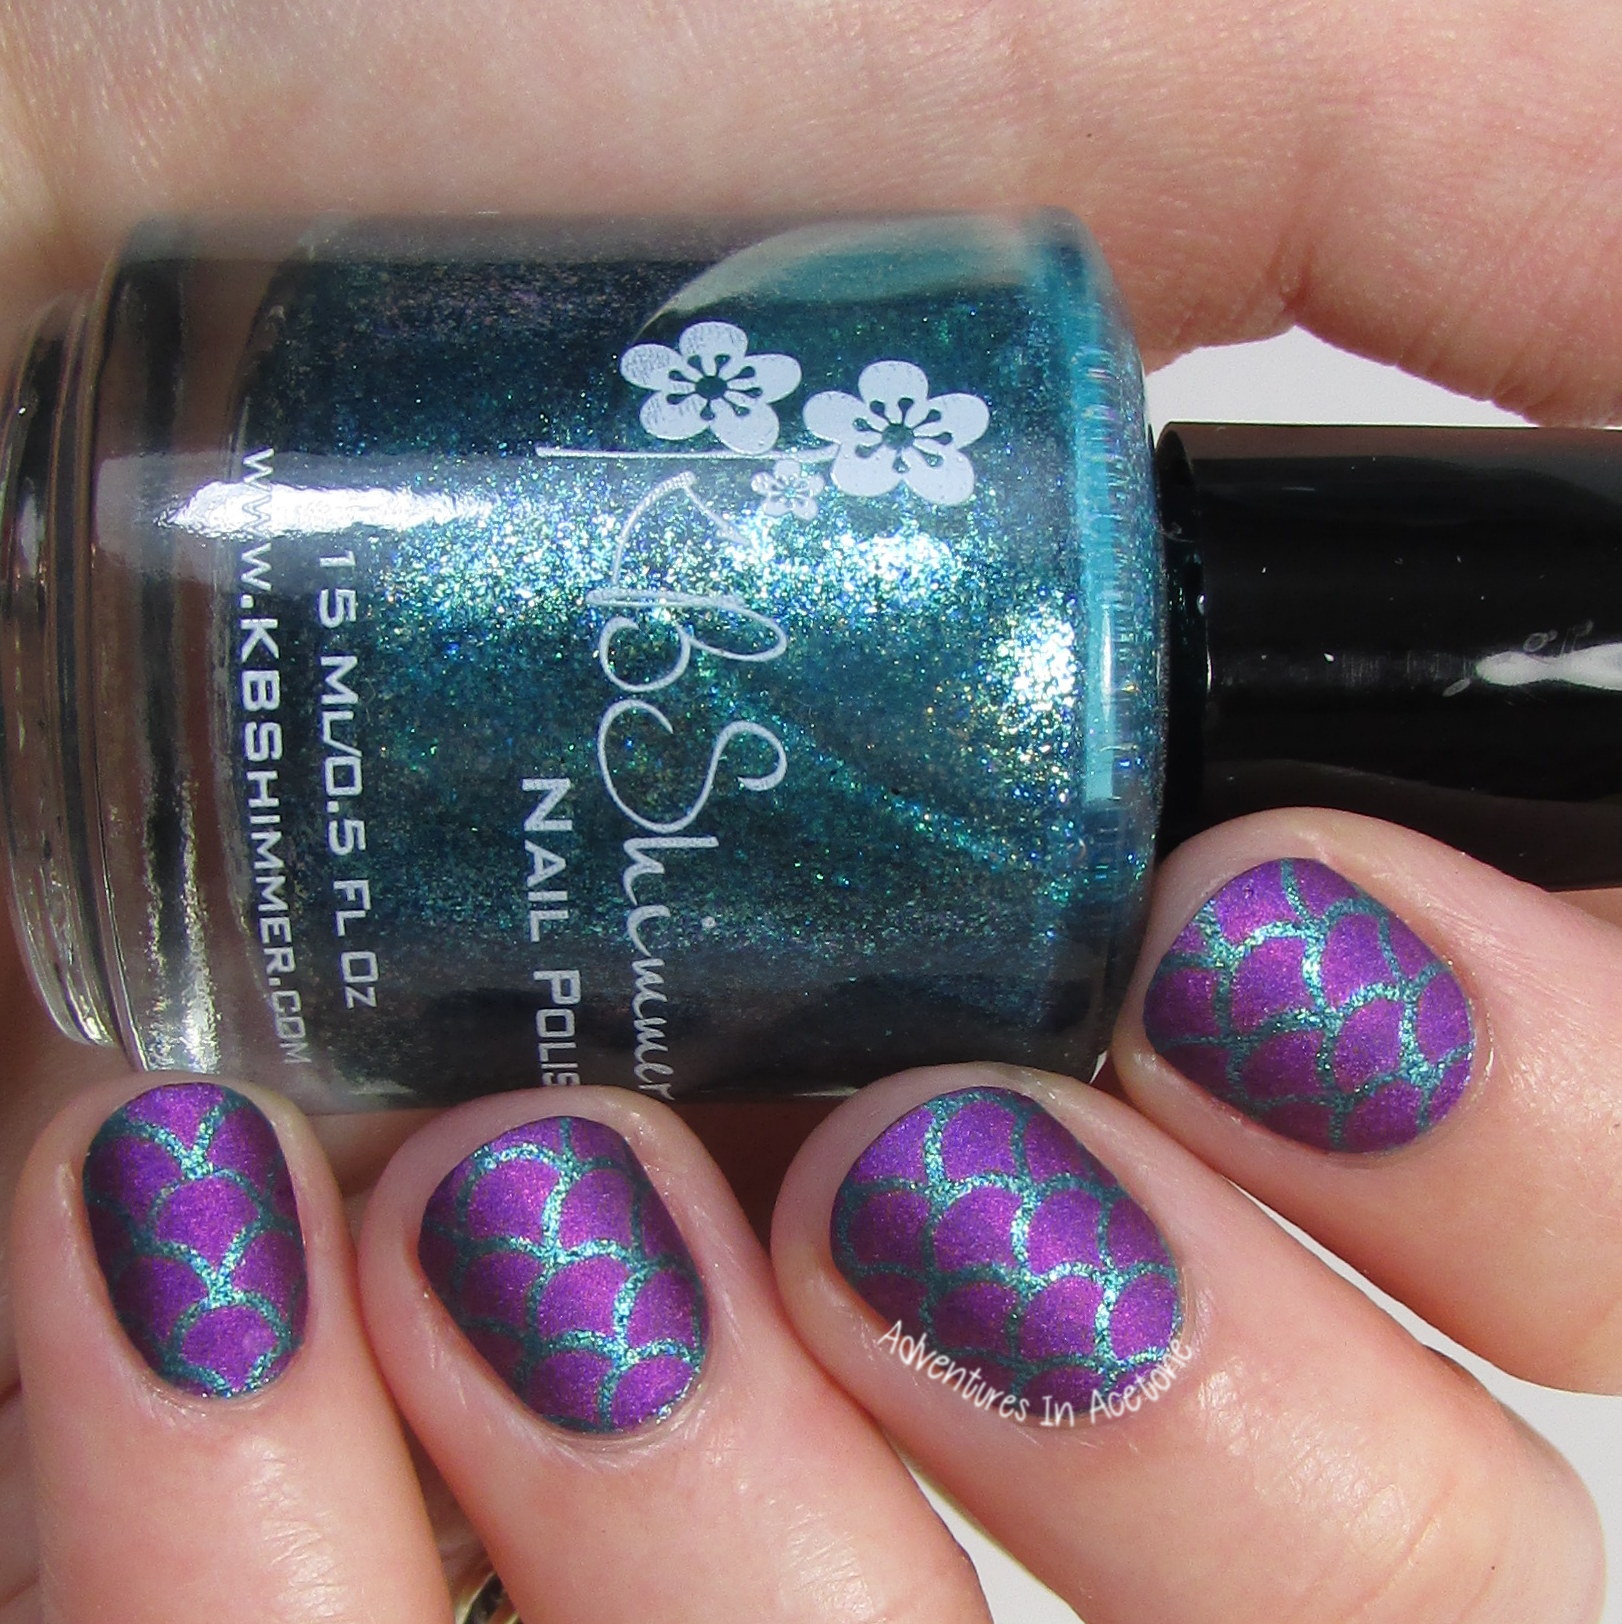
- Once that was dry, I painted two coats of KBShimmer Talk Qwerty to Me over the scales and let dry for a few minutes.
- While the decals were drying, I painted one coat of KBShimmer Teal It To My Heart onto my nails.
- I used an orange stick to carefully pry the decals off of the mat and flipped them over to reveal the new mermaid design.
- After painting a quick layer of Girly Bits Border Patrol around my nails, I did a thin coat of Qtica Extending Top Coat over my teal nail.
- I was then able to place the decal onto the tacky nail and press down.
- I used acetone and a cleanup brush to remove the excess decal from the tips.
- I used my orange stick to “cut” the excess decal from the cuticle line and then peeled the Border Patrol off taking the excess with it.
- My cleanup brush and acetone made the cuticle line cleaner and I used a coat of KBShimmer Clearly on Top to seal in the decal.
- Upon consideration, I preferred the matte look of the decal and decided to add a quick coat of Butter London Matte Finish top coat.
Follow my tutorial collage below from the top left corner around clockwise for a visual to most of the steps written above.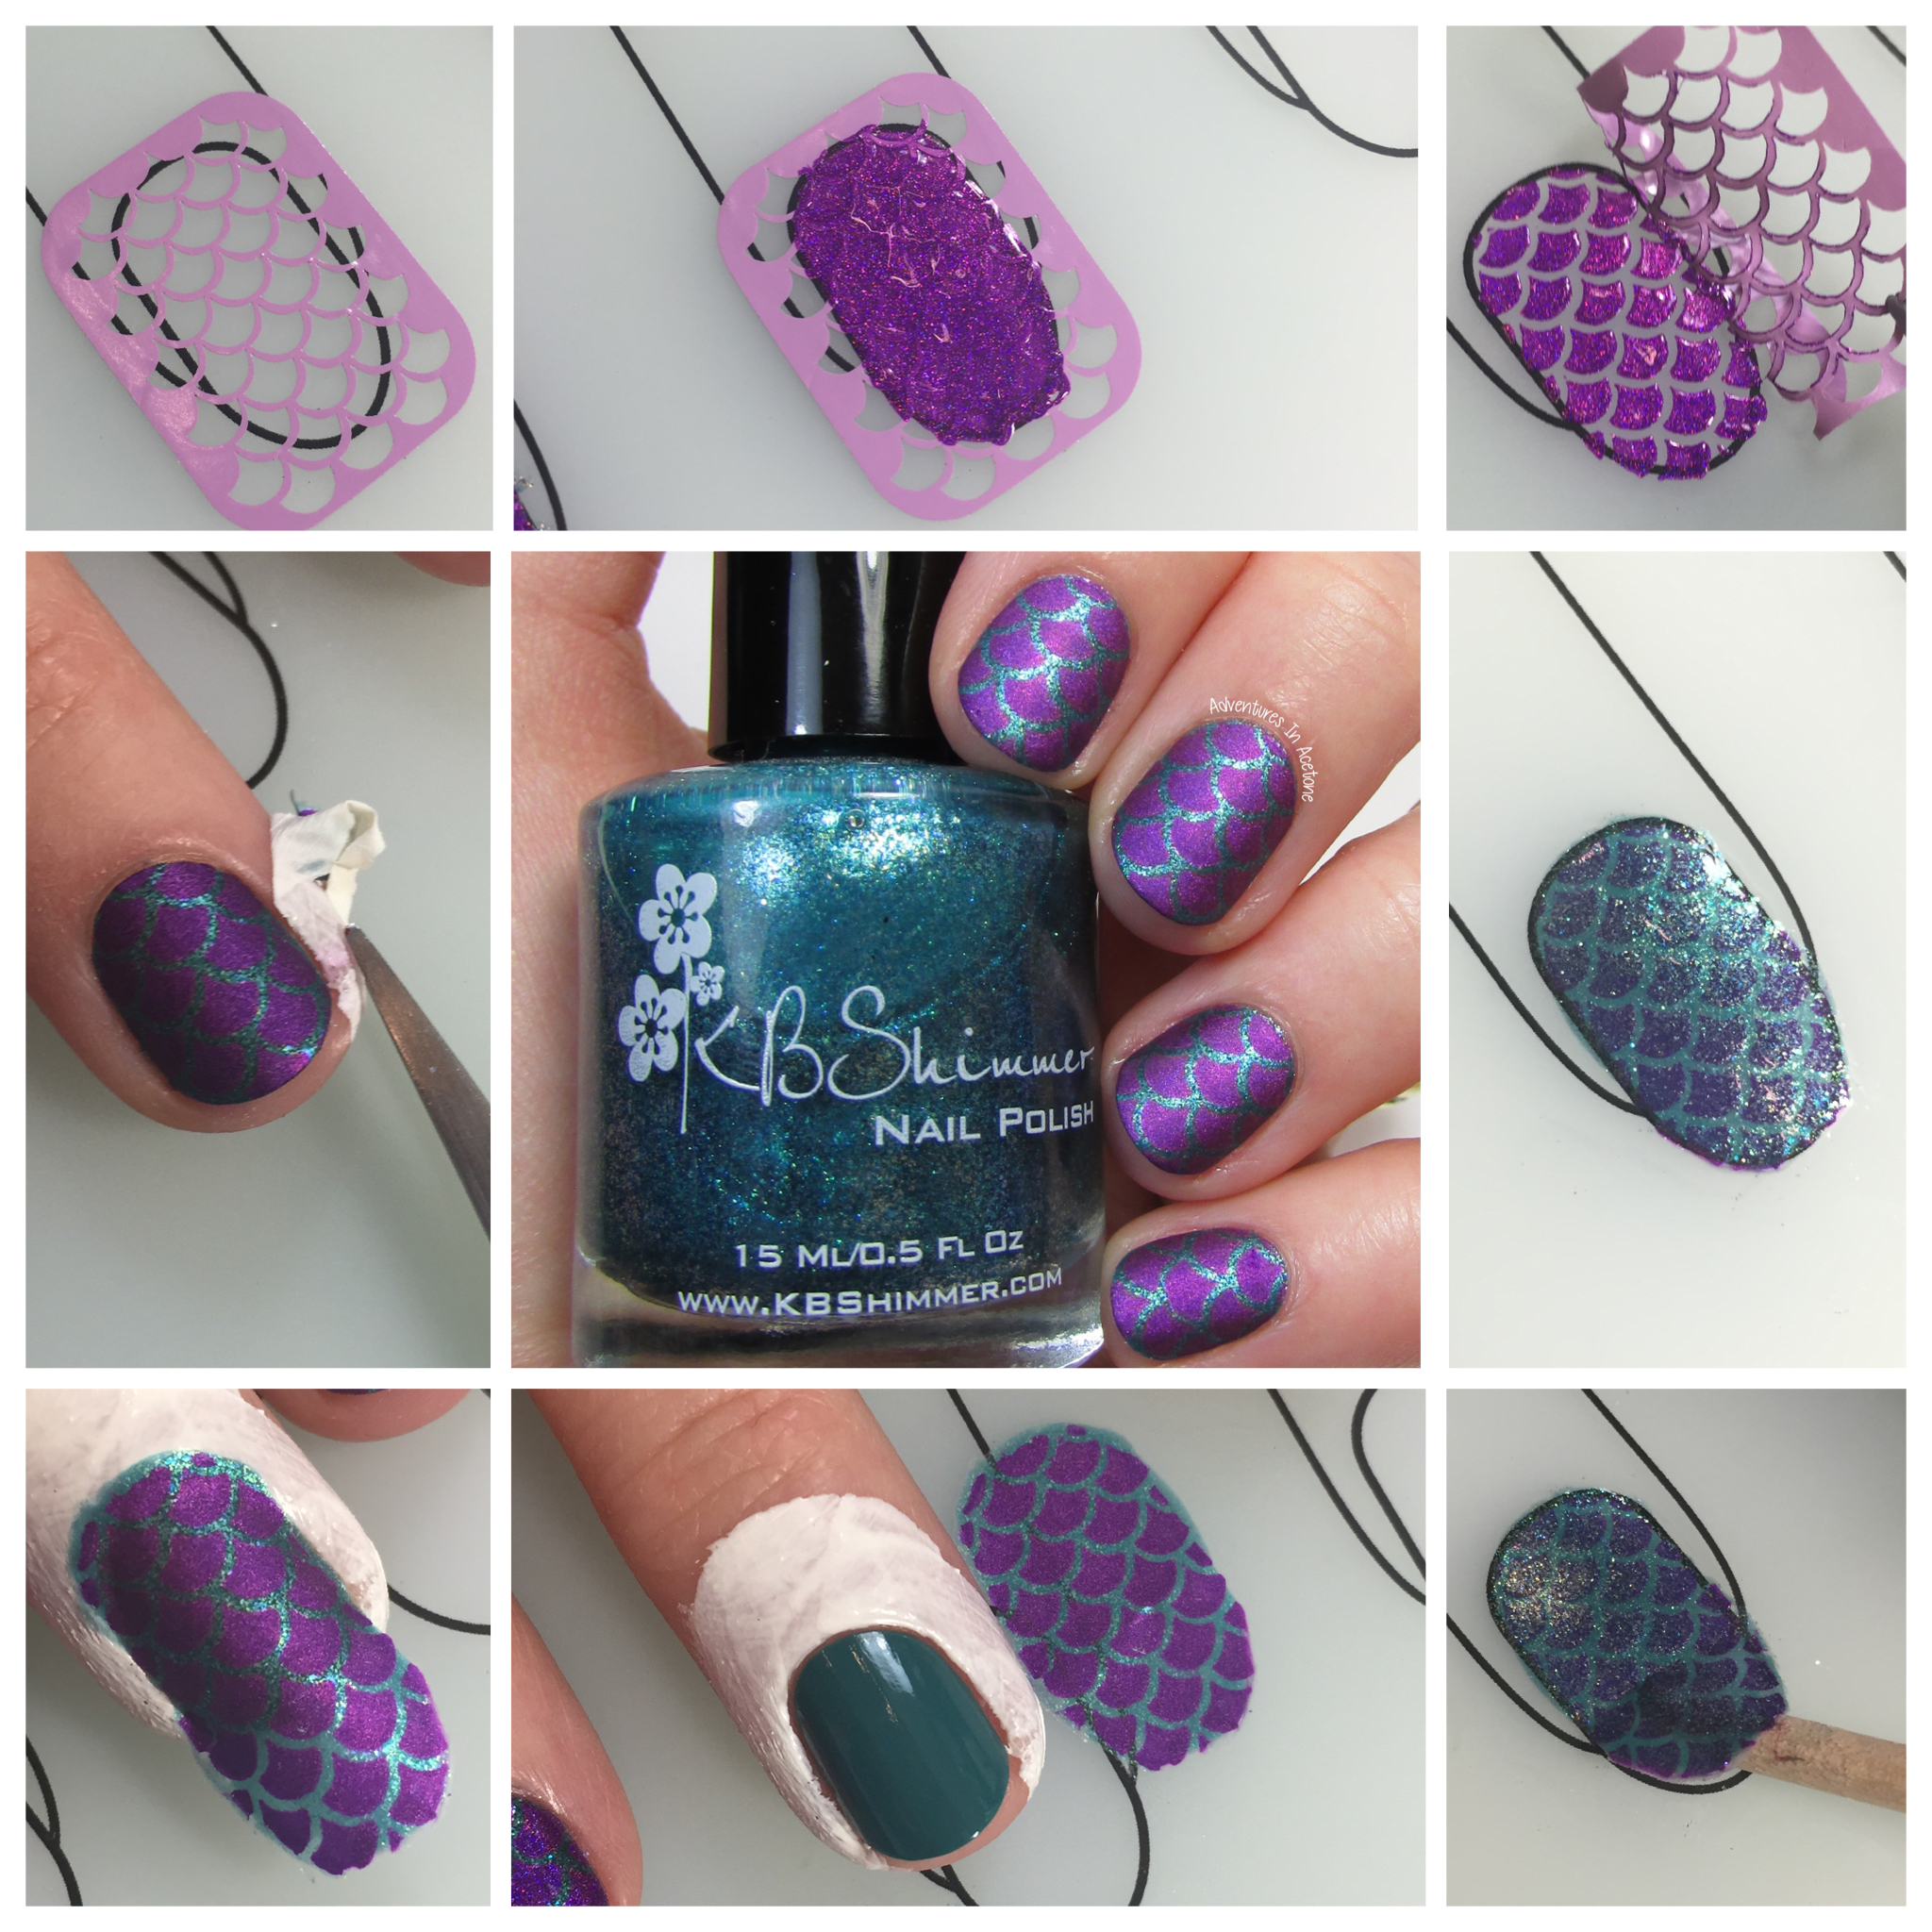
What do you think of this technique? I’m so very happy with how these turned out! The color combination was inspired by my Erin Condren mousepad(shown below) and I couldn’t be happier with the match.
I’m going to continue to catch up for the rest of the week, but check out what the other Digit-al Dozen ladies did for their second day manis on Tuesday below.
 Loading InLinkz ...
If you enjoyed this post, please Sign Up for email updates and you will have the latest news, reviews, nail art, and tutorials delivered right to your inbox! Never miss a post from Adventures In Acetone again. Thank you so much for reading.
– Let’s paint something amazing! –

Comments
This is such a genius idea! I’m super impatient and don’t like waiting for layer of polish to dry, so I always avoid vinyls. But I’ll have to give this a try!
This is gorgeous – these two polishes are amazing together.