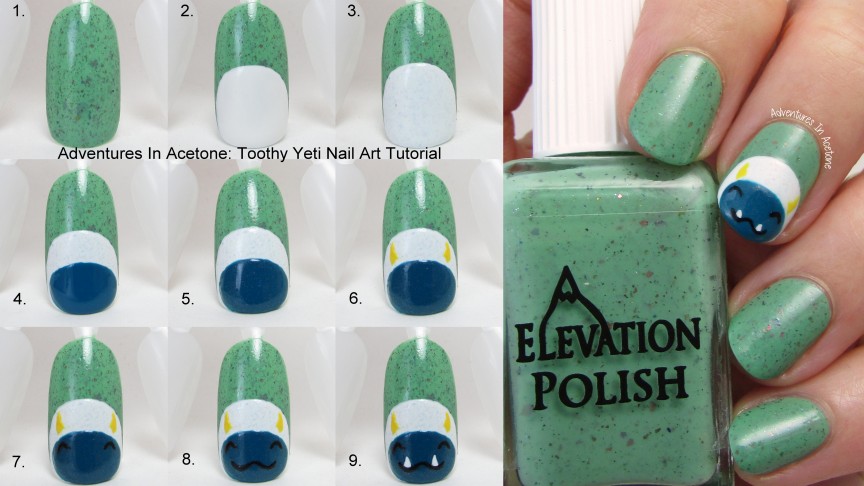
Good afternoon, readers! It’s finally time for another Tutorial Tuesday post! With Digit-al Dozen Week and then my 4th Blogiversary, I had to take a couple of weeks off but I hope you are ready! Earlier this month, I showed you swatches of Elevation Polish Yeti’s Healing Vibes— the AHF charity polish. This cute little Toothy Yeti was on my accent nail and I’ve been wanting to show you how easy he was to make. Inspired by the First Sunday Big Brother Toothy Yeti plush sold in the Elevation Polish shop, he’s so adorable and it’s hard to not love him. He was very easy to recreate as nail art, continue reading below as I walk you through the step by step process.

As I said it my original post of this design, I wanted to use as many Elevation Polish Yeti polishes as I could, so you will see 2 steps in this process where I layer a shimmery yeti over a creme of the same color. You certainly don’t have to add in these extra steps, I just loved incorporating them into the design. Let’s get started!
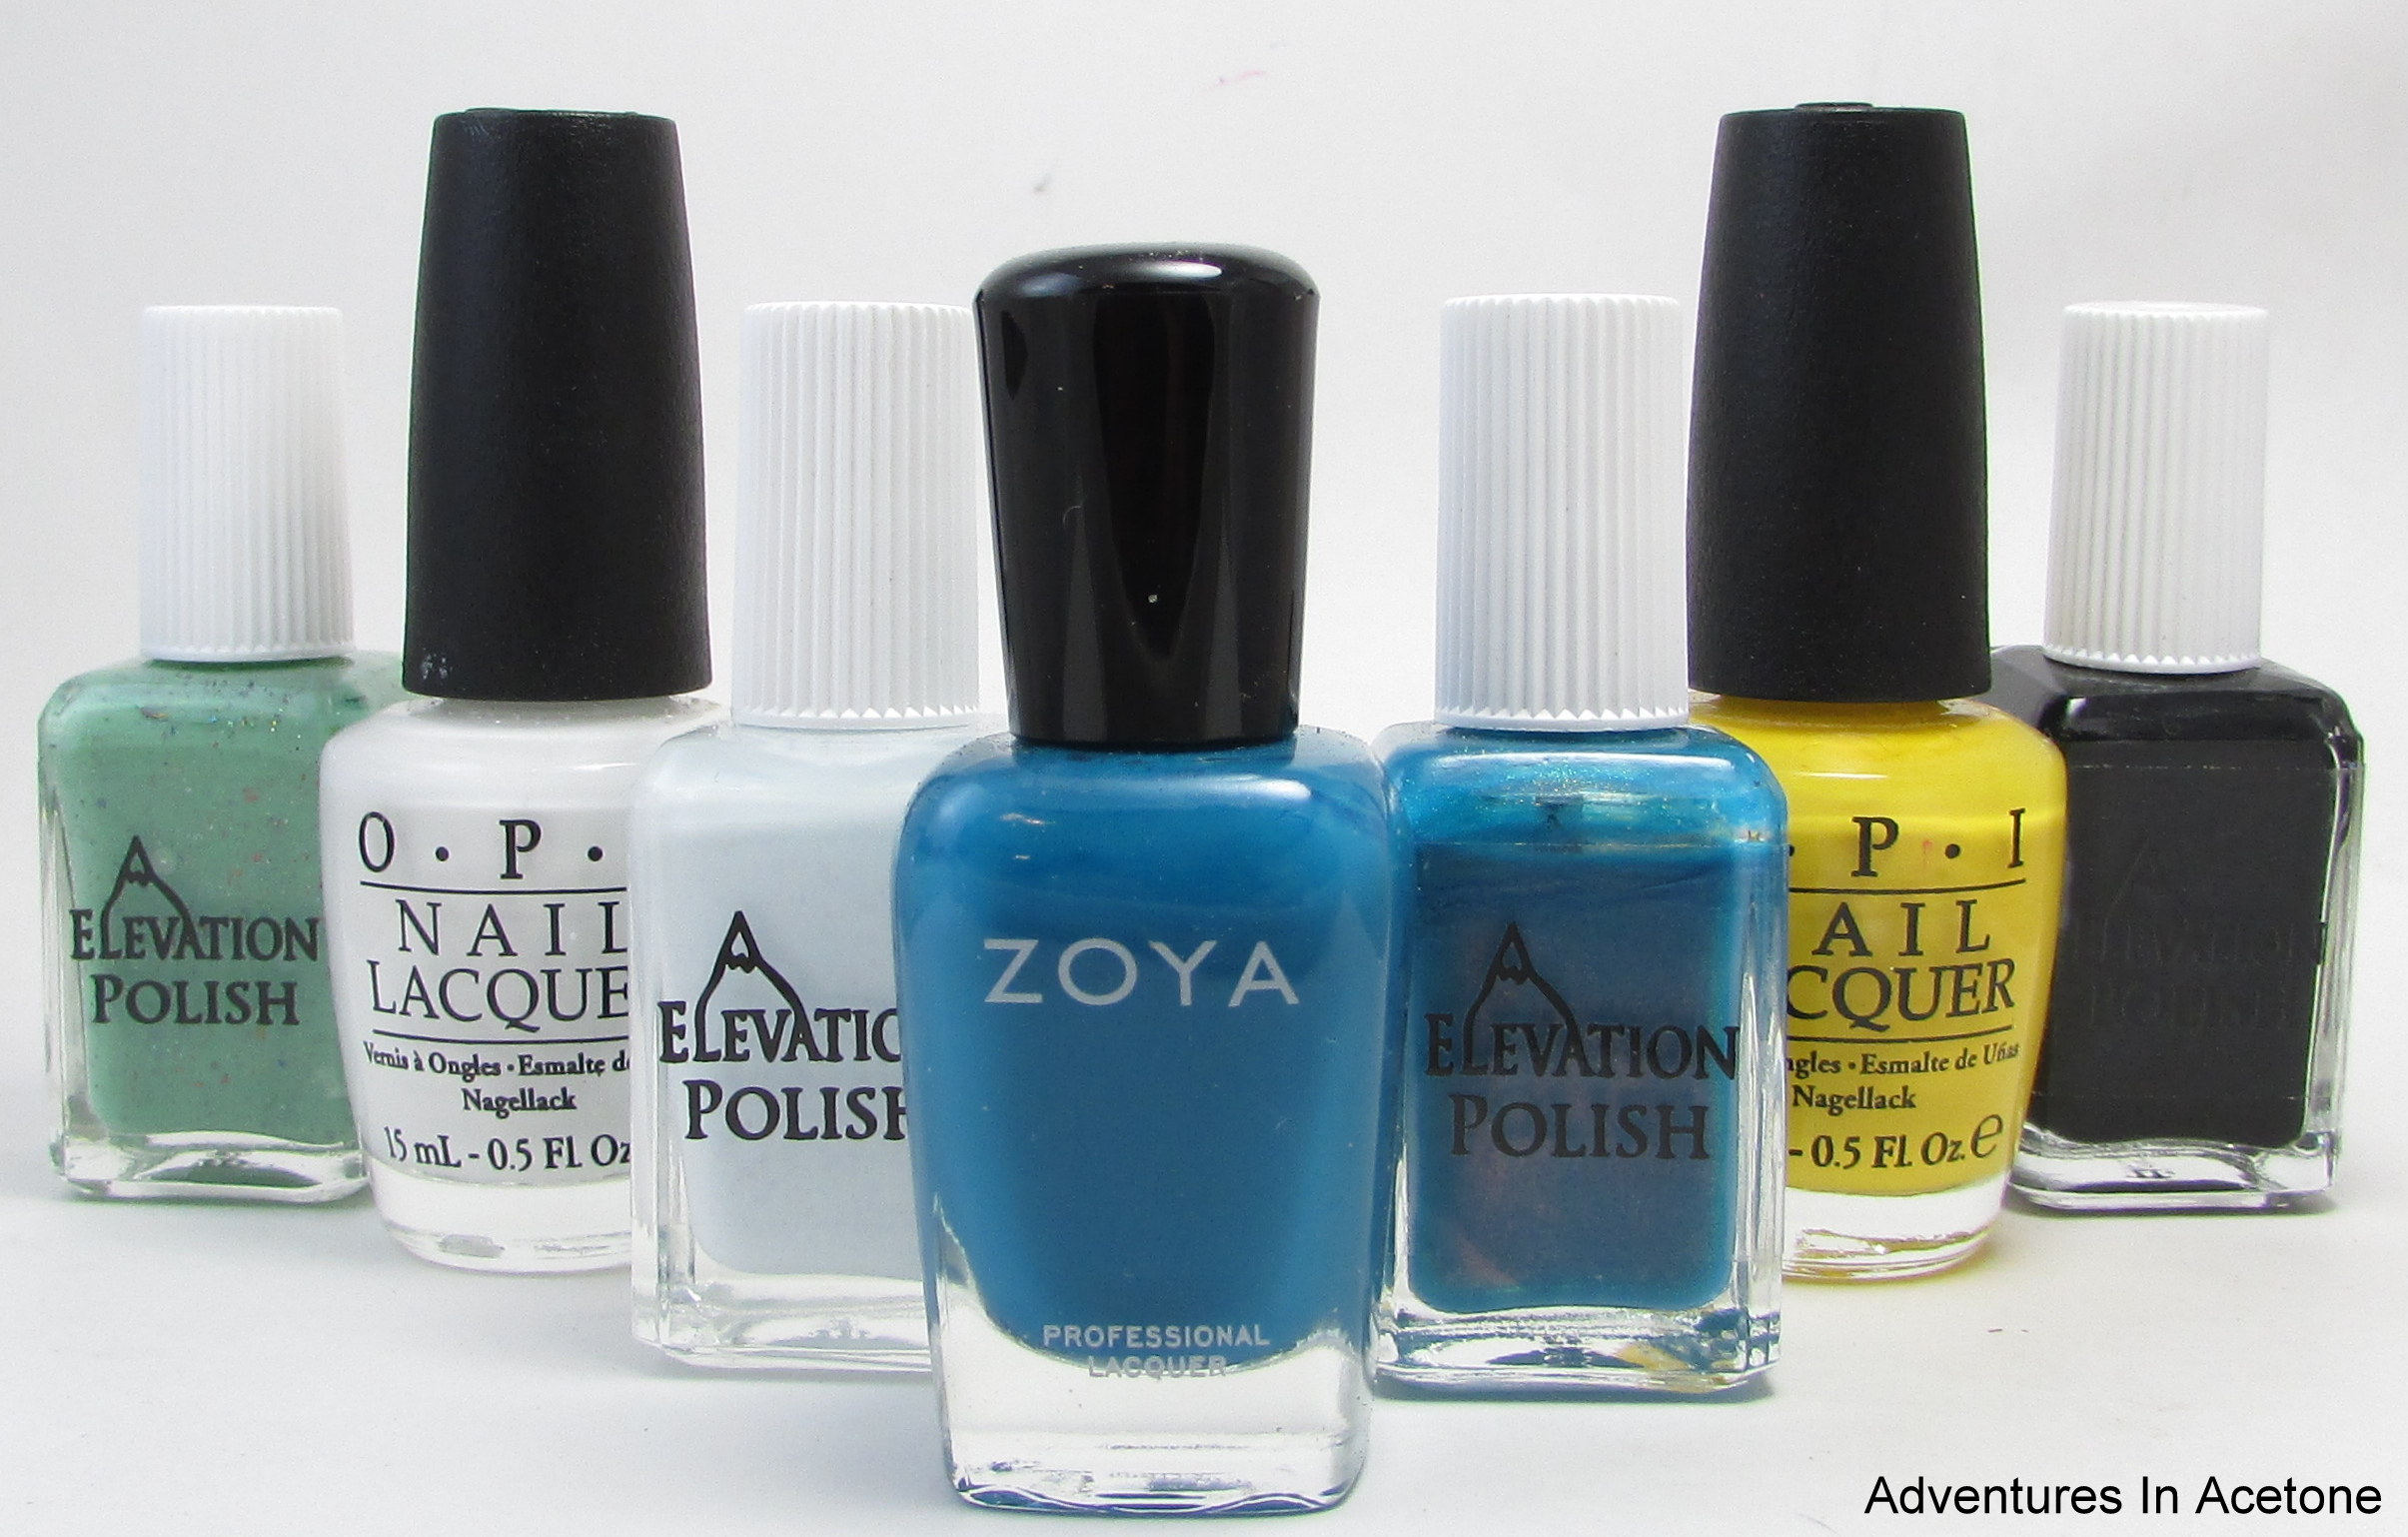 Polishes used: Elevation Polish Yeti’s Healing Vibes, OPI Alpine Snow, Elevation Polish Yeti Hugs: Feel So Close, Zoya Tiana, Elevation Polish The Twinkle in Yeti’s Eye, OPI Good Greif!, and Elevation Polish NYC.
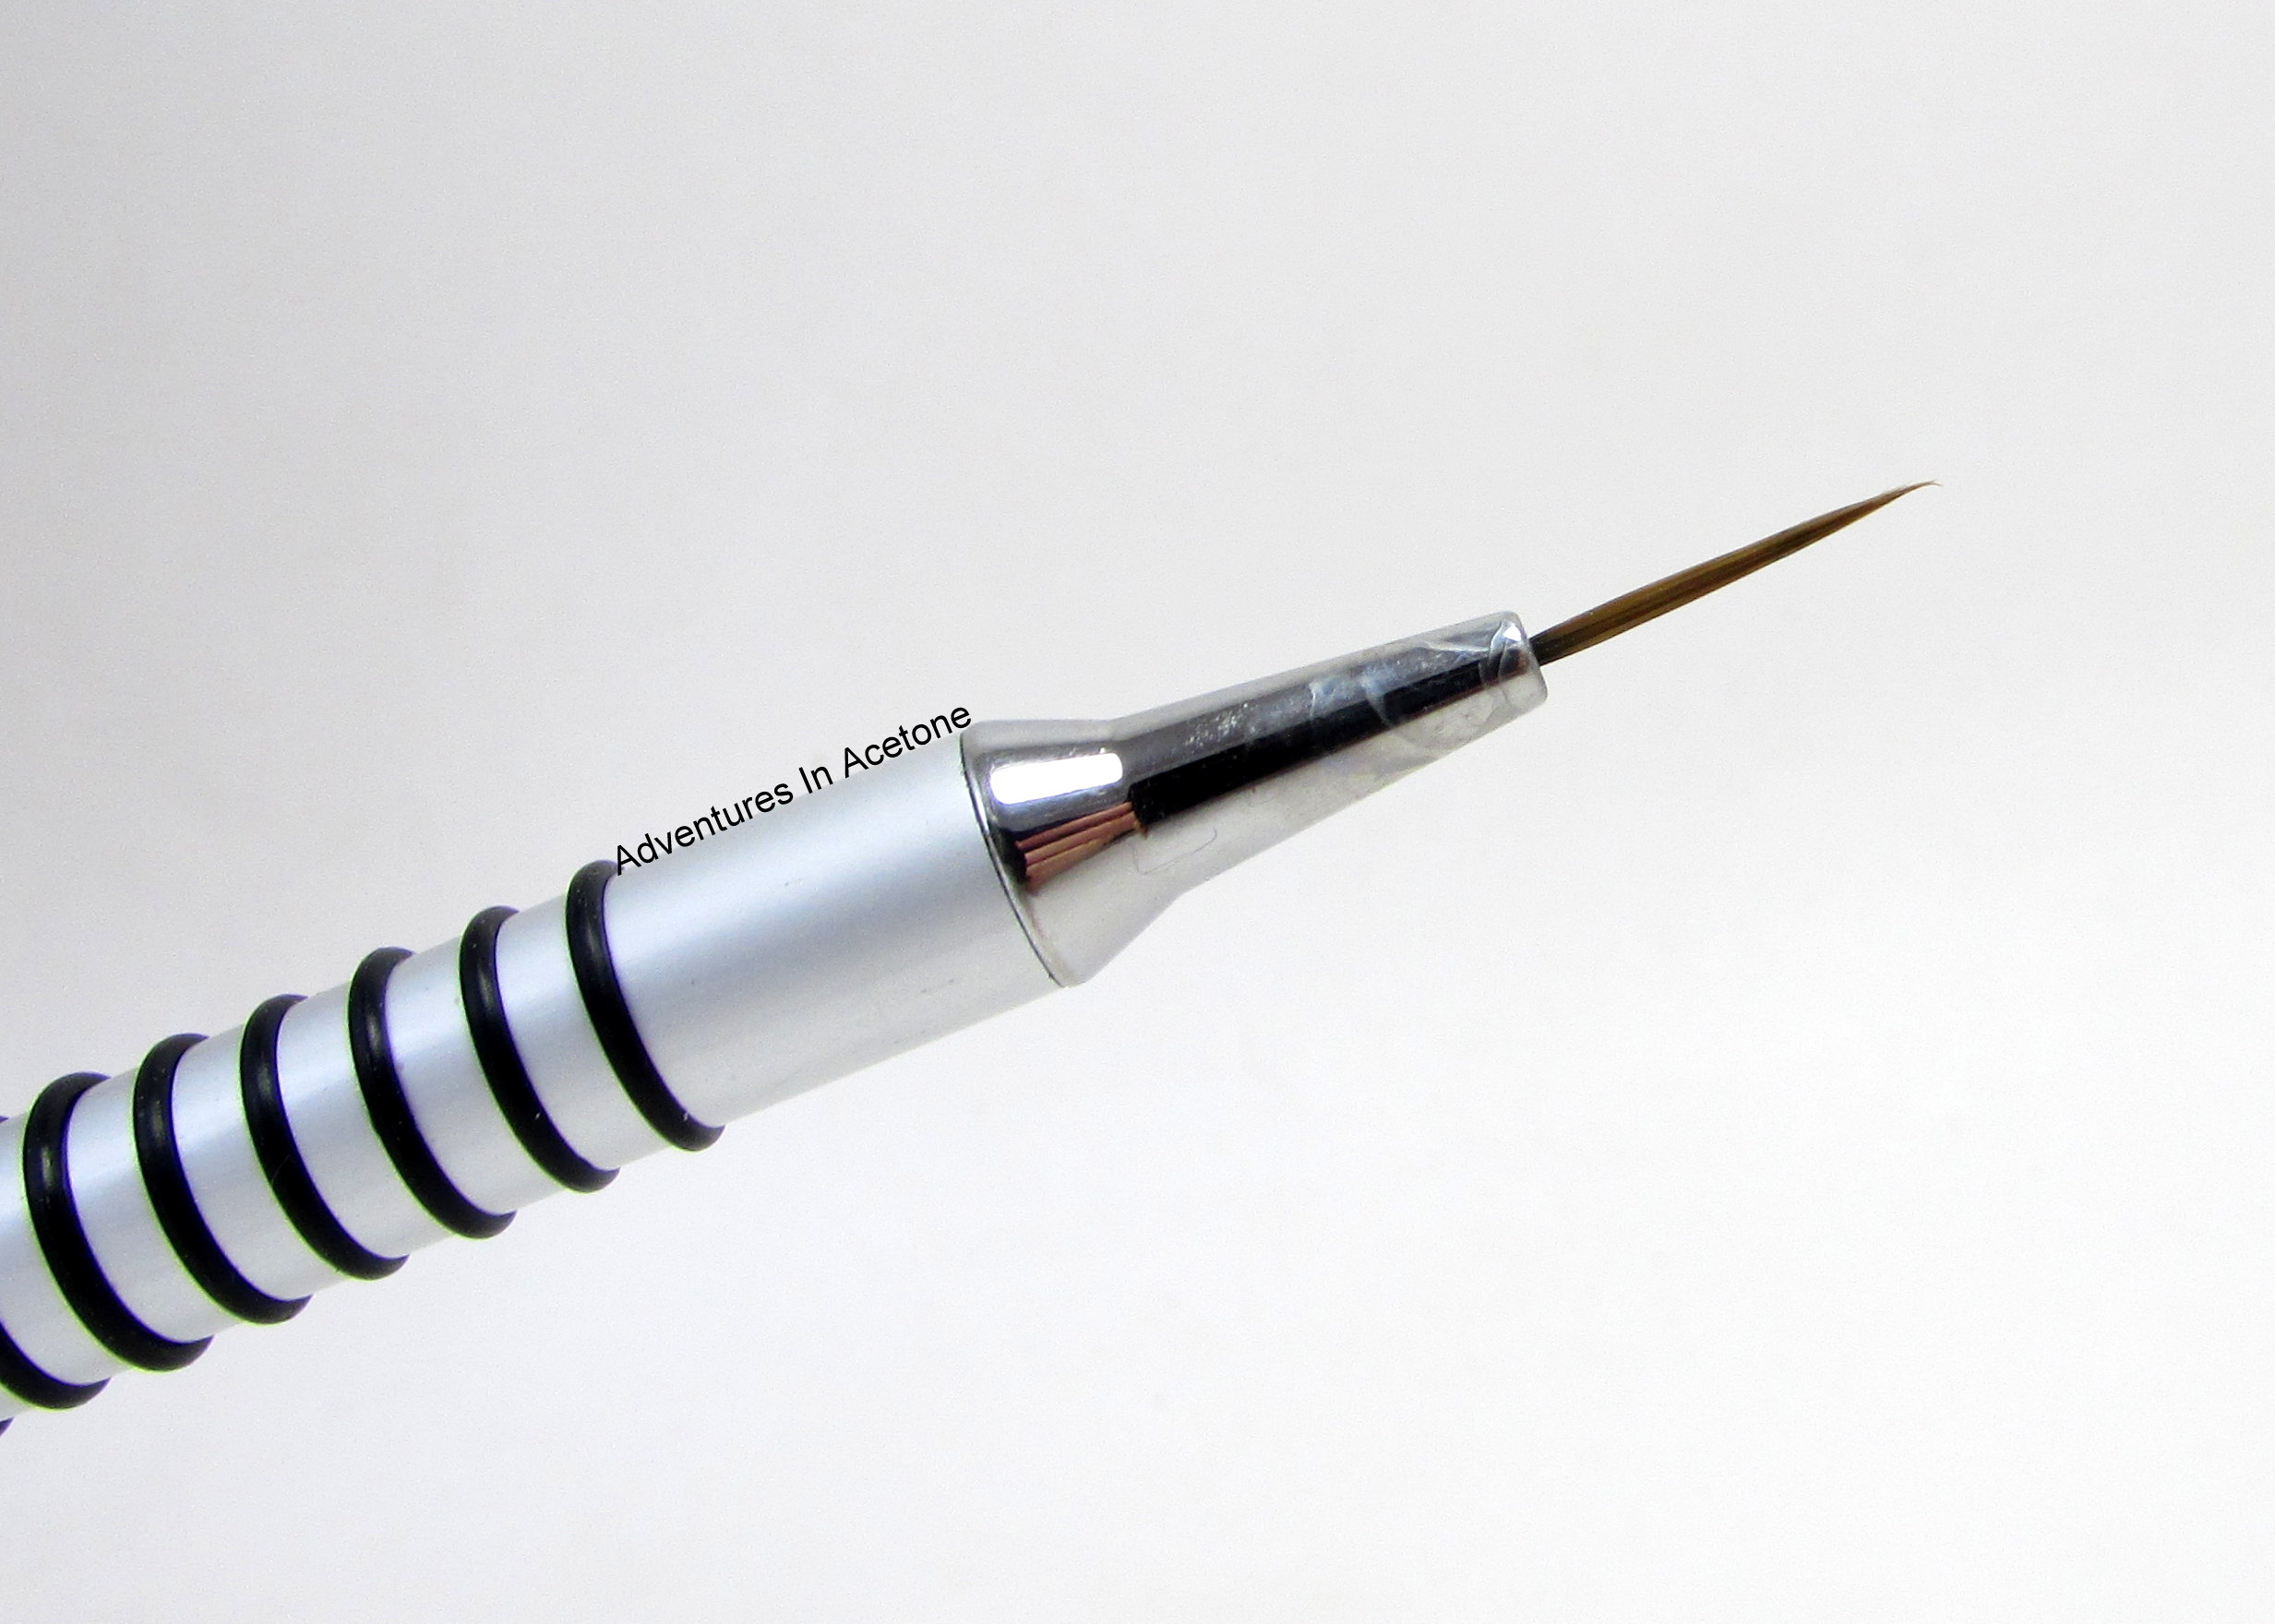 Tool used: Striper nail art brush. This is Pure Color No. 9.
Step 1) Paint two coats of Elevation Polish Yeti’s Healing Vibes on the entire nail and let dry.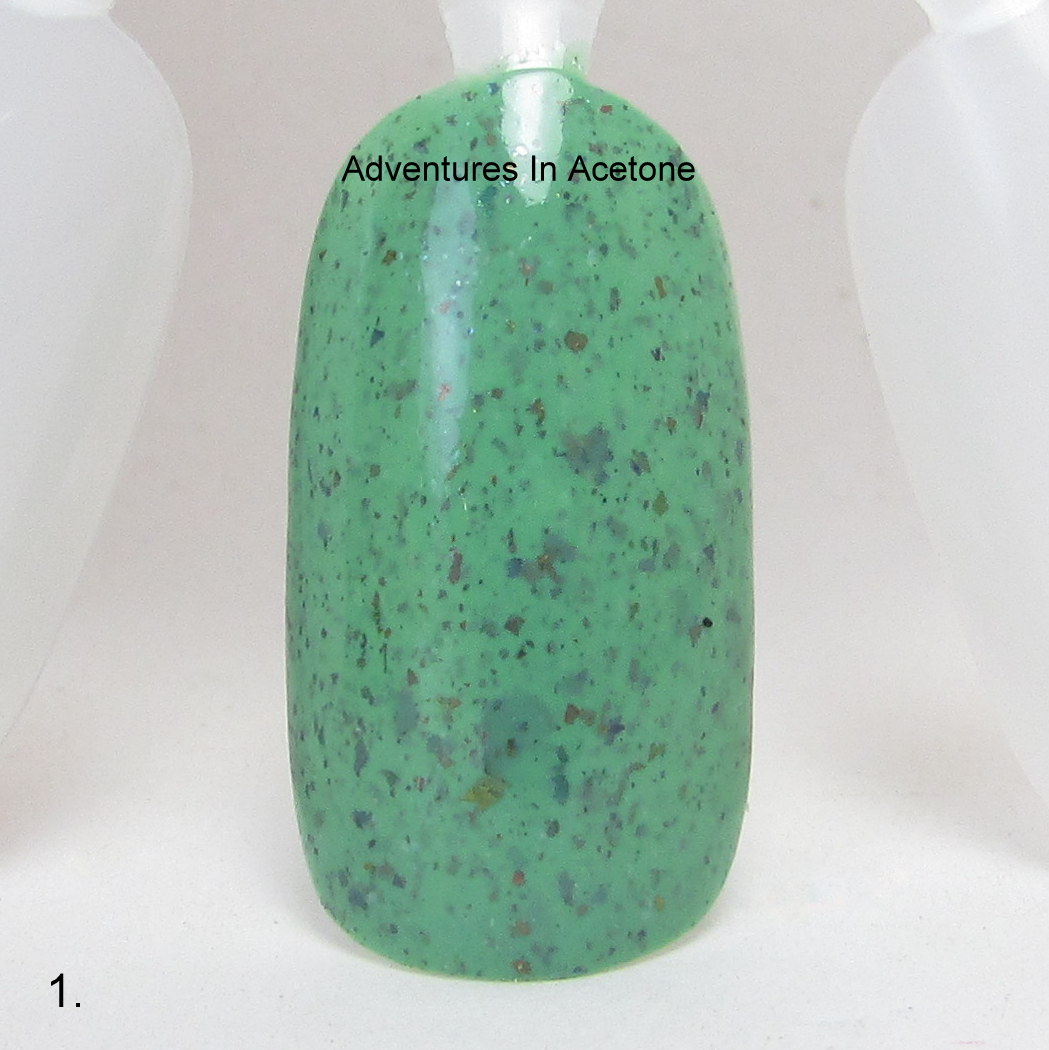
Step 2) Using the brush right out of the polish bottle, paint a rounded head shape half way up the nail using OPI Alpine Snow. If you don’t feel comfortable using the bottle brush, feel free to outline the shape with a nail art brush first before filling in. Let dry completely before moving on.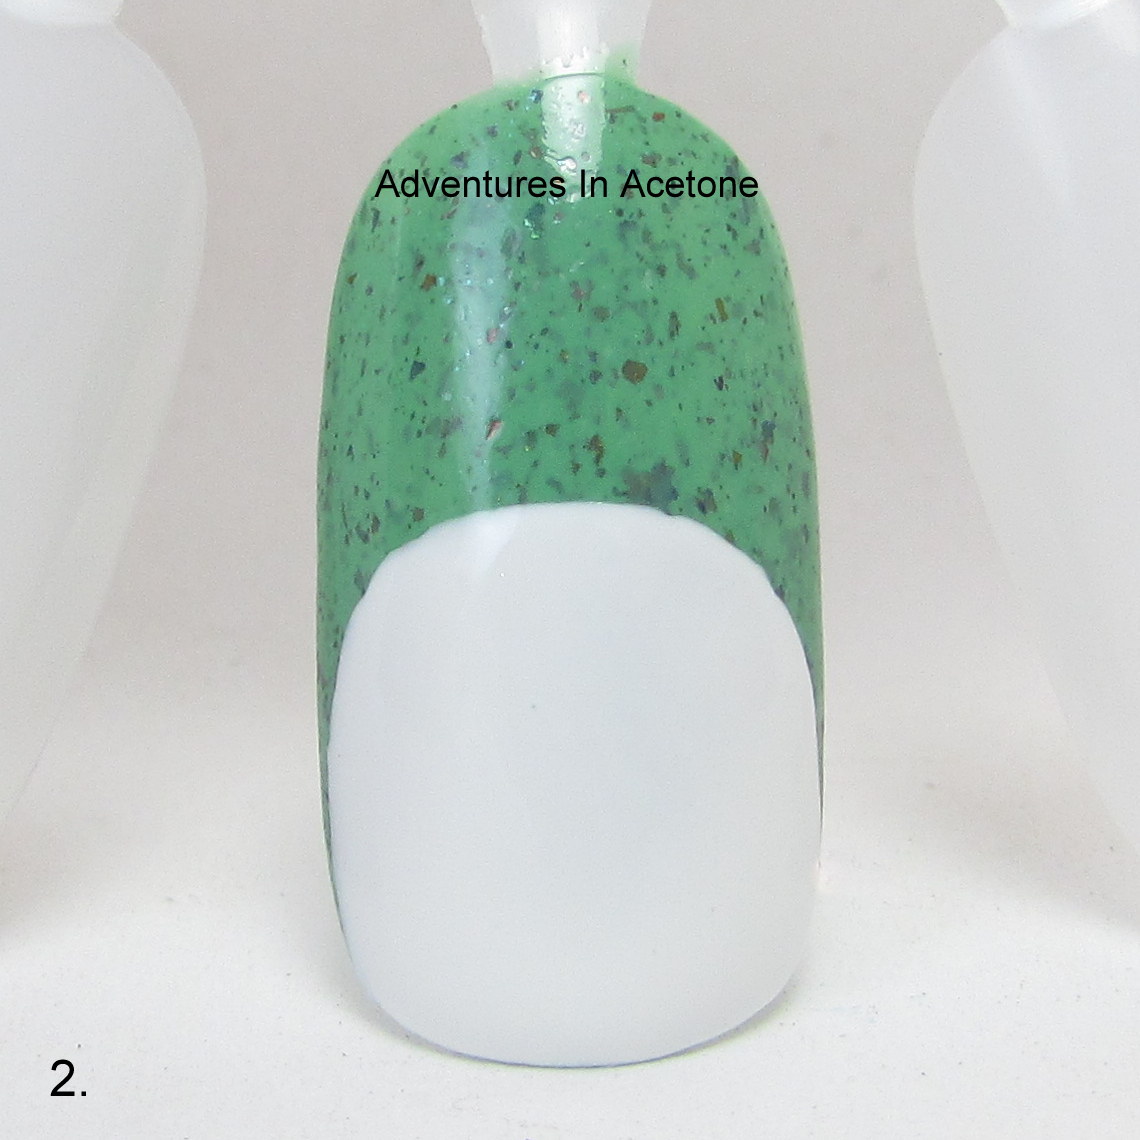
Step 3) Cover the white head with a thin coat of Elevation Polish Yeti Hugs: Feel So Close and let dry. This is one of those optional steps, but I really loved how this added color depth to the yeti and made it look almost fuzzy with dimension. 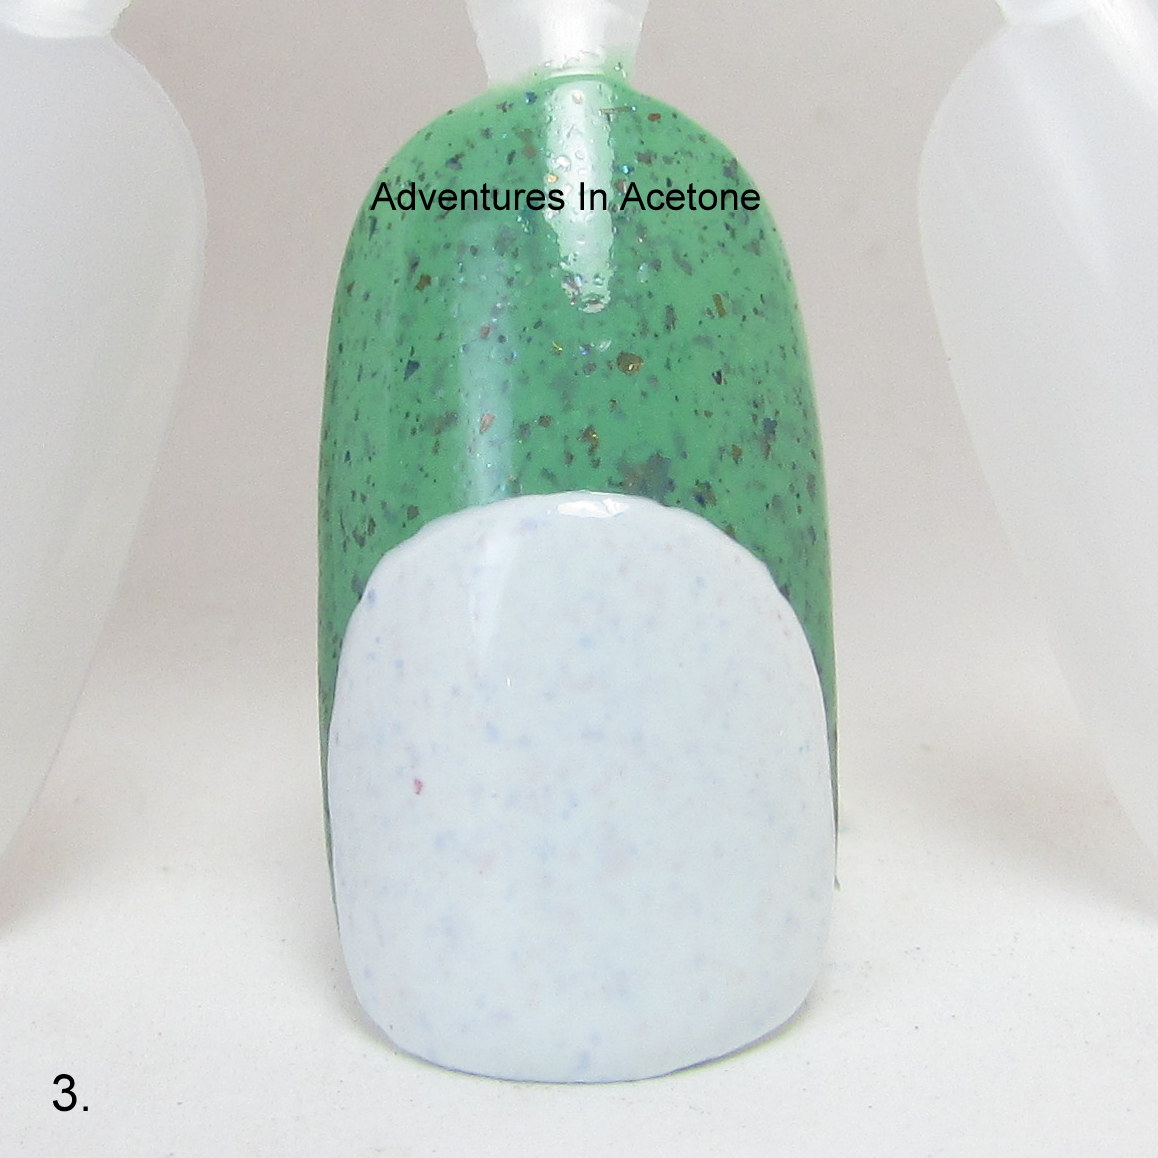
Step 4) Using the brush right out of the bottle, paint a smaller sideways oval on the bottom half of the yeti head with Zoya Tiana for the face. Again, if you aren’t comfortable doing this with the bottle brush, outline with a nail art brush first and then fill in. Let dry completely before moving on.
Step 5) Paint a thin coat over the teal with Elevation Polish The Twinkle in Yeti’s Eye. Another bonus step, completely optional.
Step 6) Use your nail art brush and OPI Good Greif! to paint a curved triangular horn on each side of the head above the face.
Step 7) Use your nail art brush and Elevation Polish NYC to paint two eye curves under the horns on the face. 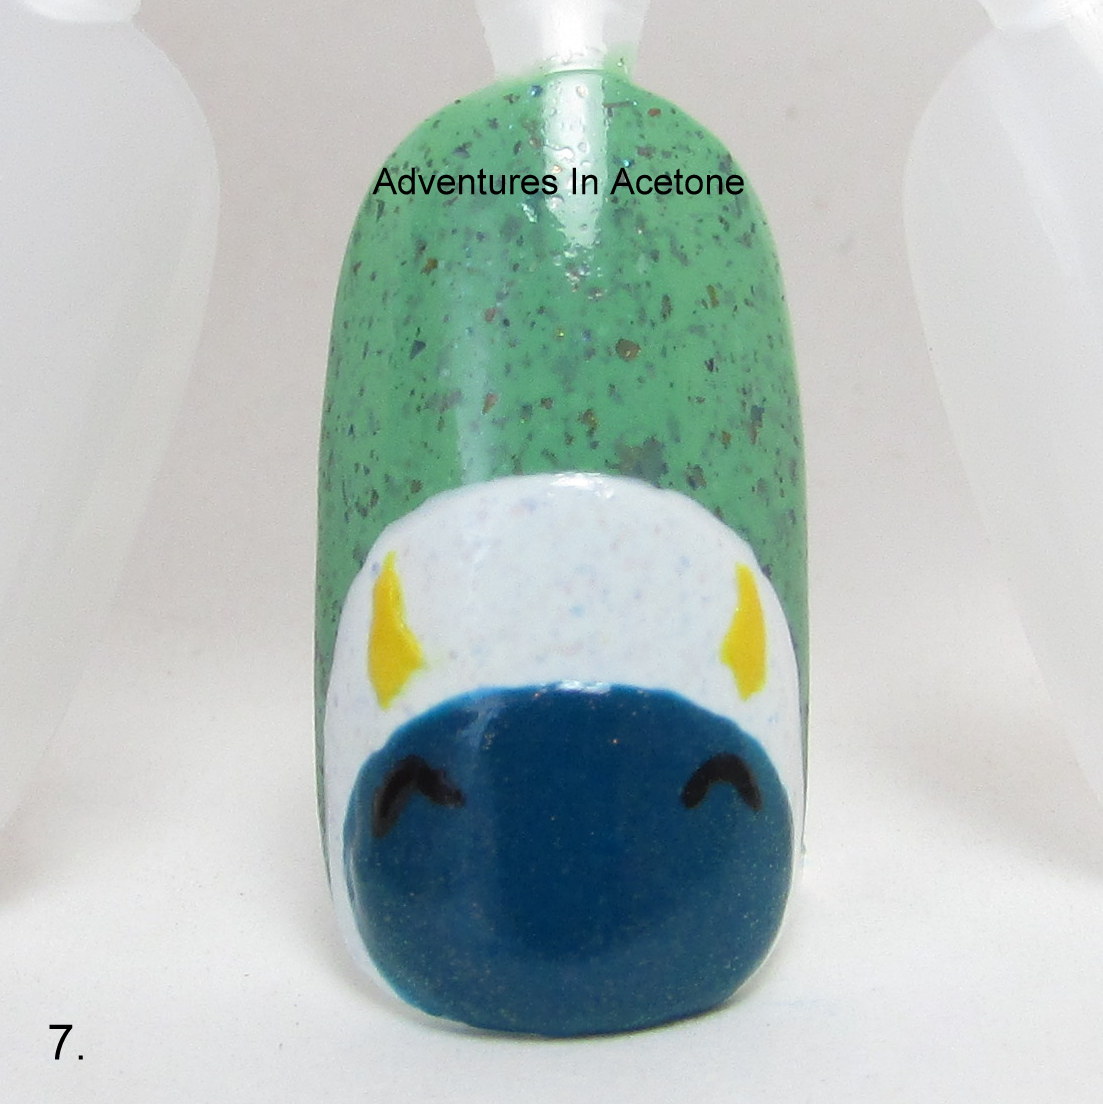
Step 8) Using your nail art brush and Elevation Polish NYC again, paint a wavy mouth line on the bottom half of the face. Don’t forget the teeth are coming so leave a spot for them in the way you make your curve.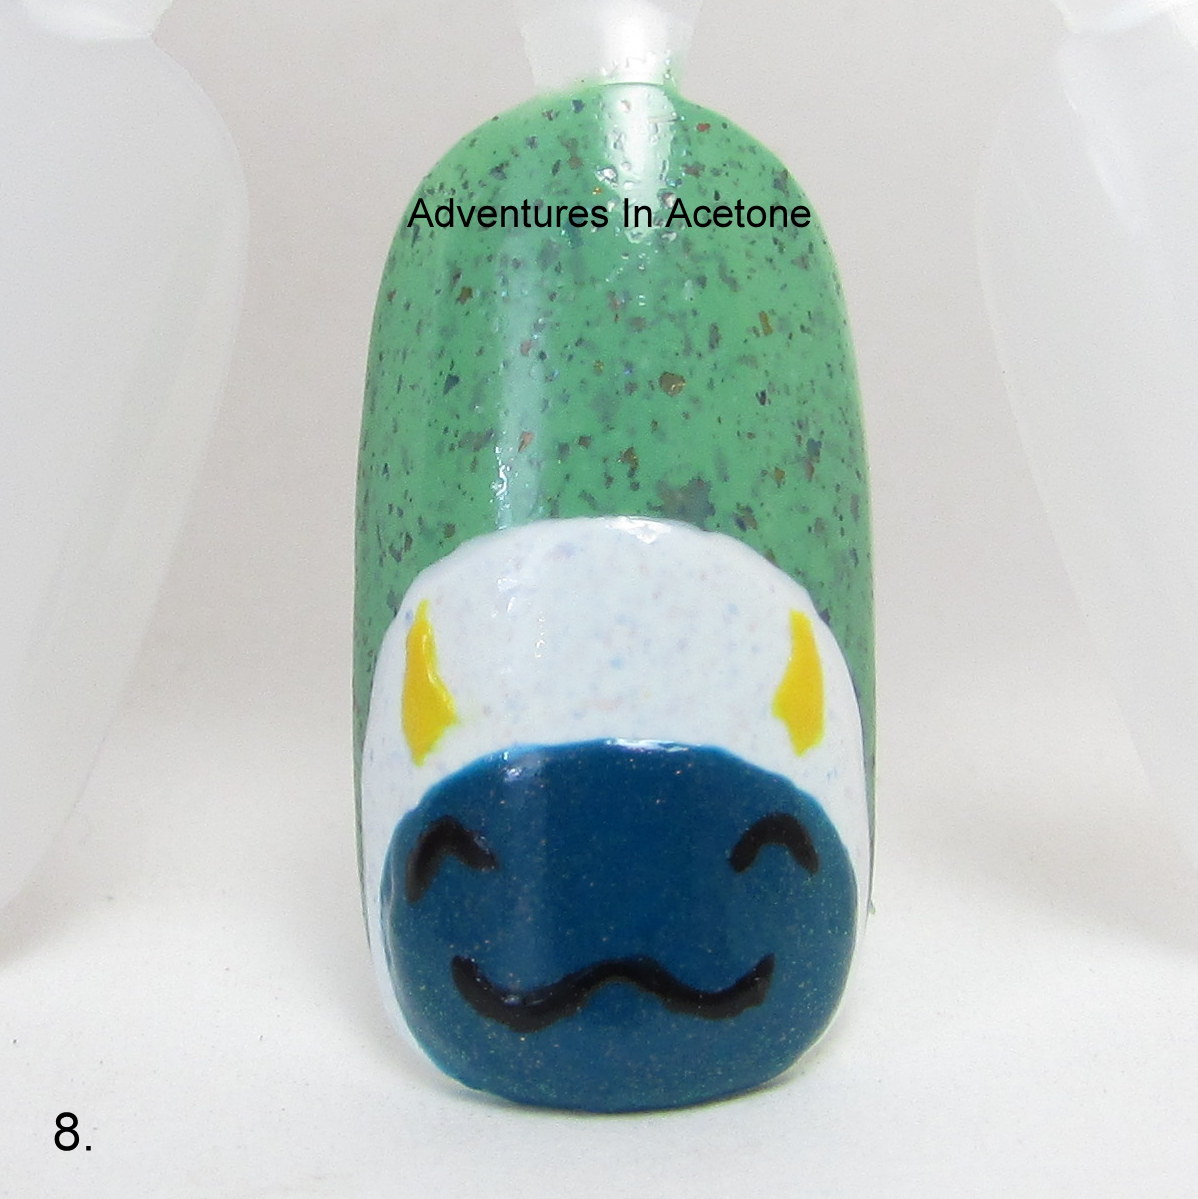
Step 9) OPI Alpine Snow and the nail art brush can be used to make two little triangle teeth on the wavy mouth line. If you get too much white over the black mouth line, go back with the black and nail art brush and cover any white that overlapped.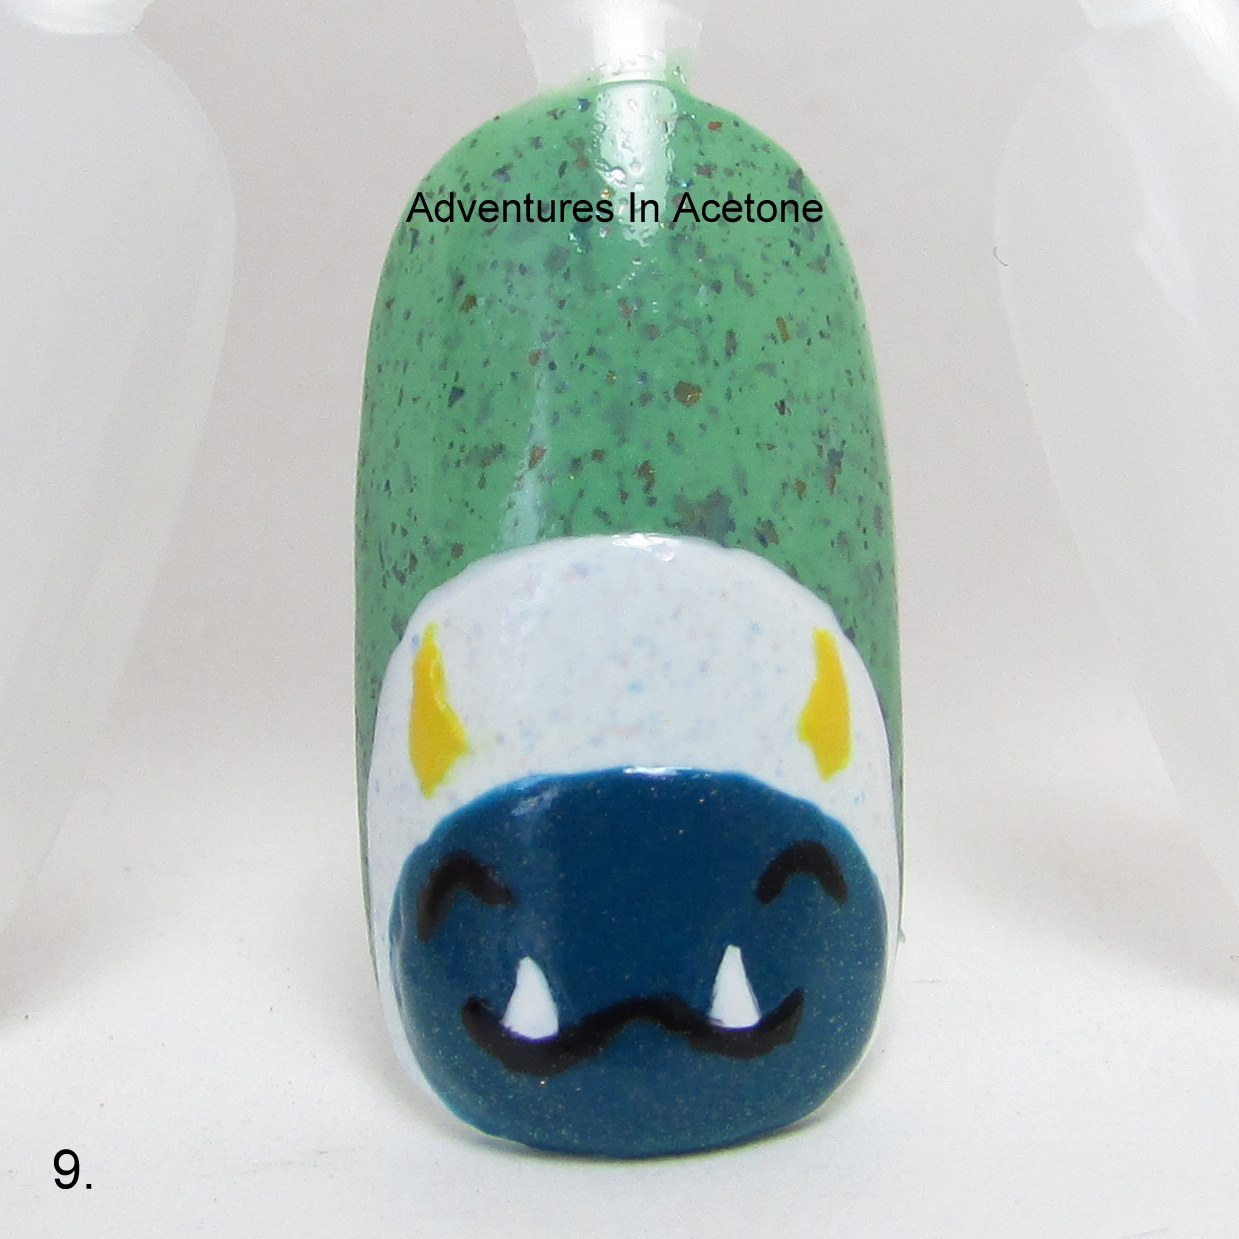
After this step, I also added a coat of top coat to seal in the design and add shine. I recommend thicker quick drying top coats like Seche, Poshe, KBShimmer, Girly Bits, or HK Girl for topping nail art. Get a large dollop of top coat on the brush and hover above the nail spreading the top coat without touching the bristles to the design. Thinner top coats can drag the image so use those at your own risk.
What do you think of this design and tutorial? Are any of you Elevation Polish fans going to try it out? I would love to see your recreations so if you share on Instagram or Facebook, please tag me or post to my page! Thank you so much for reading.
If you enjoyed this post, please Sign Up for email updates and you will have the latest news, reviews, nail art, and tutorials delivered right to your inbox! Never miss a post from Adventures In Acetone again. Thank you so much for reading.
– Let’s paint something amazing! –
