Press Sample
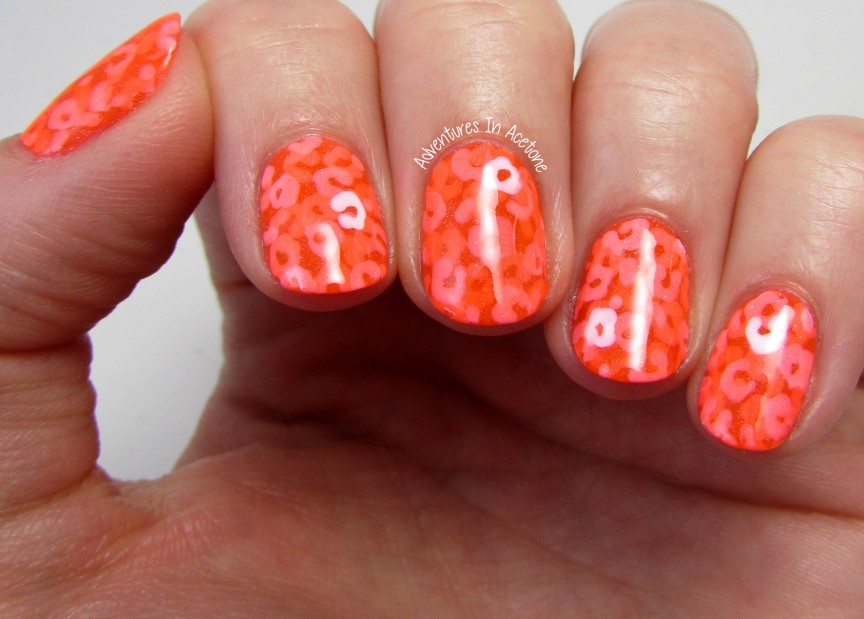
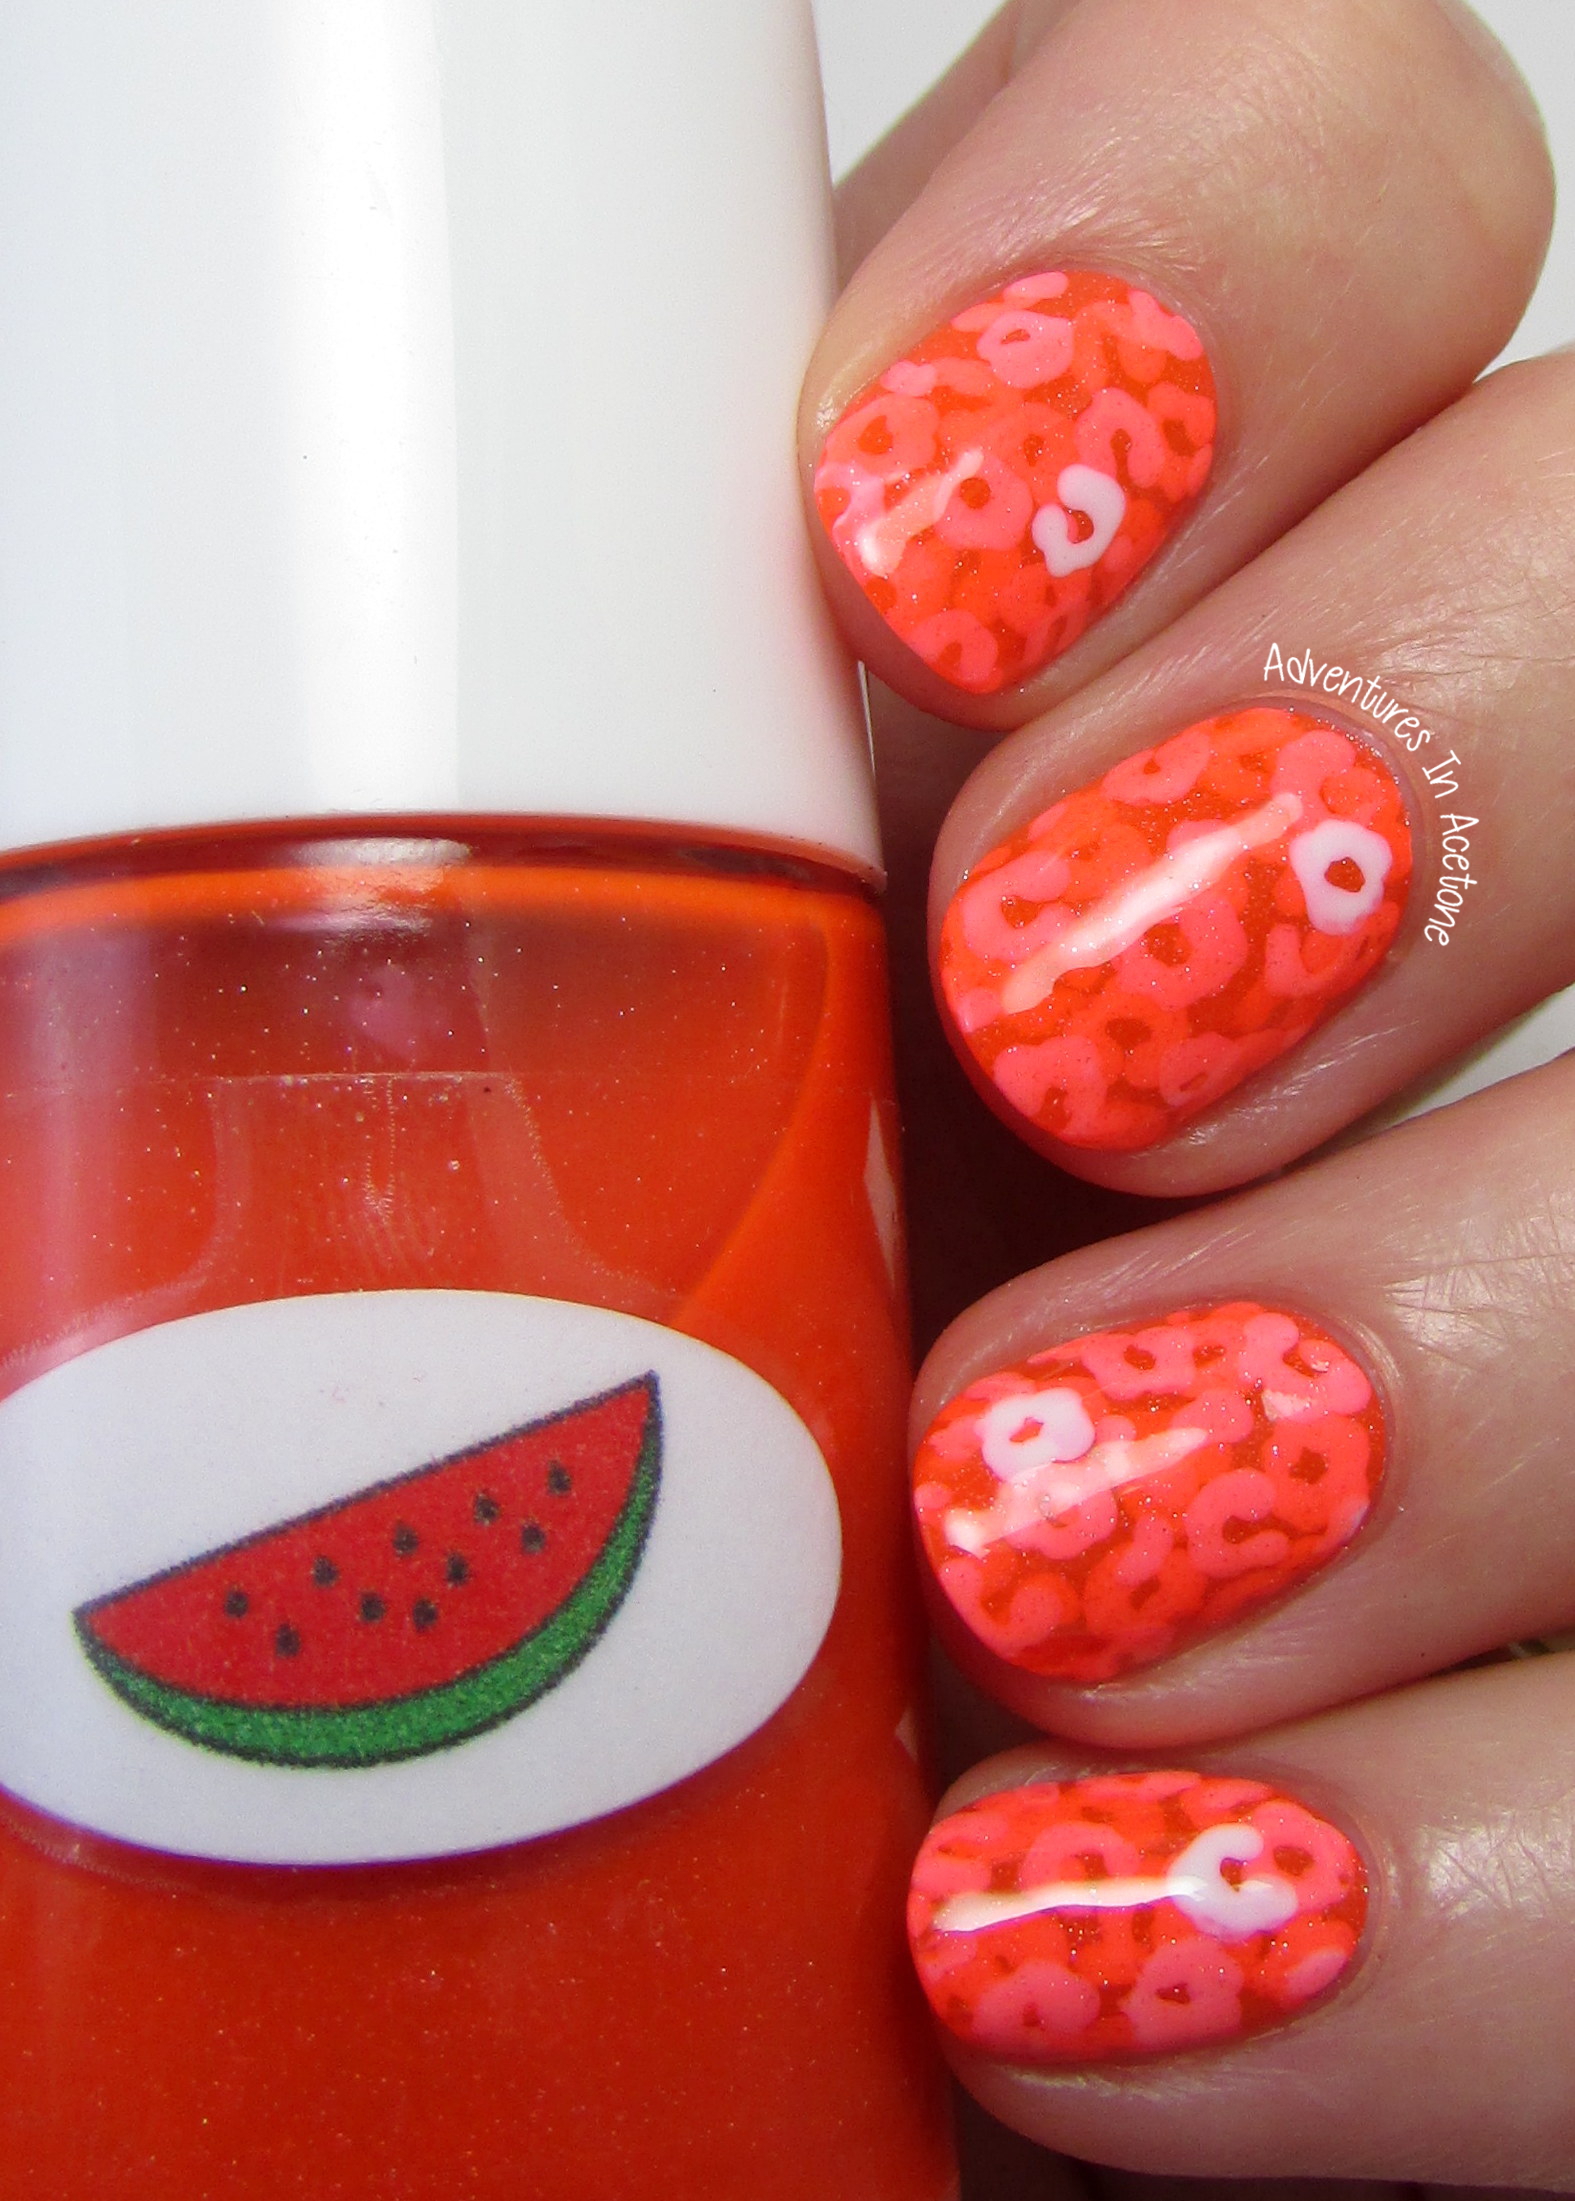
Good afternoon, readers! It’s been 8 months since my last pond mani and I am excited about today’s version with cheetah print layered in between the coats of jelly polish. I’ve been brainstorming ideas for pond manis all morning and this was one of my favorites! I tend to do simple shapes using a dotting tool for my pond manis so I can recreate multiple layers easily without taking hours. Cheetah print seemed like a perfect match, I am shocked it took me this long to think of it! I knew I wanted a bright, summery jelly polish (remember my current love of neons + animal print?) so I went through my collection of The Nail Junkie’s Neon Shimmer Jellies and Watermelon was begging to be worn. It is a neon red-orange jelly polish loaded with holographic shimmer and is even brighter in person than you see in my photos.

I created this mani just like my other Pond Manis by layering jelly polishes and a white design using a dotting tool. This mani has cheetah print shapes between the jelly layers.
- I started out with one coat of The Nail Junkie Watermelon and let dry.
- Then, I dropped some OPI Alpine Snow onto my work surface and dipped a small dotting tool into it.
- I used the dotting tool to create the cheetah print onto the nail. To create cheetah print shapes, I make C, U, and O shapes with the dotting tool while varying how close to the nail surface the dotting tool is. This creates thinner and thicker parts of the shape and they will be less uniform. I also wiggle the dotting tool a bit while making those letter shapes to create more variation. You really can’t mess these up, none can be the same anyway!
- Once I was happy with the cheetah spots for the first layer, I added a few dots in between the spots.
- After letting them dry for a minute or two, I applied a second coat of The Nail Junkie Watermelon, and let dry.
- I repeated the steps above to add more cheetah print and dots, overlapping some of the first layer’s spots. I prefer my pond manis to have overlapping designs because I feel it adds to the depth of the design, but you are free to add just a few spots each layer and not overlap them if you prefer!
- I added a third coat of The Nail Junkie Watermelon and spots again.
- Finally, I added a fourth coat of The Nail Junkie Watermelon to cover the spots. Instead of doing another full layer of white cheetah print, I only did one spot randomly on my nail and left it white.
- I added one coat of KBShimmer Clearly on Top to seal in and protect the mani.
What are your thoughts on this look? Have you tried a pond mani before? Come back tomorrow for an easy step-by-step tutorial on how to recreate this look!
The Nail Junkie Links
Shop: https://www.etsy.com/shop/TheNailJunkie
Facebook: https://www.facebook.com/TheNailJunkie
Instagram: https://instagram.com/thenailjunkiepolish
Twitter: https://twitter.com/AletaColucci
*The polish in this post was sent for me to review with my honest opinion.
If you enjoyed this post, please Sign Up for email updates and you will have the latest news, reviews, nail art, and tutorials delivered right to your inbox! Never miss a post from Adventures In Acetone again. Thank you so much for reading.
– Let’s paint something amazing! –

Comments
I love this! It reminds me of sequins!
What an amazing manicure. This has certainly inspired me to try some new ideas, especially with the OPI Tints polishes I bought recently. I love the jelly/crelly look, and I also love animal prints, but this would look equally good with dotting, etc, too, so thanks for sharing your inspirational ideas with us.