Good morning, readers! I always have a hard time when I have to skip a Tutorial Tuesday in order to do the monthly Digit-al Dozen challenge, so this month I’ve combined them! I did Jack O’ Lantern skittles and an easy step by step tutorial on how to create your own!
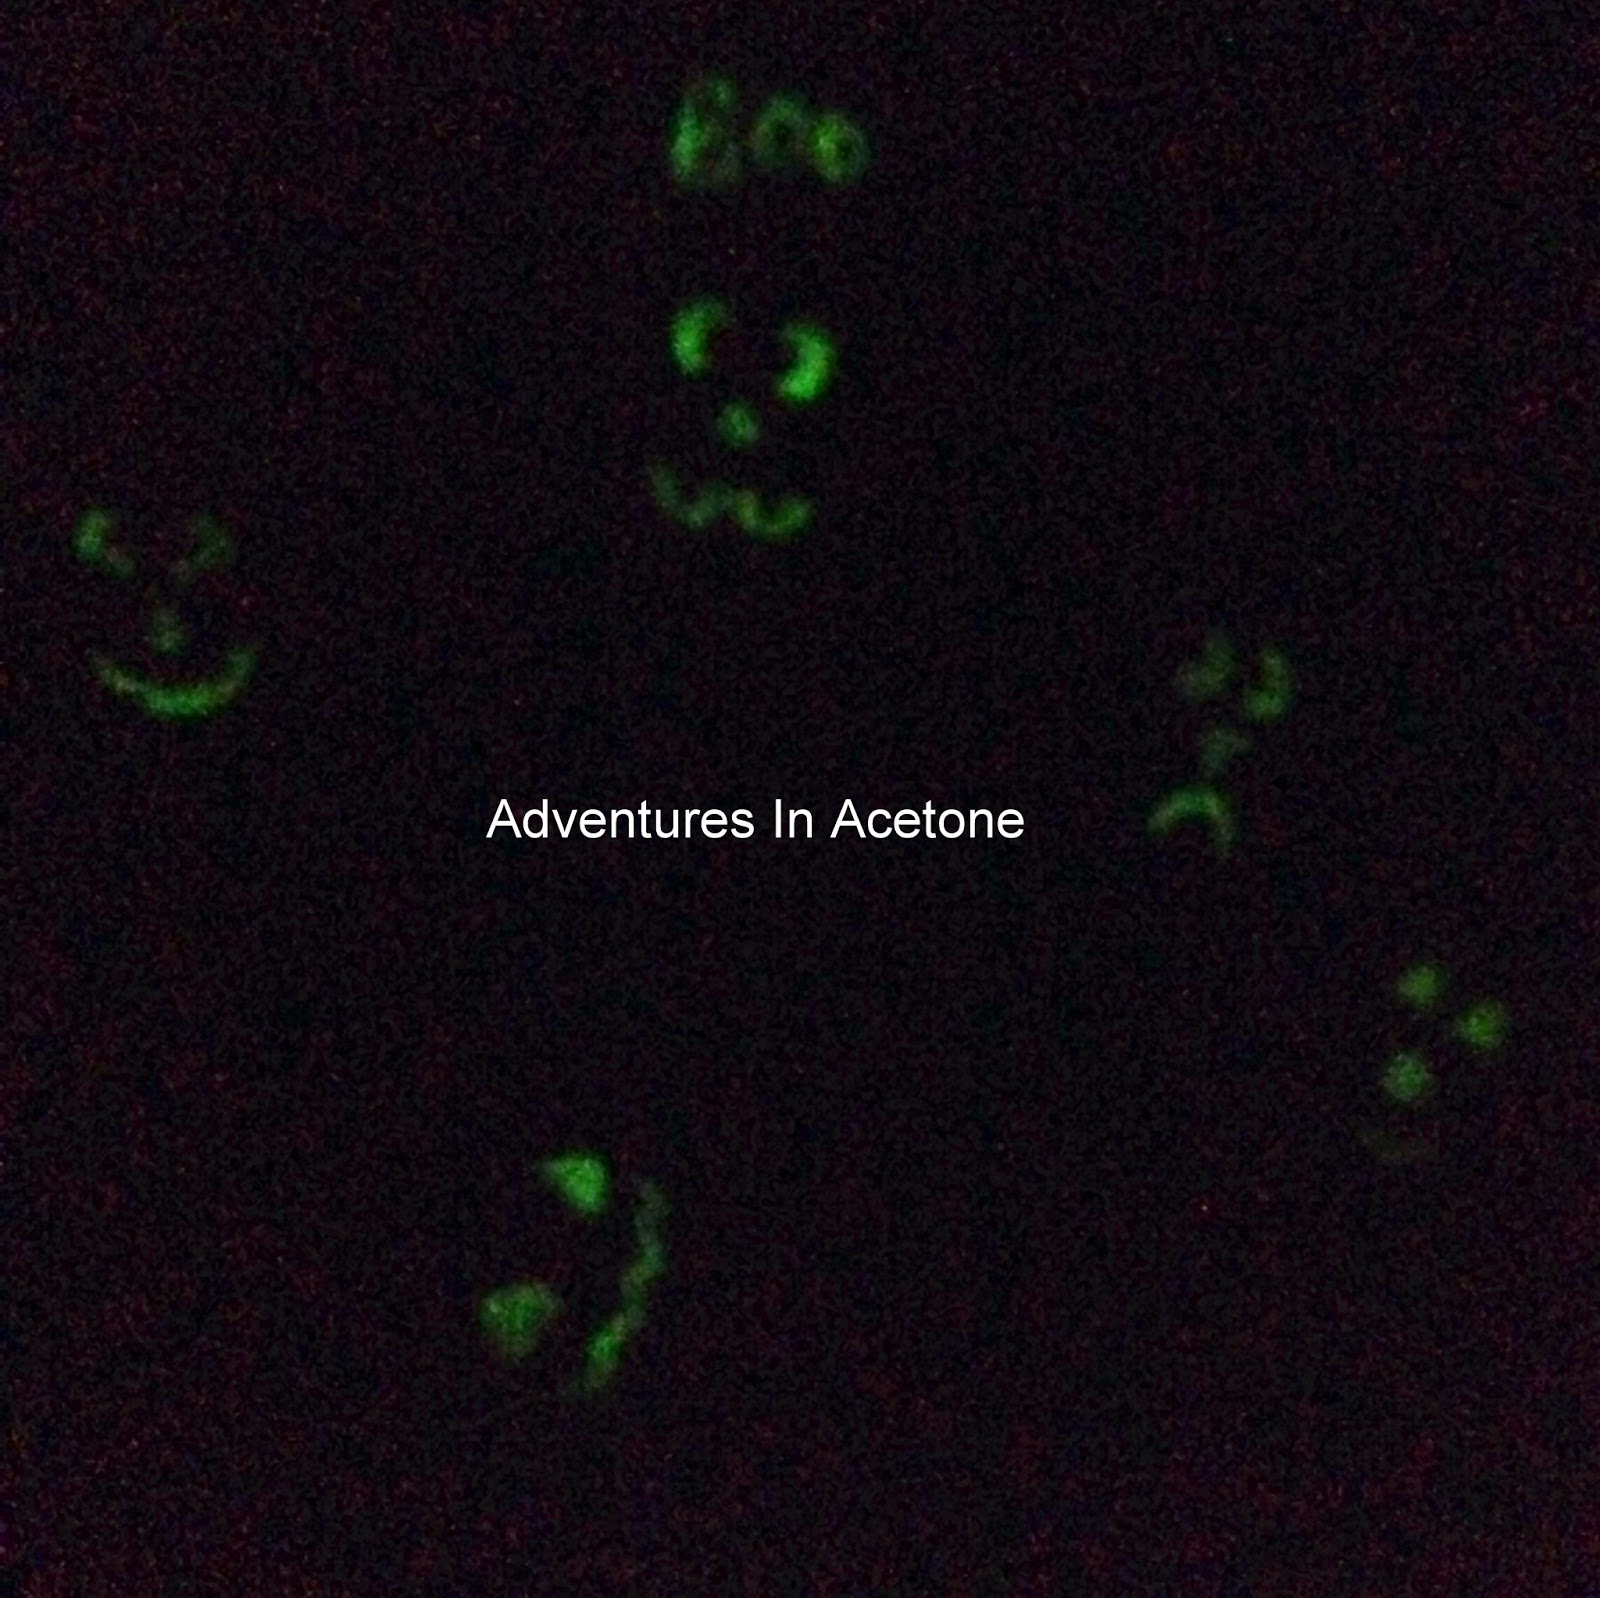
I also used a glow in the dark top coat over the yellow parts of the Jack O’ Lanterns, but I didn’t do that for the tutorial because I wasn’t happy with how they glowed.
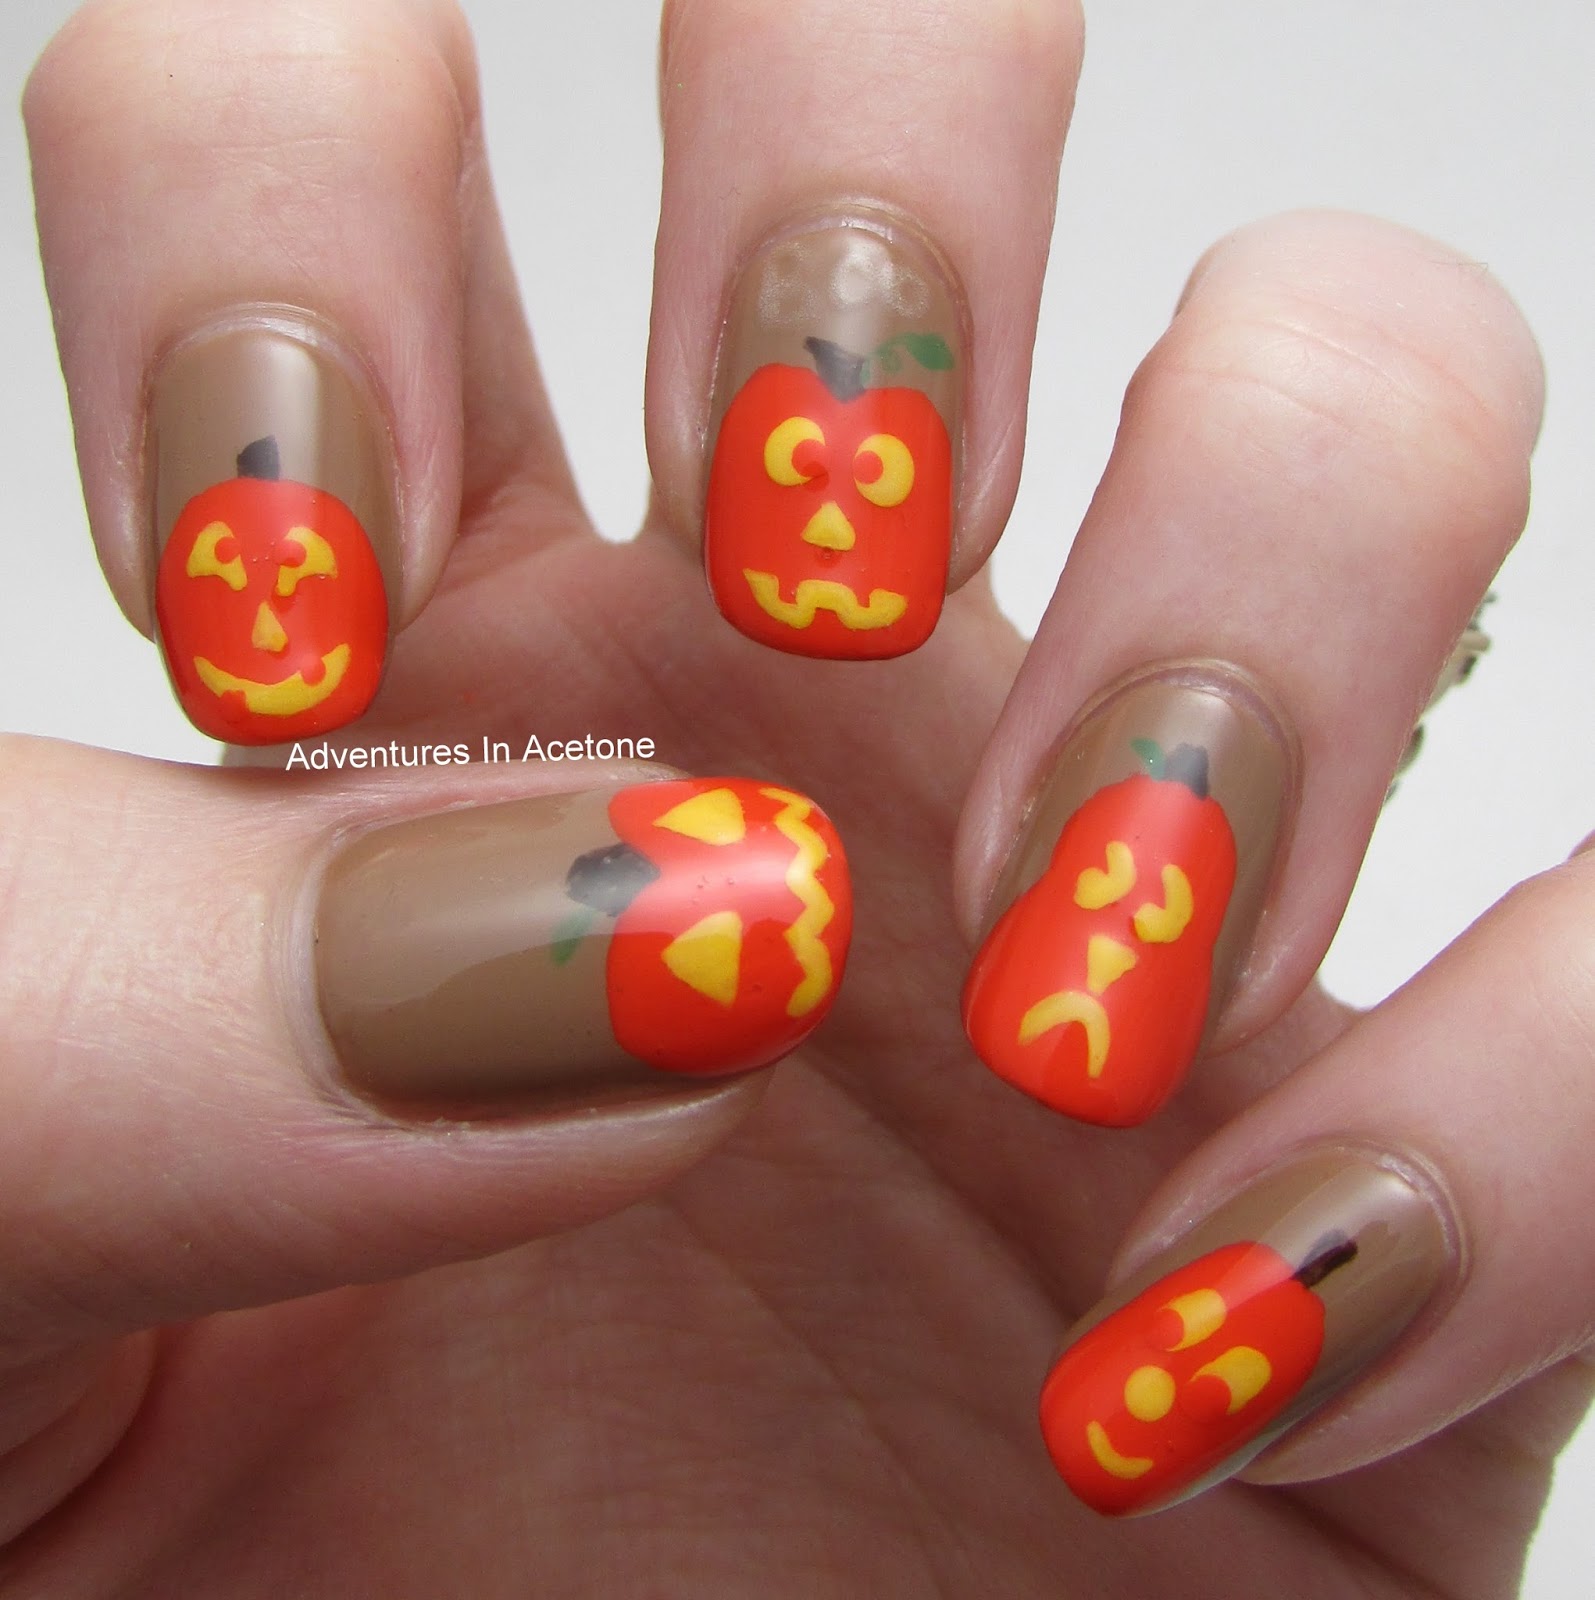
The beauty of this design is that you can do any shape of pumpkin and any face you’d like! I came up with 5 different ones for my skittle mani but the possibilities are endless!
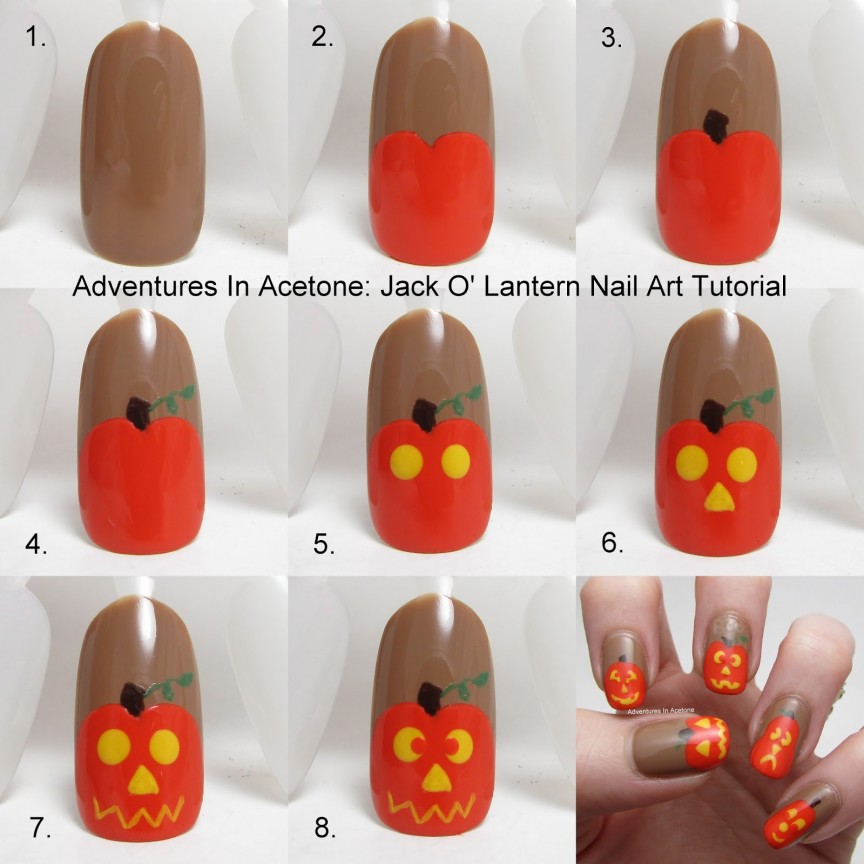
Here is a sneak peek collage at this tutorial. You will find full sized pictures and step by step instructions further down in this post.
Here is a bigger picture of the full mani, and below that is a glow in the dark photo.
There was just too little glow in the dark because I used a striper brush to paint it on over the yellow parts. I wish it had been stronger.
Okay, onward to the tutorial!! Things needed:
Zoya Flynn, Milanis Jiffy Orange(he had an accident haha) and Canary, OPI Suzi Loves Cowboys, China Glaze Starboard.

Striper brush, large dotting tool, small dotting tool.
Step 1) Paint 2 coats of Zoya Flynn and let dry.

Step 2) Using Milani Jiffy Orange and the brush from the bottle, paint a circle with an indent in the top middle for the pumpkin. I had to do 2 coats of the orange to completely cover the camel colored base.
Step 3) Use your striper brush and OPI Suzi Loves Cowboys to do a stem on the top middle of the pumpkin.

Step 4) Use the striper brush and China Glaze Starboard to do a twisty vine and leaf from the stem. You can just do a straight vine or even just the leaf if that’s easier.

Step 5) Use Milani Canary and your big dotting tool to do 2 eye dots.

Step 6) Use your striper brush and Milani Canary to do a simple triangle nose.

Step 7) Use the striper brush and Milani Canary to do a simple zigzag mouth smile.

Step 8) Take your small dotting tool and OPI Jiffy Orange and do some small dots on the inside edges of the eyes to make them look like a cutout you would see with real Jack O’ Lanterns.

Don’t forget to add a thick, quick drying top coat to protect and seal in your design! I prefer Seche Vite, H K Girl Top Coat, or Poshe. Put a thick bead of top coat on the brush and gently spread it toward the tips and side, taking great care to not let the bristles touch the polish underneath. Thinner top coats can cause streaking or bleeding of the colors and the bristles drag lines through the design. YOU’RE DONE!
What do you think of this simple Jack O’ Lantern tutorial design? Please share pics of your nails using my tutorials by tagging me on Instagram (@adventuresinacetone) or posting to my Facebook Page!
Thanks so much for reading! Come back tomorrow to see the next “Skittle” themed mani with The Digit-al Dozen!
document.write(”);
If you enjoyed this post, please Sign Up for email updates and you will have the latest news, reviews, nail art, and tutorials delivered right to your inbox! Never miss a post from Adventures In Acetone again. Thank you so much for reading.
– Let’s paint something amazing! –


Comments
This is so great! I love the sad pumpkin! haha
Love this!
So adorable!
Love this look! It's so cute.
This is cute. I love how they all have different expressions.
Awww! These are adorable! And great tutorial as always 🙂
Great tutorial! I love those little glow in the dark faces!
Thanks for the tutorial. love the mani
The cuteness is too much! I need to recreate this! 🙂
Love all the different faces! Too cute!
This is sooooo cute! I think I need to recreate that for my blog *_* May I?
wow these are adorable and that glow is amazing!!
I LOVE the little leaves! Super cute, and great tutorial to boot
I love your Jack O Lanterns – and your tutorials too!
the cross-eyed pumpkin is the best EVER!!!
So stinkin' cute!