Press Sample
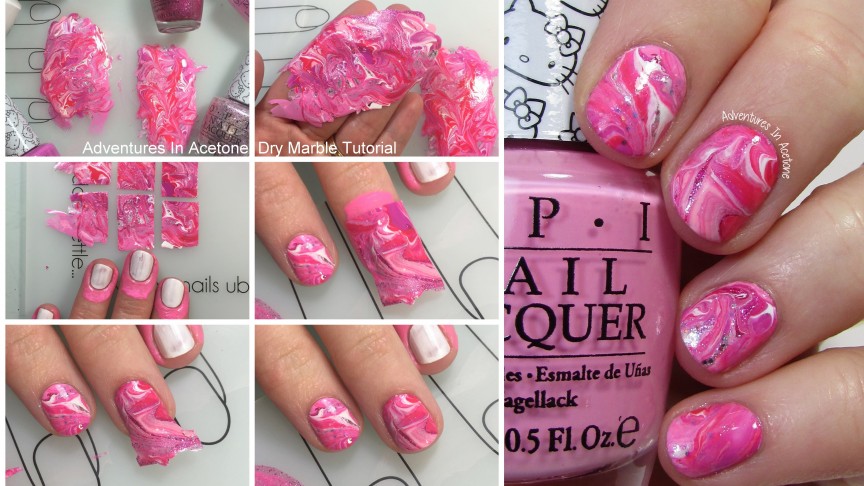
Good morning, readers! I’m still having fun playing around with the new OPI Hello Kitty Collection. The colors are so cute and go great together in nail art. For today’s look, I was inspired by a recent tutorial by HannahRoxNails on Youtube. It’s essentially a dry marble, using an old nail polish bottle brush to swirl colors together on a plastic bag, letting dry, and then peeling back up. I used my ÜberChic ÜberMat instead of a plastic bag and it worked perfectly! Definitely check out Hannah’s video above, I have some step by step pictures of applying onto the nails, but not for the swirling part.

For this look, I quickly painted thick stripes of OPI Alpine Snow, OPI Small + Cute=❤️, OPI Look at My Bow!, OPI Super Cute in Pink, OPI Spoken from the Heart, OPI Charmmy & Sugar, and OPI Starry-Eyed for Dear Daniel. I was going for a big enough pile of polish on the mat to be able to cut up for at least 5 nails worth of squares. I drizzled some of the colors over the others as well while everything was still wet. As with Hannah in the video linked above, I grabbed an old top coat and cleaned the brush to use for the swirling. I basically swirled and dragged all over until you see the random designs in the polish below.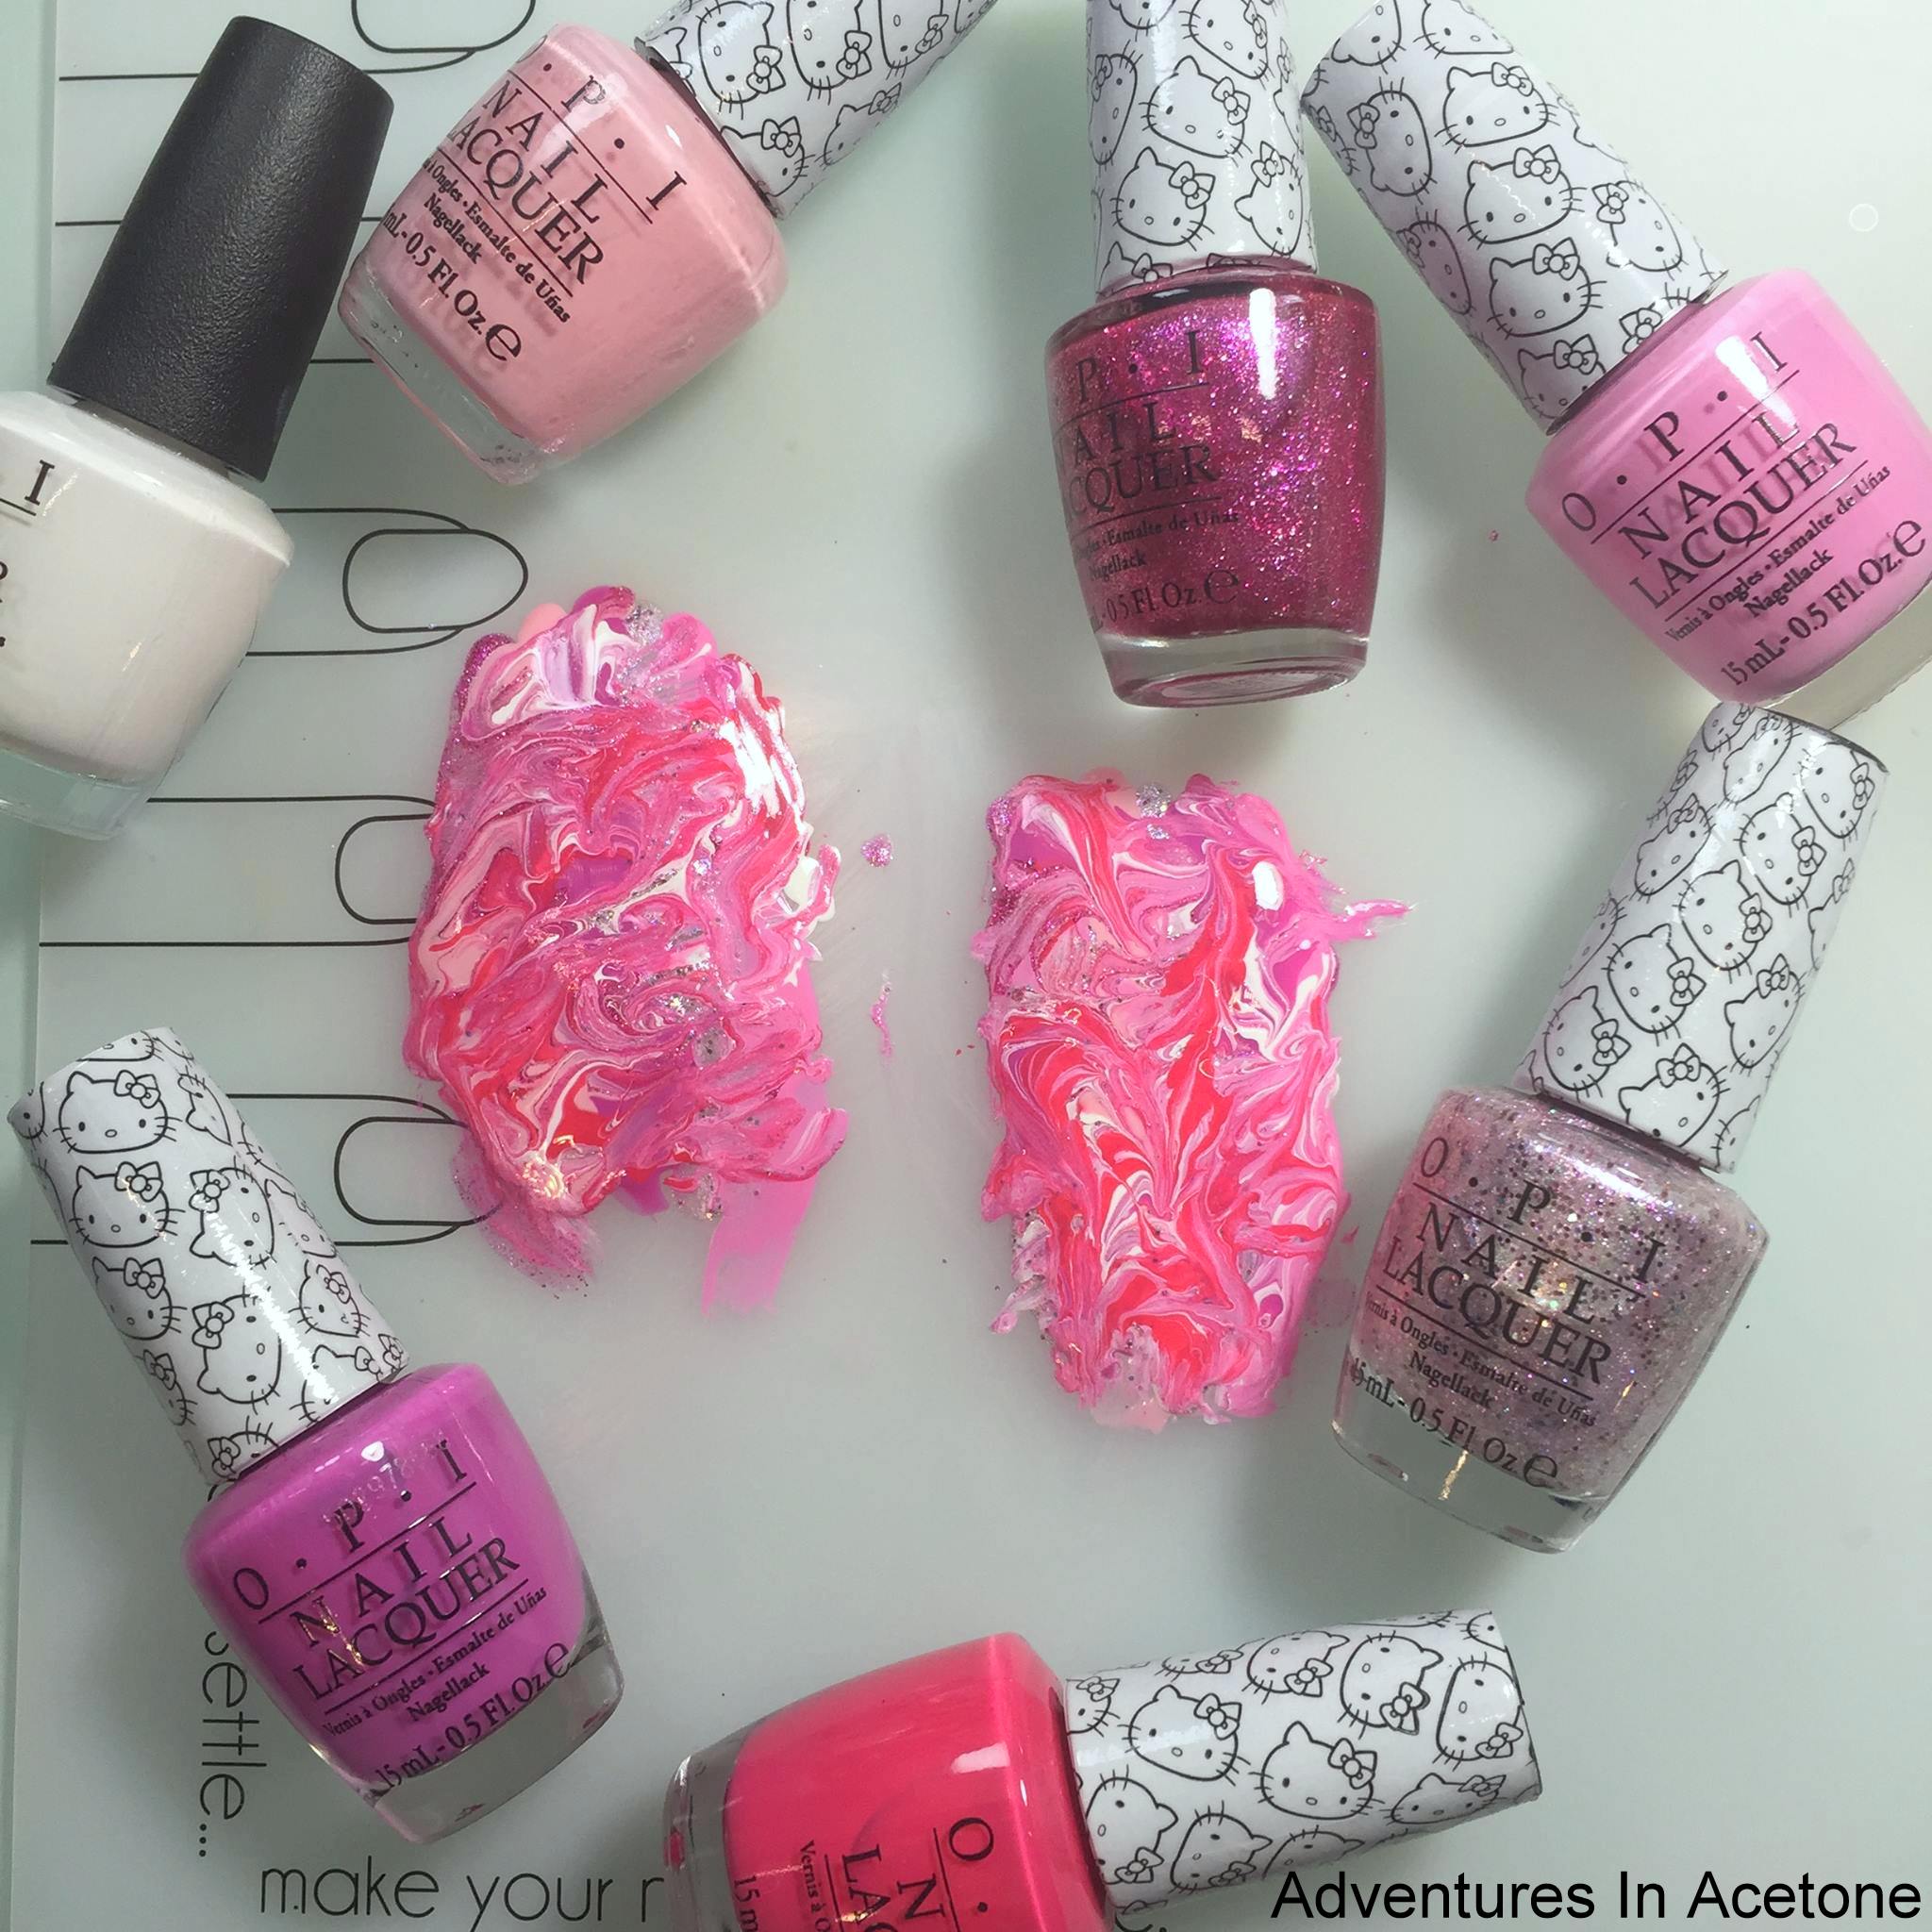
After I was happy with my swirls, I created a second for my other hand and let them dry. It sat for probably 45 minutes to an hour, mostly because I had to get the kids ready for bed and settled in before I could continue with my nails. I gently pressed my fingertip onto the dry marble and once it seemed dry and not tacky, I used an orange stick to carefully pry and peel up the whole section from the mat. (Shown below on my hand.)
Following Hannah’s instructions, I cut the dry marble into rectangles, making sure that they were wide enough for my nails and bigger for easy application.
To prep my nails, I painted a coat of OPI Alpine Snow and then used Glisten & Glow – CTRL-ALT-DEL Latex Barrier around my nails for easy cleanup.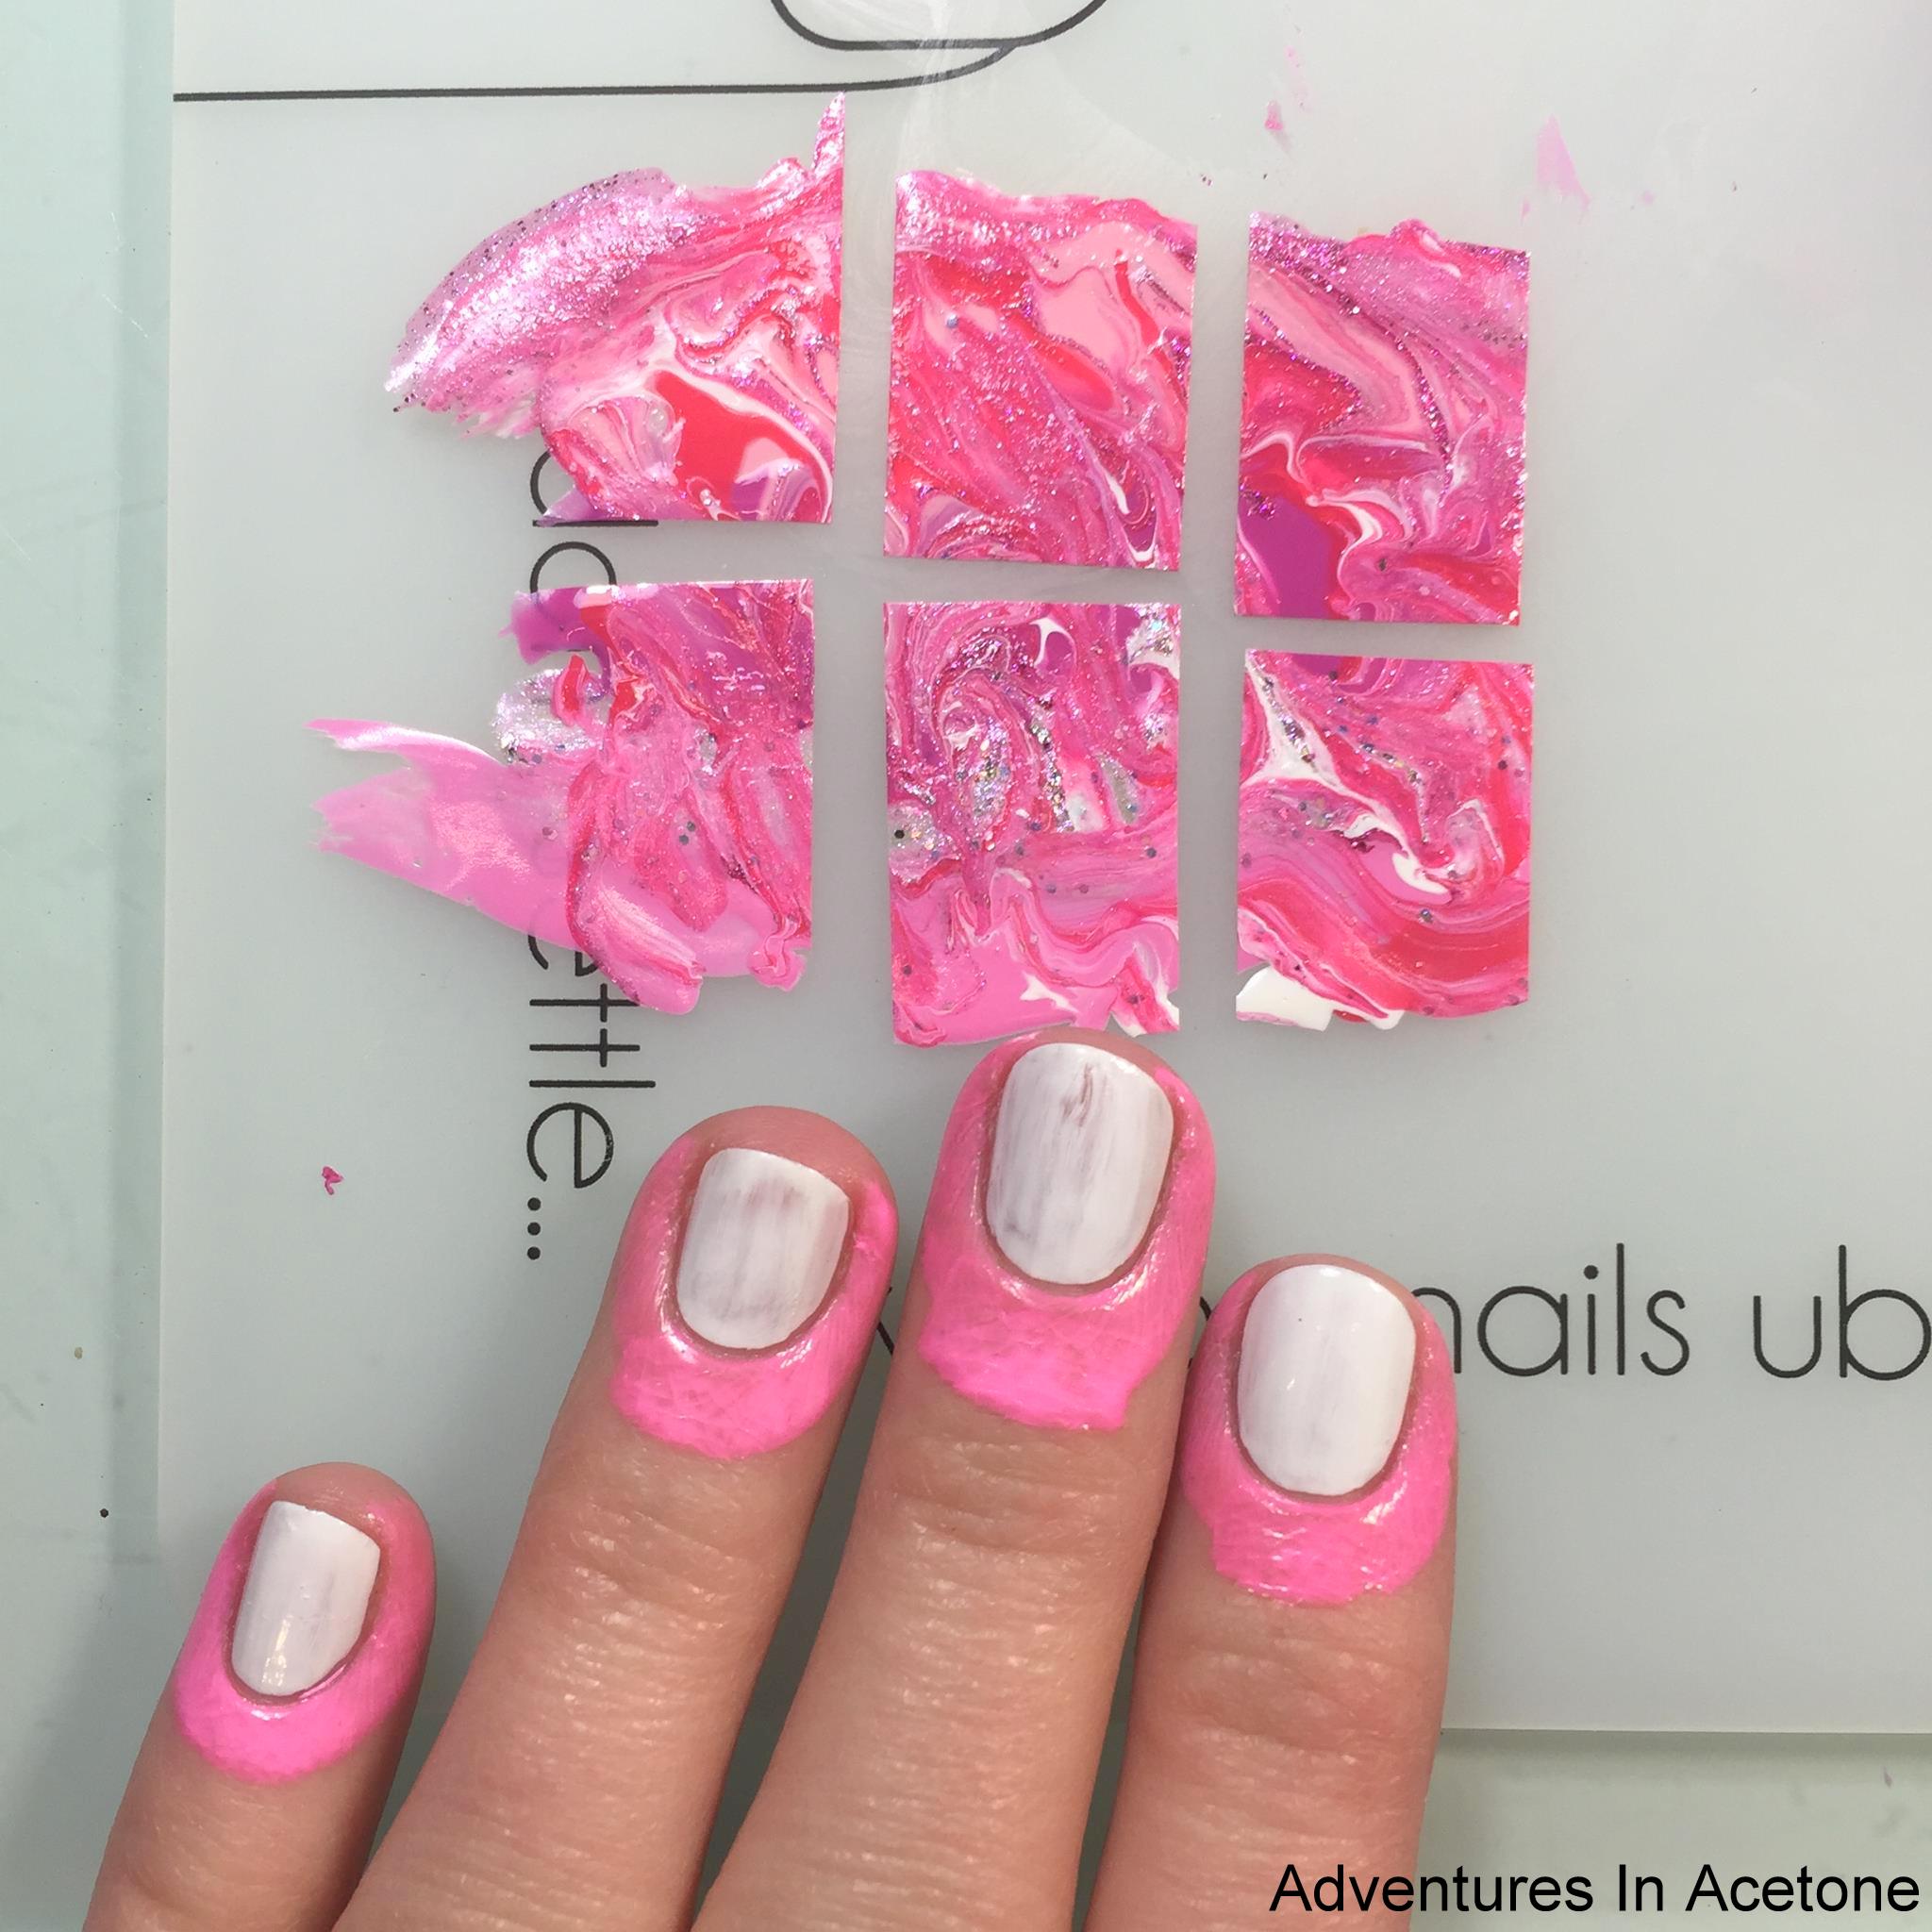
When I was ready to apply to my nails, I did it one nail at a time. First, I painted a thin coat of Qtica Extending Top Coat over my white base to give the decal something to stick to. Then, I selected the cut up marbled decal I wanted, positioned in onto the nail with the swirls I liked, and pressed firmly along the nail. 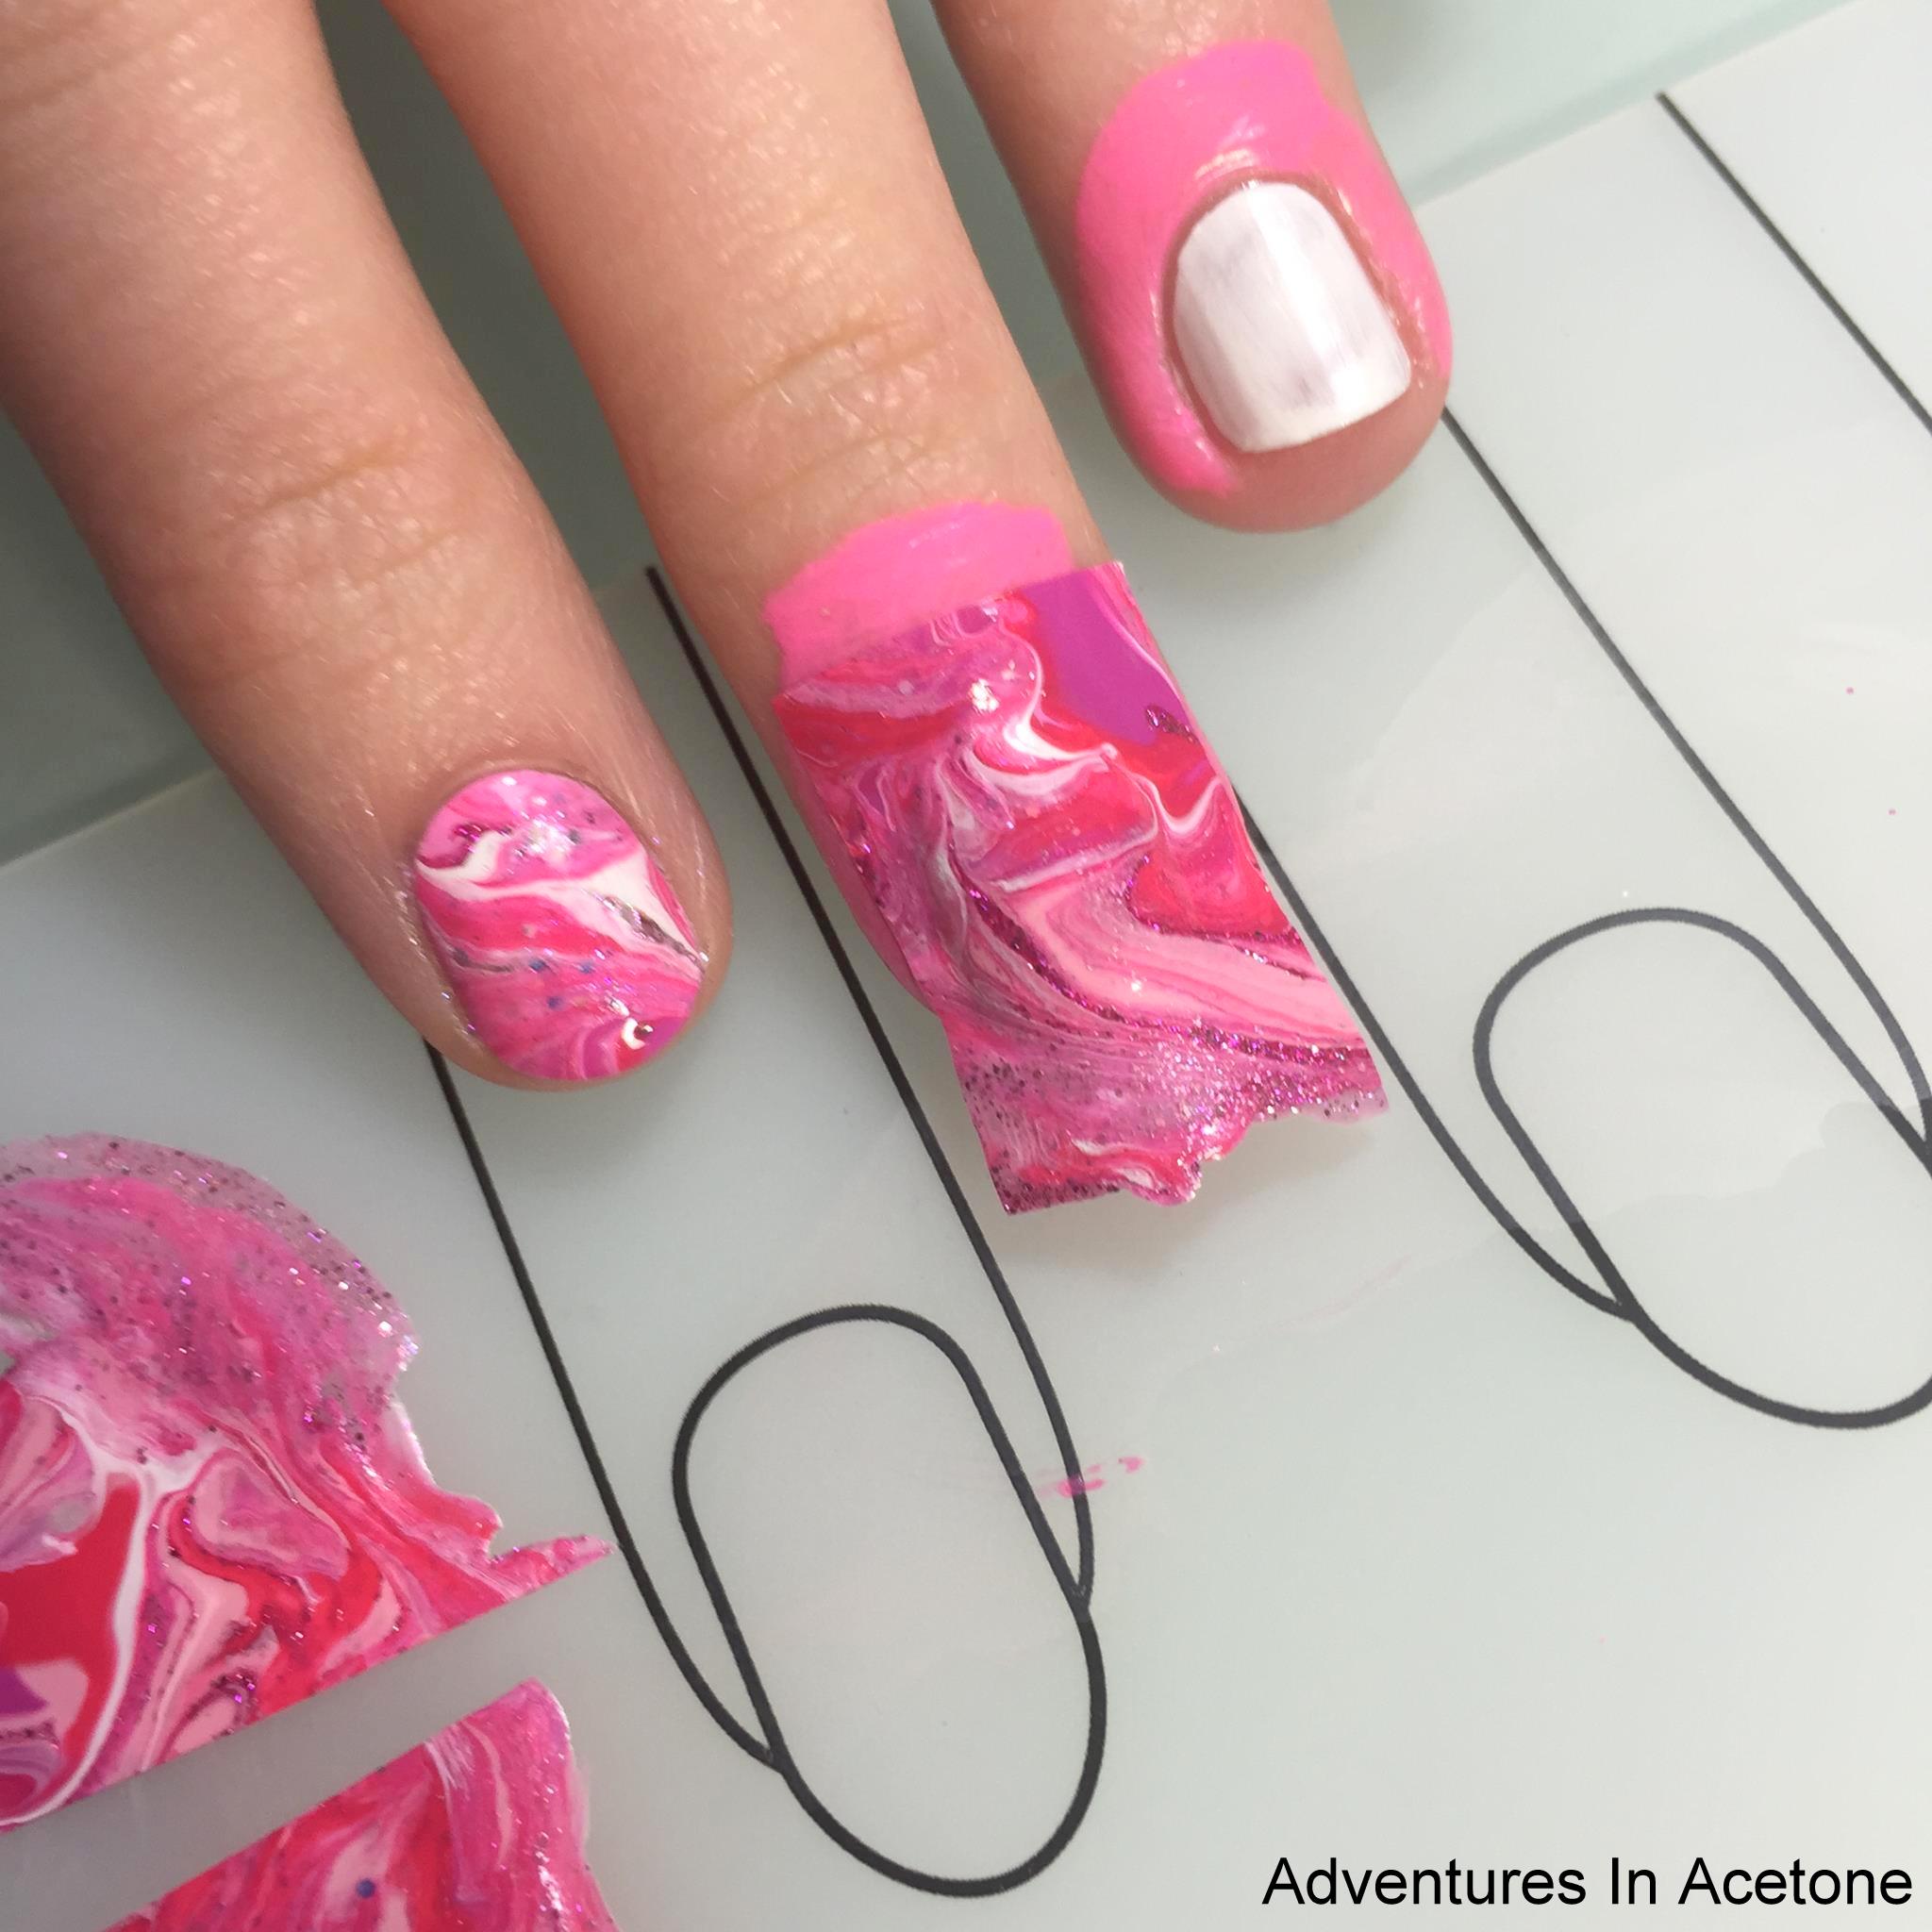
I used an orange stick to press along the cuticle line and it mostly “cut” the excess away from the nail for me. After peeling the latex barrier away with the excess, I used acetone and my ÜberChic Cleanup Brush to clean the cuticle line for a neater appearance.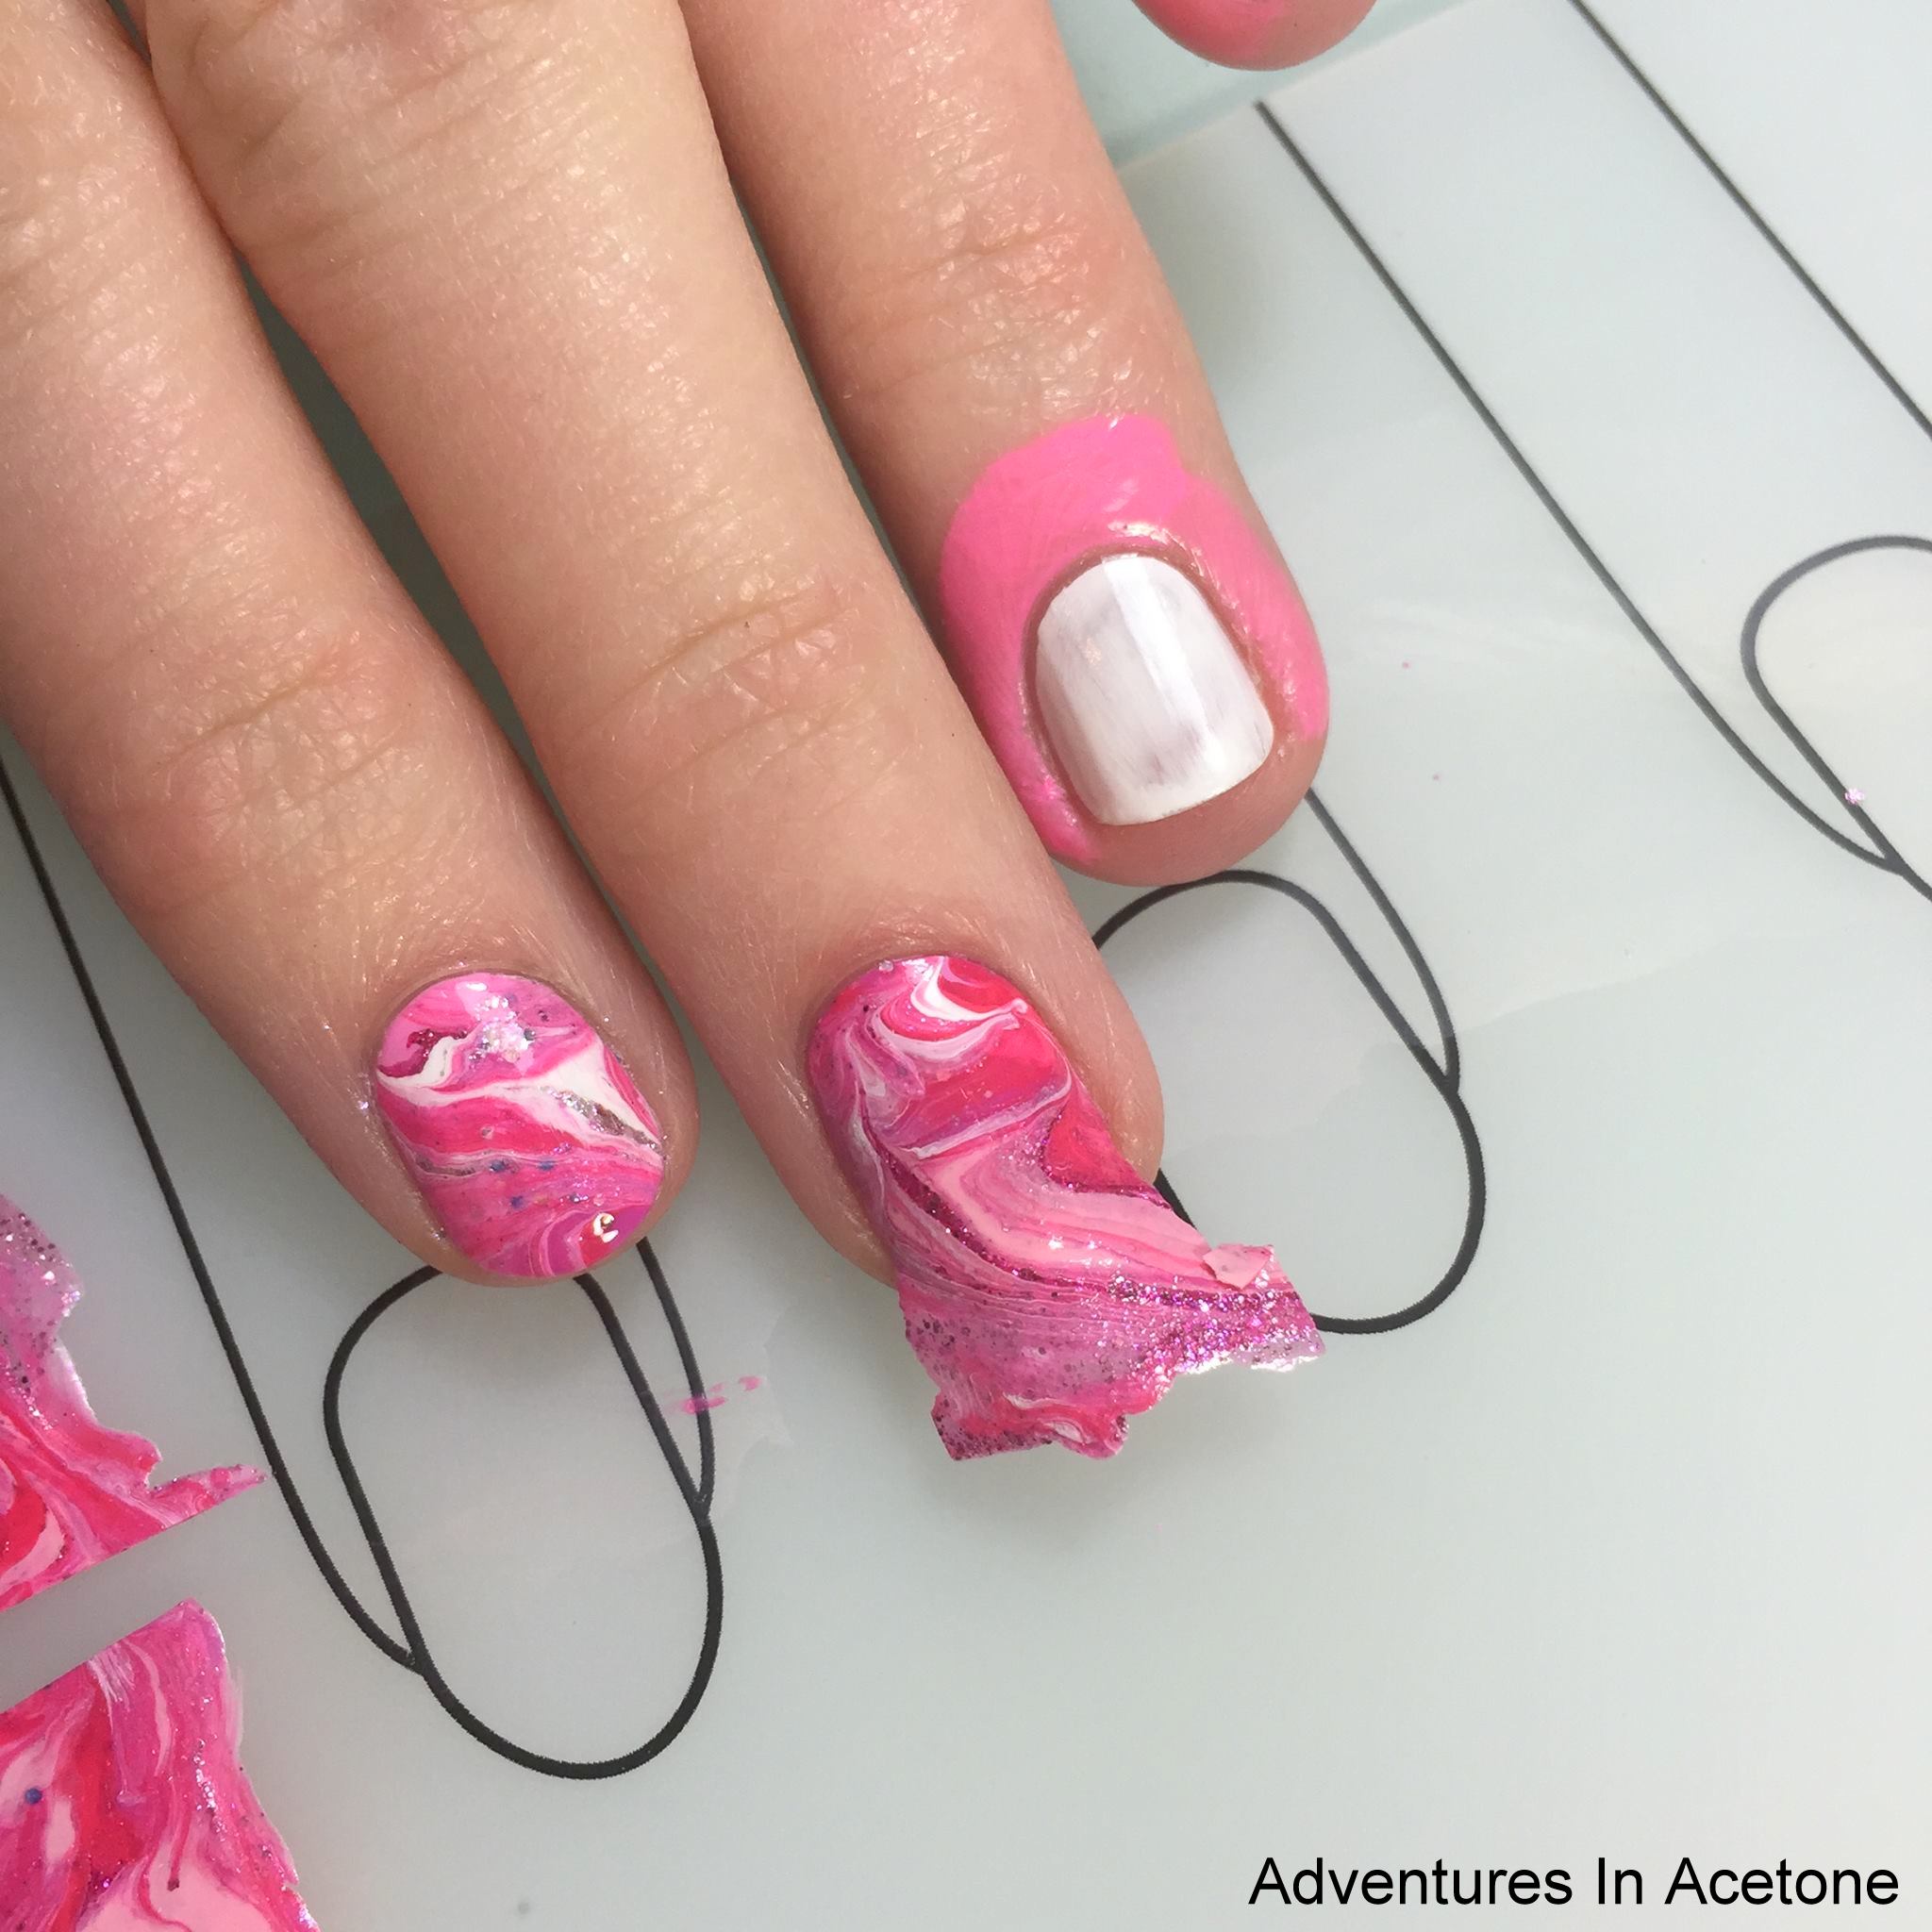
Lastly, I removed the excess from the tips by trimming with scissors, and then melting away the rest with acetone and the cleanup brush. I continued these steps until all 10 nails were done and then added a coat of KBShimmer Clearly on Top to seal them in.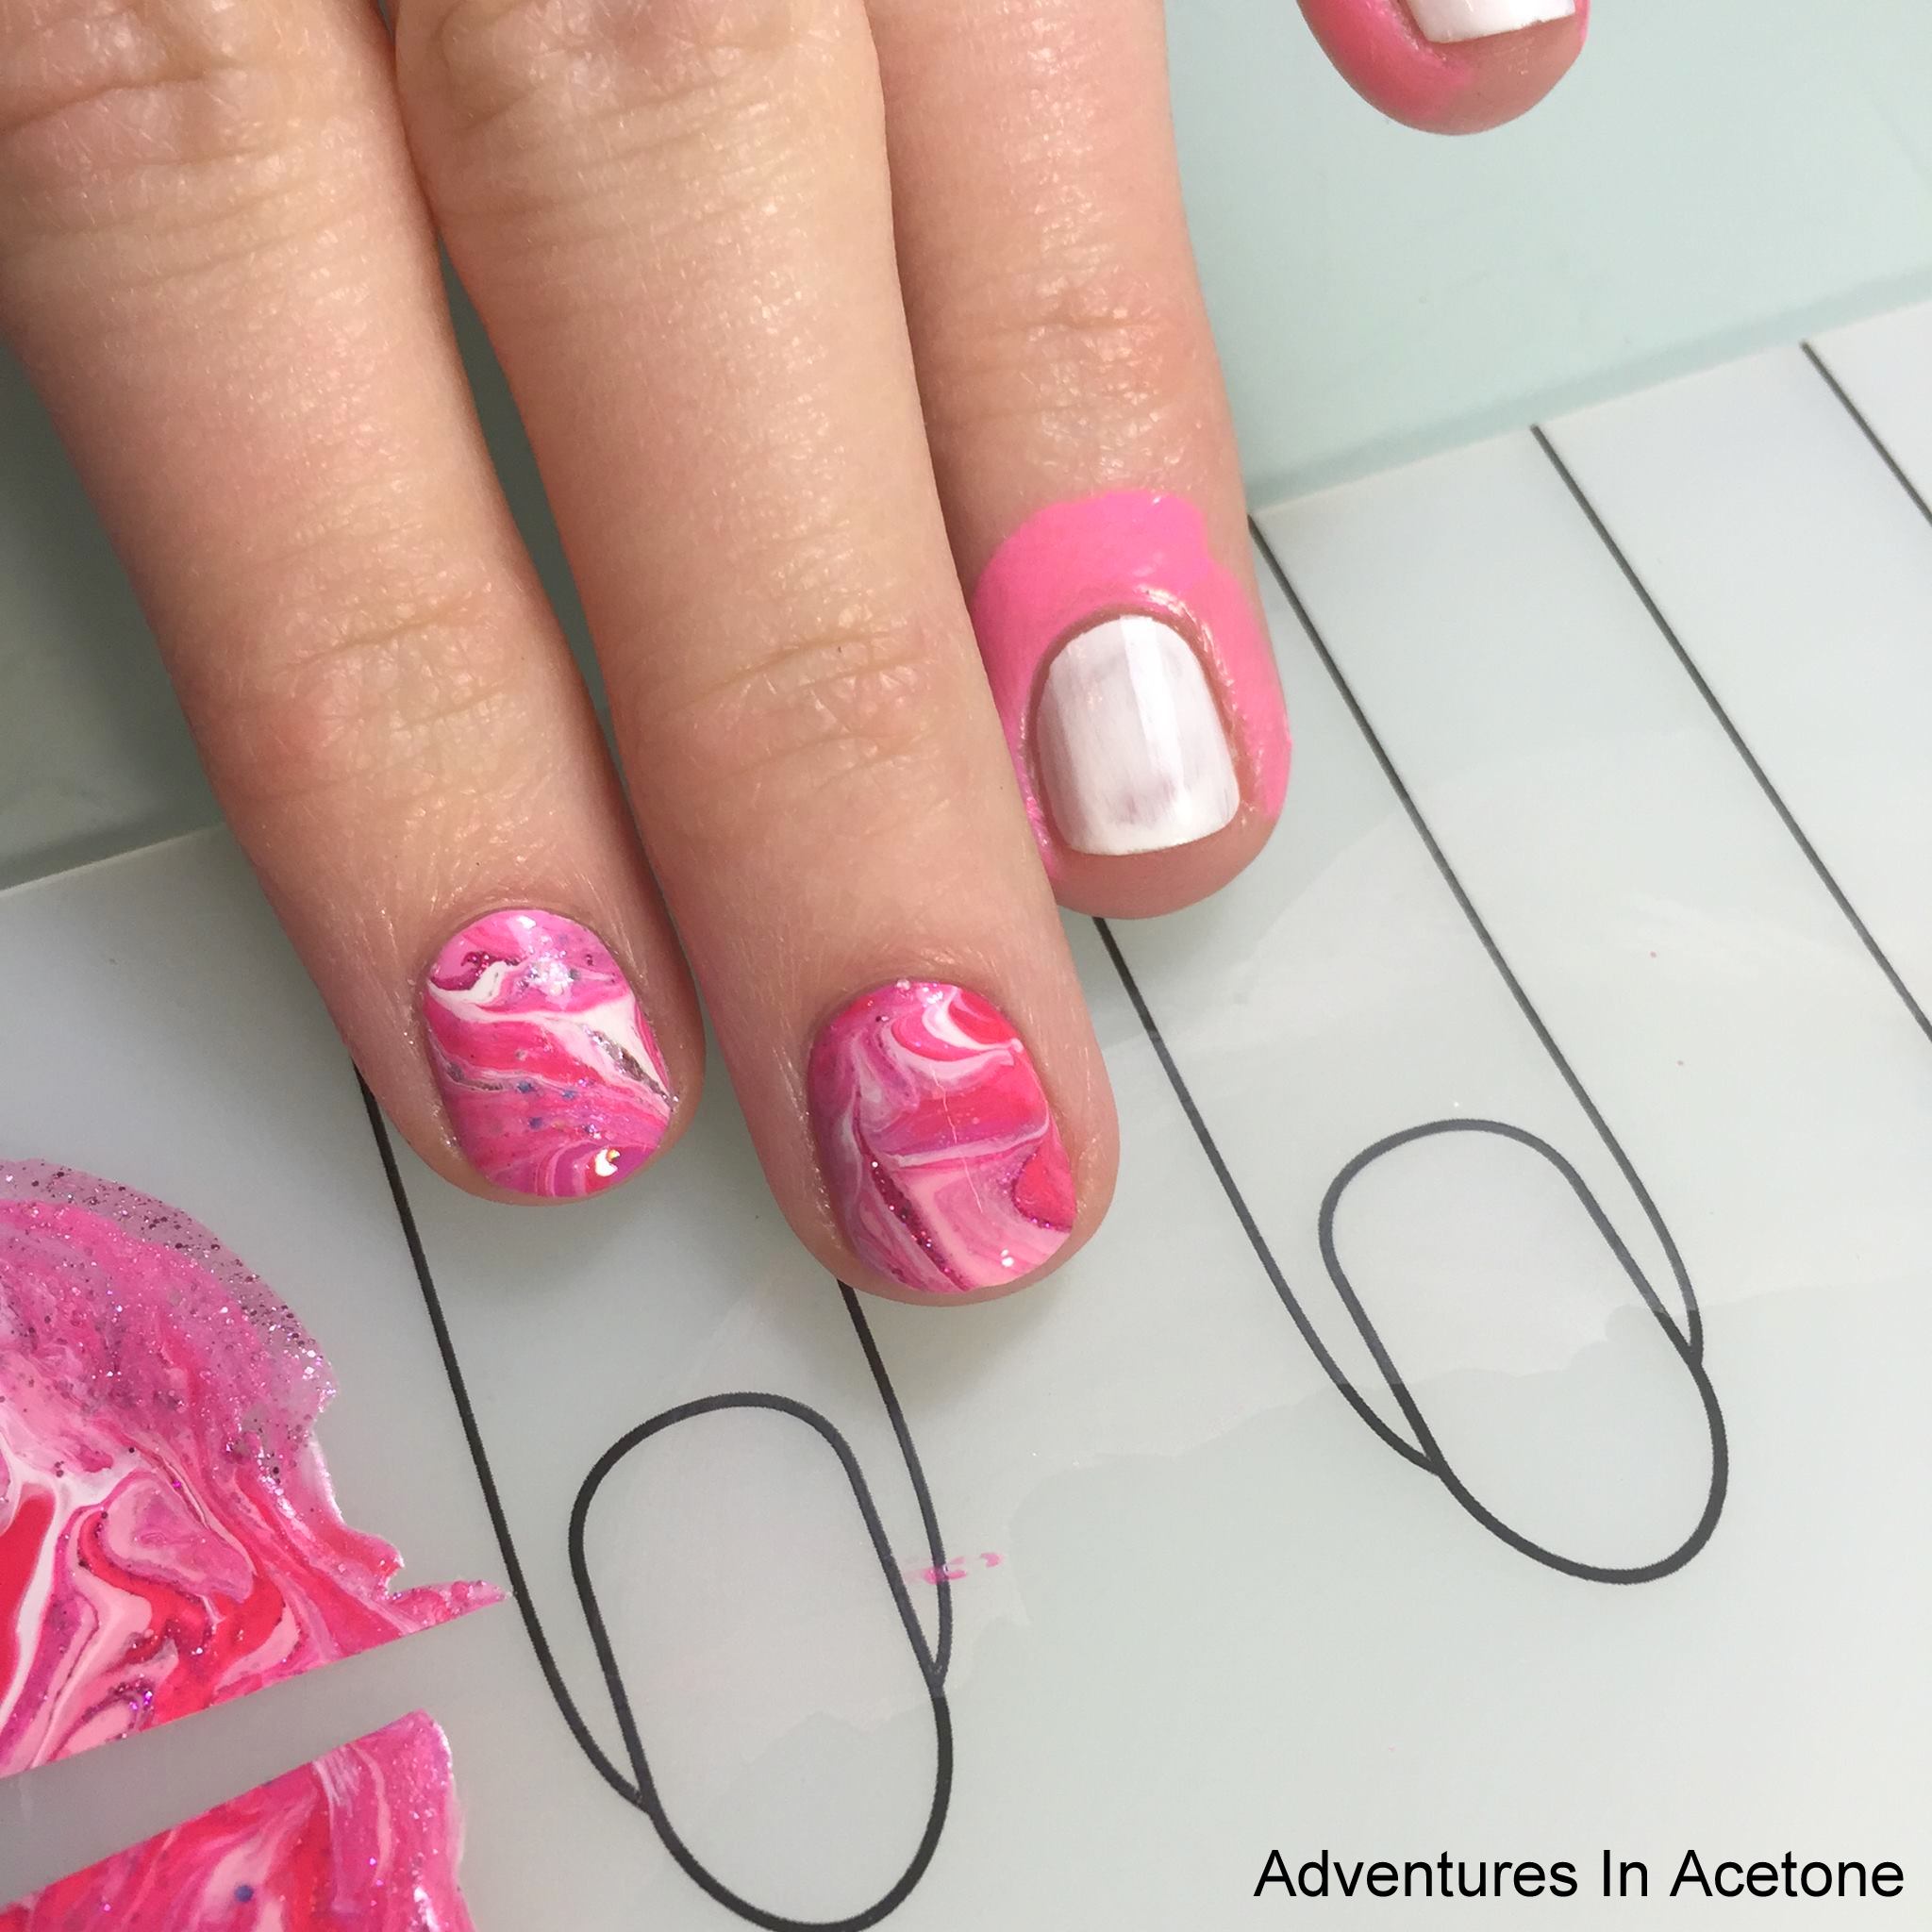
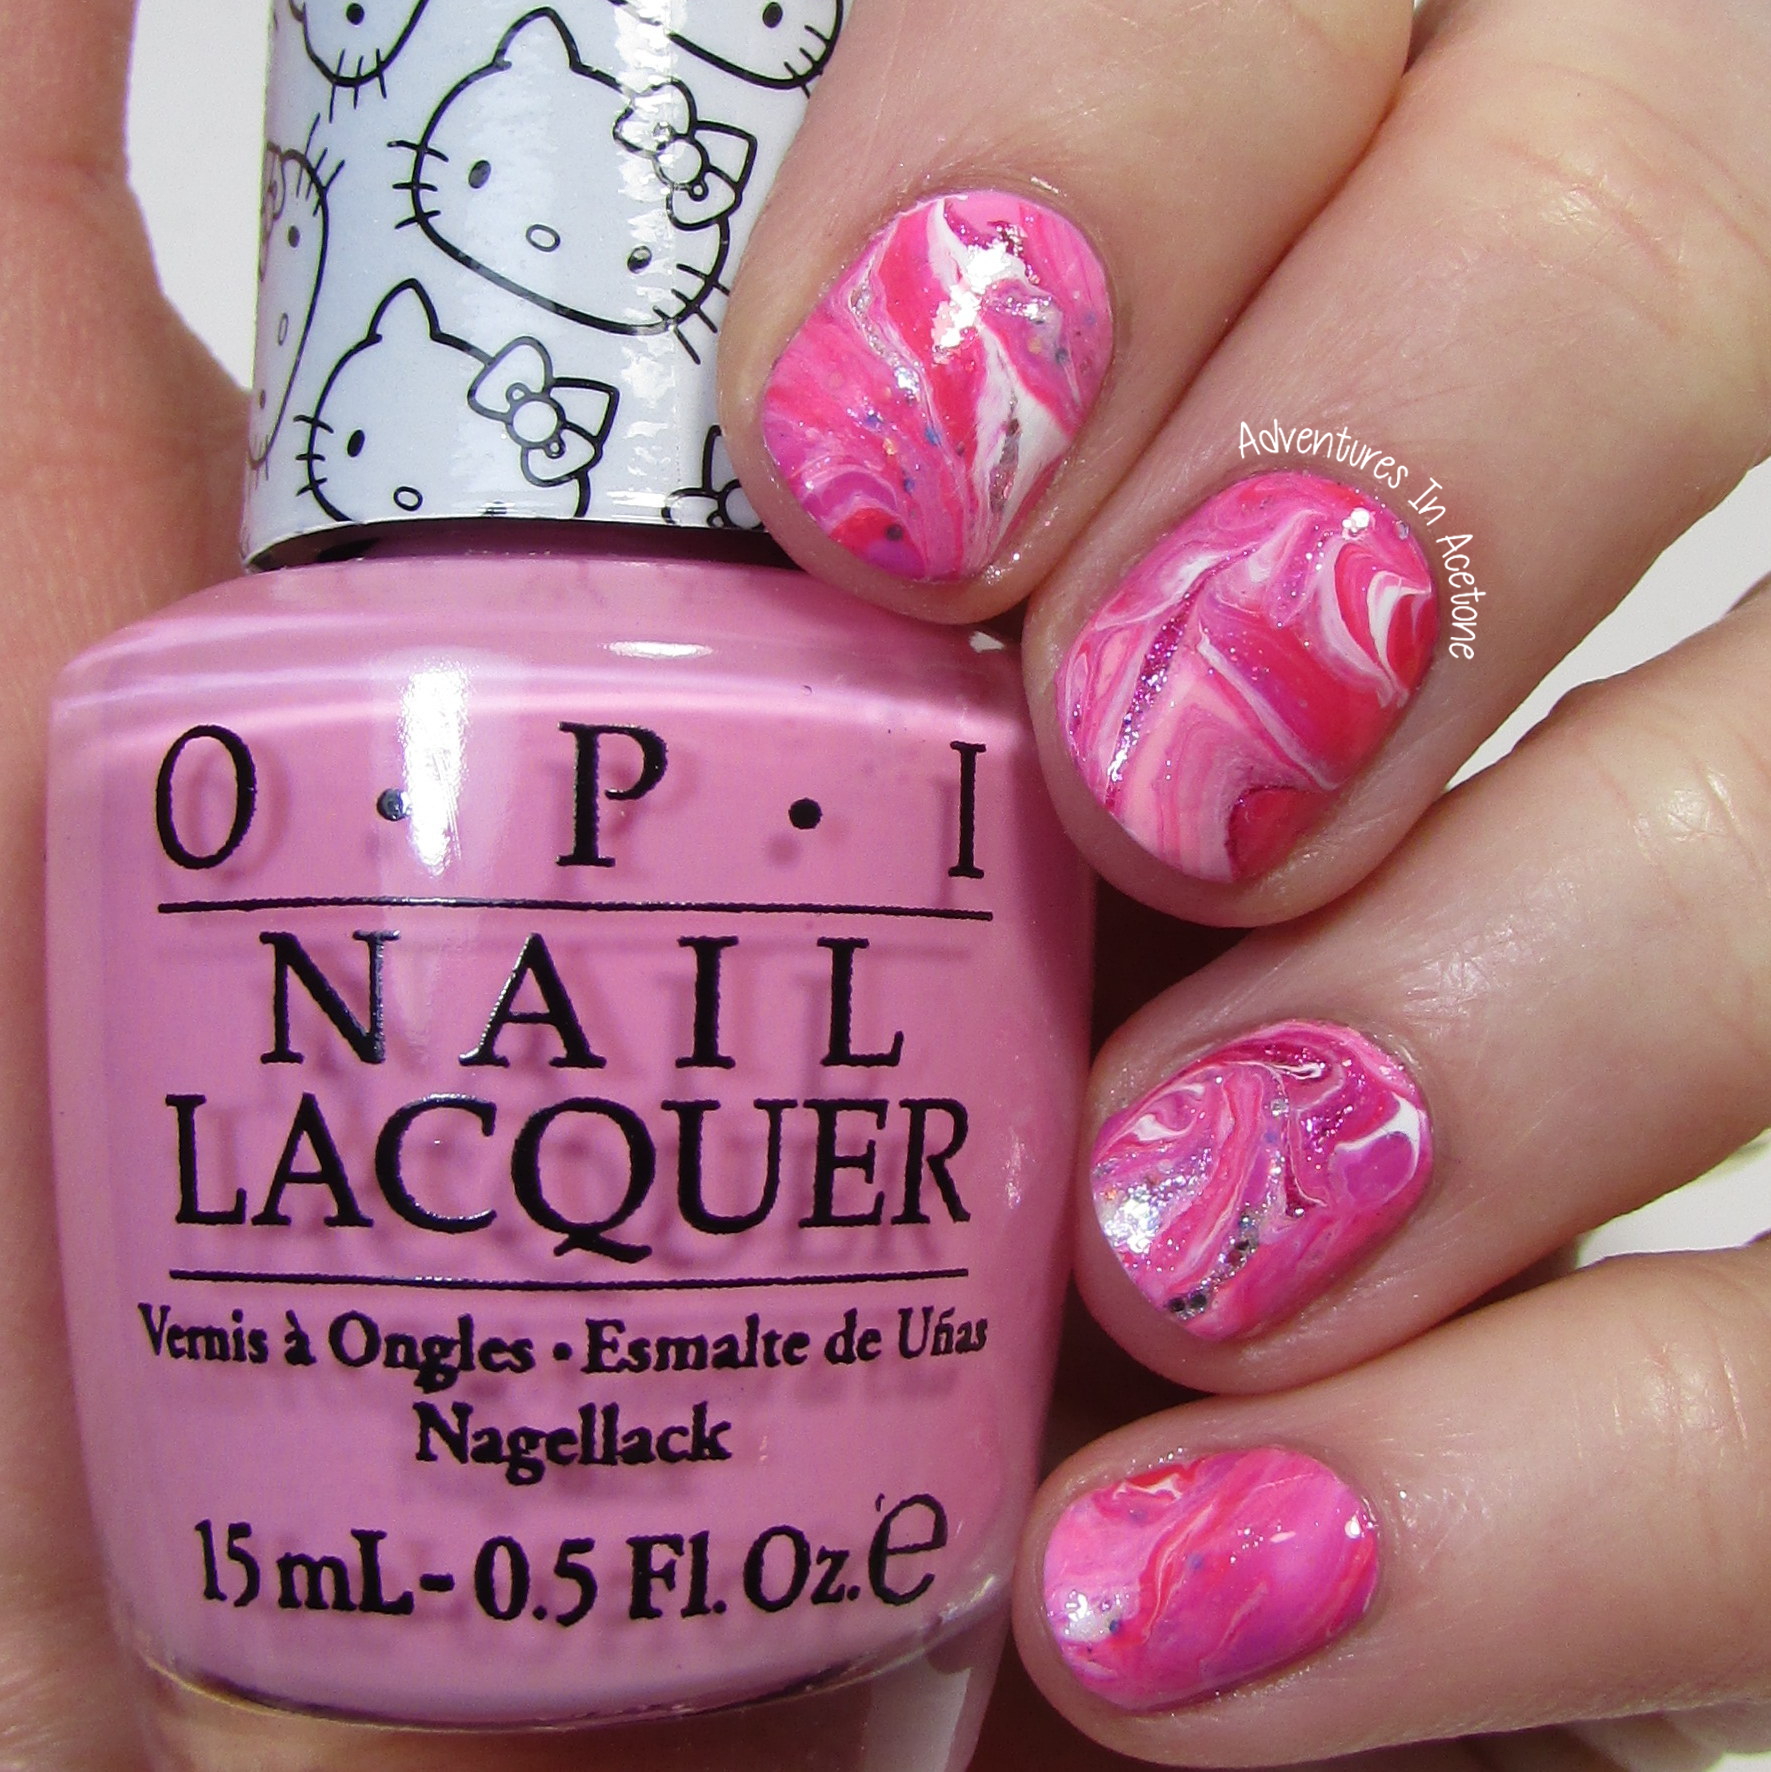
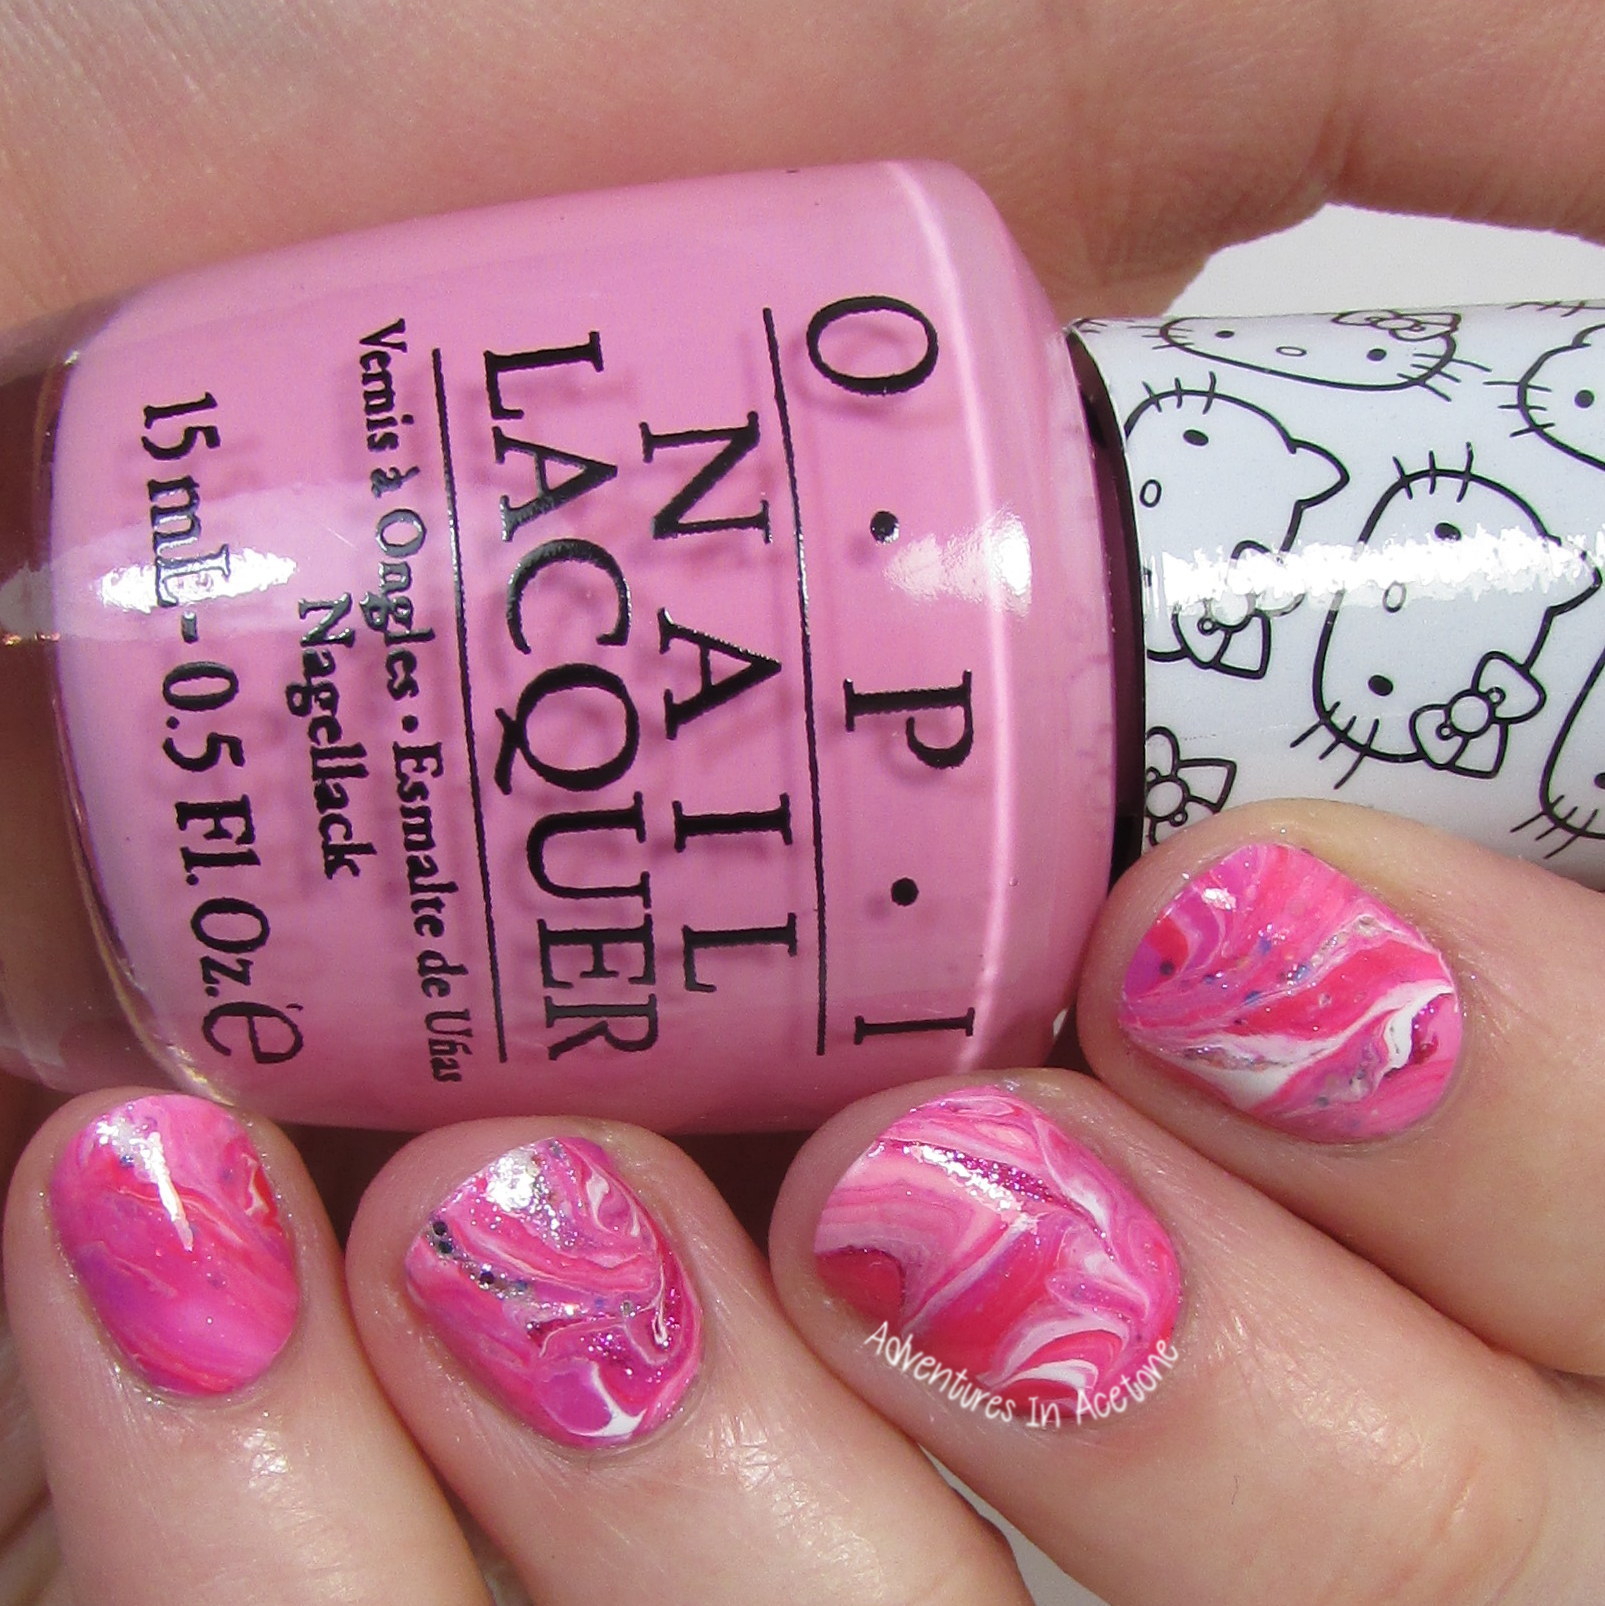
What do you think of this look? I love how random the swirls are and the shimmery shades made these look a lot like geodes in my opinion! Although it takes a bit of time for this kind of mani, it really is very easy to do! Have you watched Hannah’s video? I should have full swatches of the OPI Hello Kitty Collection in the next week or so, so check back for that.
DON’T FORGET TO ENTER MY SILLY BEE’S CHICKADEES GIVEAWAY HERE!
*The polishes in this post were sent for me to review with my honest opinion.
If you enjoyed this post, please Sign Up for email updates and you will have the latest news, reviews, nail art, and tutorials delivered right to your inbox! Never miss a post from Adventures In Acetone again. Thank you so much for reading.
– Let’s paint something amazing! –

Comments
I saw this and ran off and bought 4 after lkoniog at all the ones in the shop! Yummy! Thanks for posting these, would have not known about them otherwise 🙂 I couldn’t find Candy Corn, though 🙁