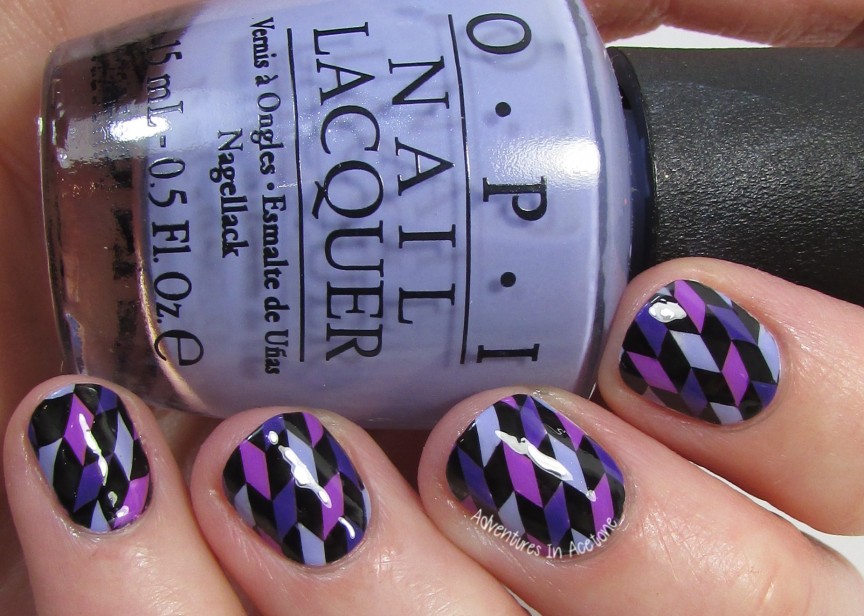
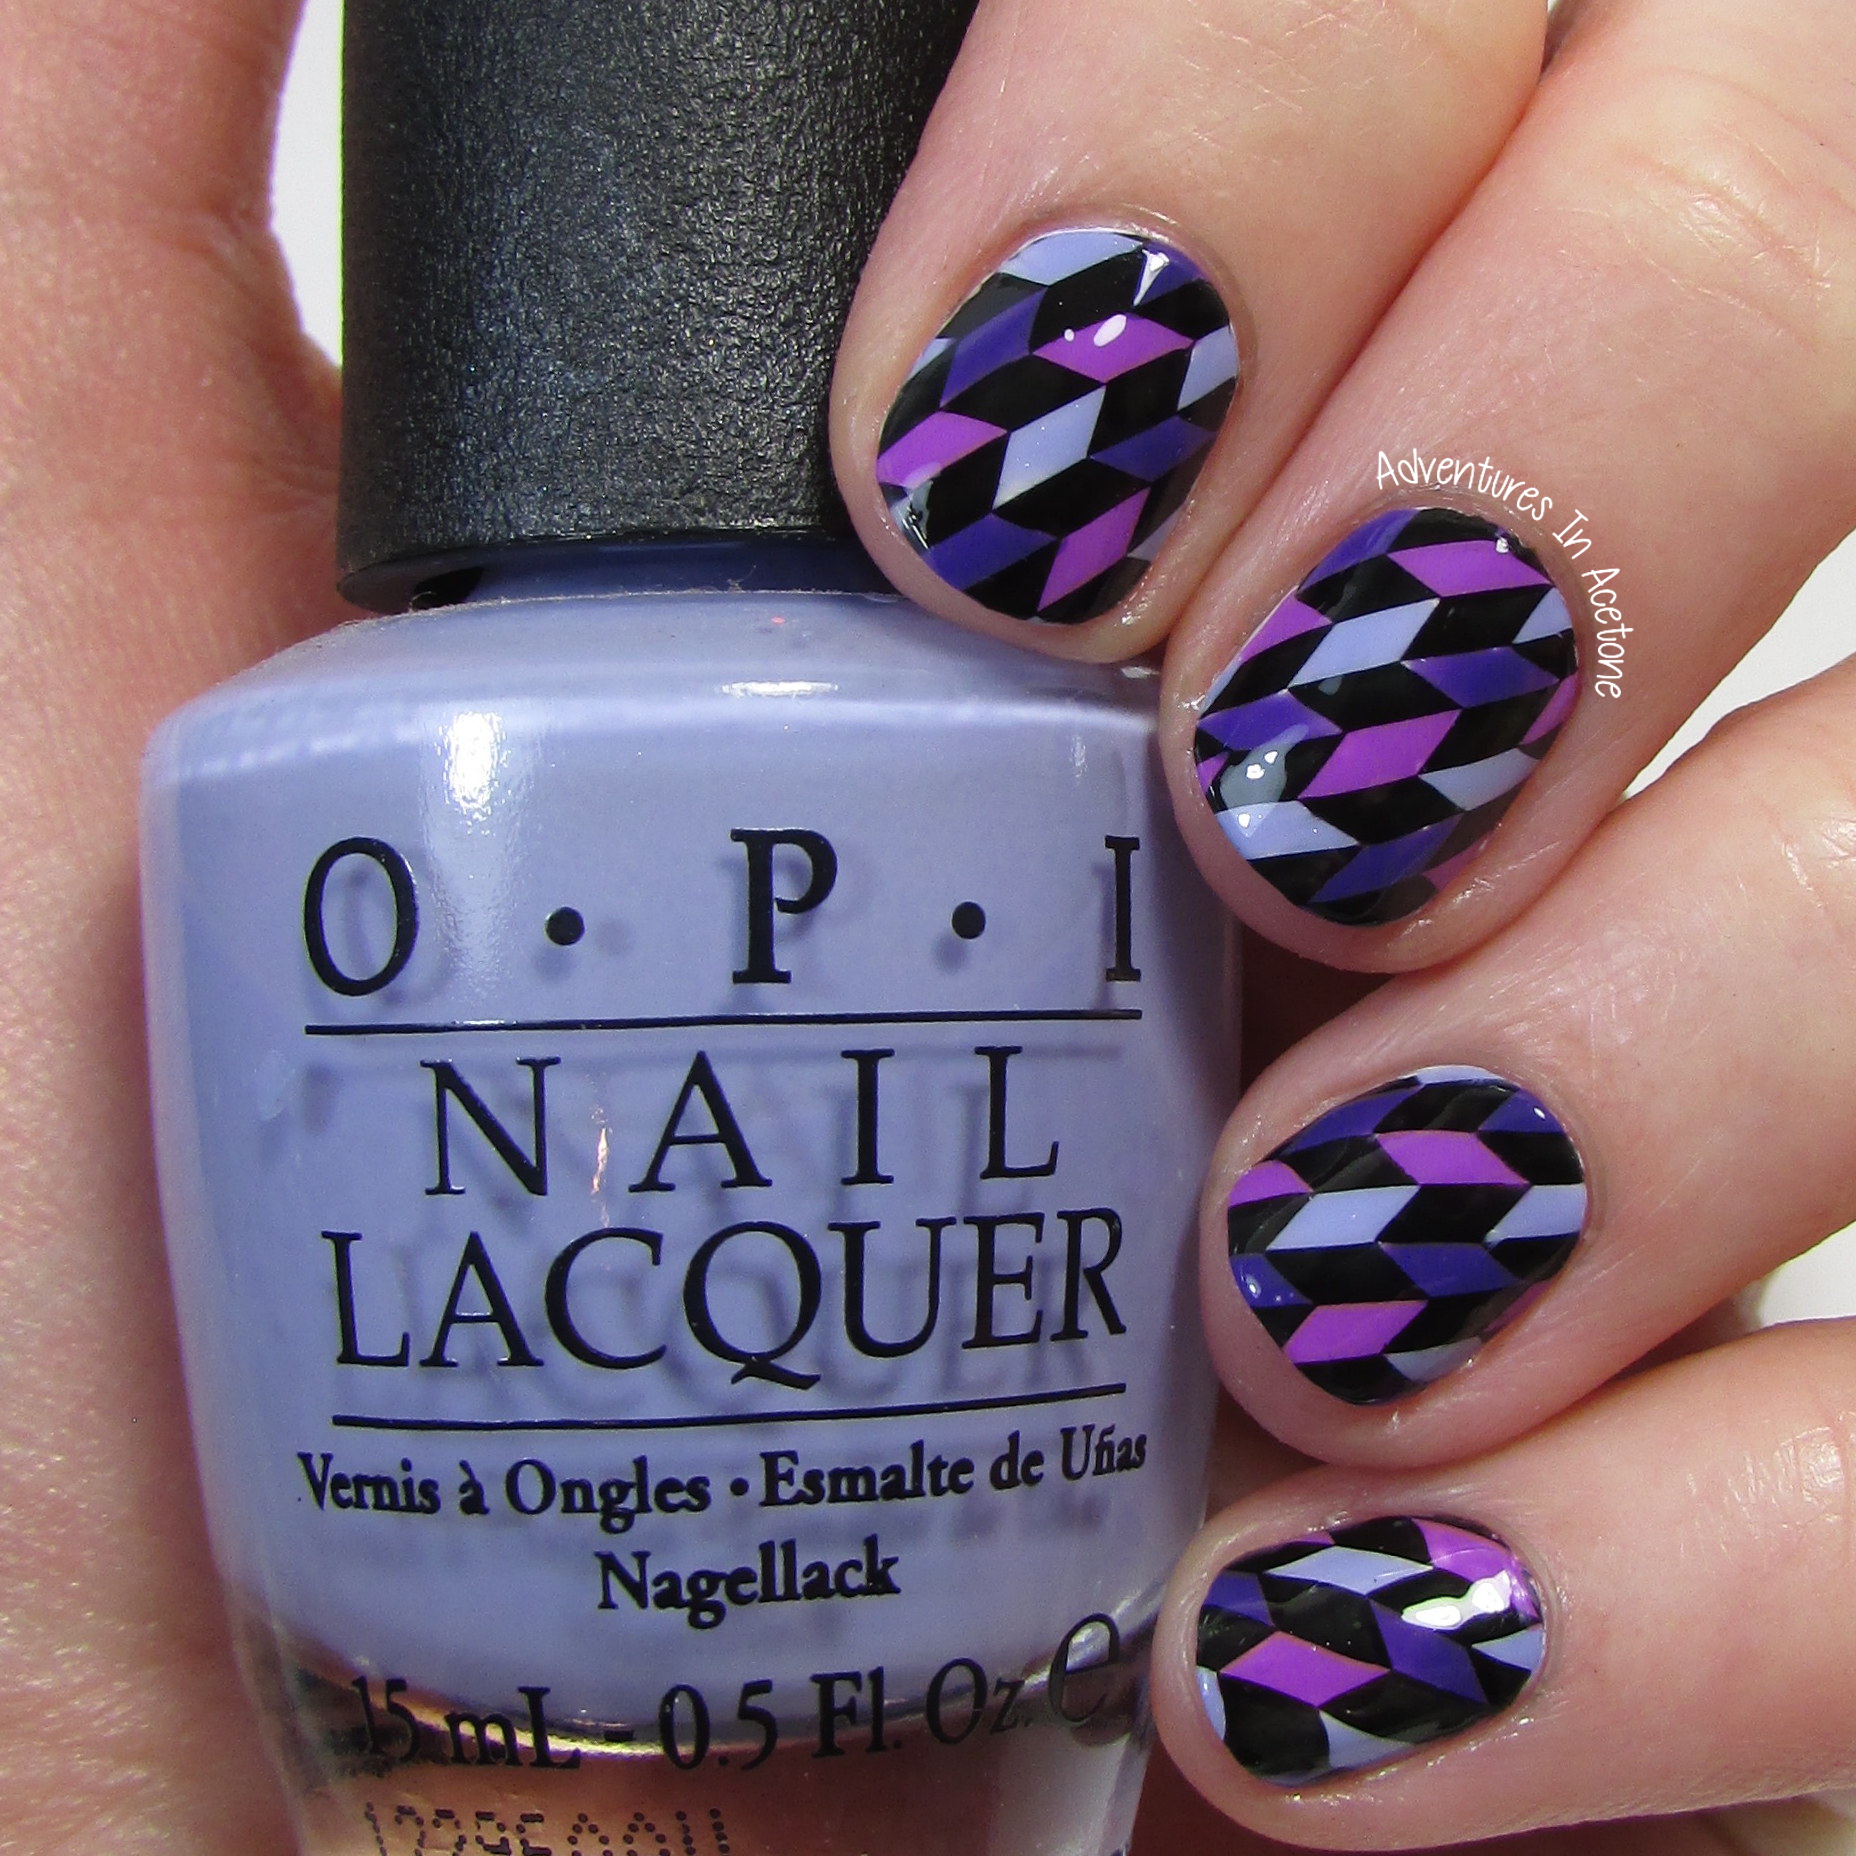
Good morning, readers! This week’s 40 Great Nail Art Ideas prompt is 3 Shades of Purple. I am still having fun playing with my newest ÜberChic purchase of the Set 6 Stamping Plates, and found the coolest geometric rhomboid pattern to use for this linkup. I showed you a sneak peek on Instagram last night while making these decals on my ÜberMat and I love how they turned out so much–they may rank up there with one of my favorite manis EVER. There is something so cool about geometric pattern nails and the ÜberMat made this so easy! For “3 Shades of Purple,” I decided to go with three variations. The pink-leaning berry purple of KBShimmer Sarong Place, Sarong Time, the blue-leaning darker purple of Paint Box Polish The Knight Bus, and the light periwinkle purple of OPI You’re Such a Budapest. I love the color combination of these purples, let’s take a look!

- I painted a thin coat of Qtica Extending Top Coat onto the 10 nail sections of the ÜberMat and let dry.
- Next, I stamped the rhomboid image with Funky Fingers Dark Knight using an image from ÜberChic plate 6-02 onto each dried top coat section of the mat.
- As shown in the tutorial below, I used the ÜberChic Detail Brush to fill in alternating rows of rhomboids with Paint Box Polish The Knight Bus, KBShimmer Sarong Place, Sarong Time, and OPI You’re Such a Budapest.
- After painting a white basecoat onto my nails, I peeled up the decals and applied them to my nails, cleaning any excess overhang with acetone and the ÜberChic Cleanup Brush.
- Each nail was topped with two thin coats of KBShimmer Clearly on Top.

**I have a little tip that I figured out with the decals last night and wanted to share! I let some of these filled in decals sit on the mat to dry for about an hour or more while I made dinner and ate. Those that were completed were too delicate after sitting for so long and they started breaking as I was gently applying to my tacky nails. To prevent that, I added another thin coat of Qtica Extending Top Coat and let that dry before peeling the decal off of the mat. I typically skip adding top coat to a decal before removing it from the mat because it makes it thicker and less pliable for application–but if you have to leave the decals for a while I highly suggest this extra step before peeling them up. This is the first time I’ve made decals and not applied them right away so I wish I had known before having to redo 2 new decals for this mani–so I hope this helps you!
What do you think of this mani? Have you tried stamping decals before? Check out what the rest of the Crumpet’s Nail Tarts have done for 3 Shades of Purple below.
 Loading InLinkz ...
If you enjoyed this post, please Sign Up for email updates and you will have the latest news, reviews, nail art, and tutorials delivered right to your inbox! Never miss a post from Adventures In Acetone again. Thank you so much for reading.
– Let’s paint something amazing! –

Comments
Amazing the result is incredible, I love it!
So. Freaking. Cool!
This looks really cool!
This is so impressive. I’ve never heard of an uber mat but now I want one so I can create these kinds of decals. Very cool and such a great manicure! Great post!