Purchased by me
Good afternoon, readers! Long time no “see!” I’ve had some lovely family time over the weekend but I’m ready to get back to posting. I have a zillion new collections waiting to be swatched as well, so keep an eye out for those in the next few weeks. For now, however, I have a mani and tutorial I’ve been holding onto for over a week to share with you.
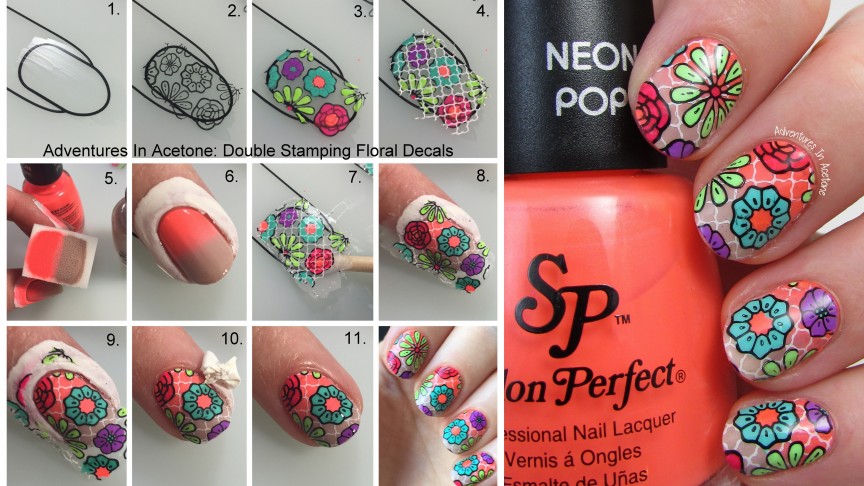
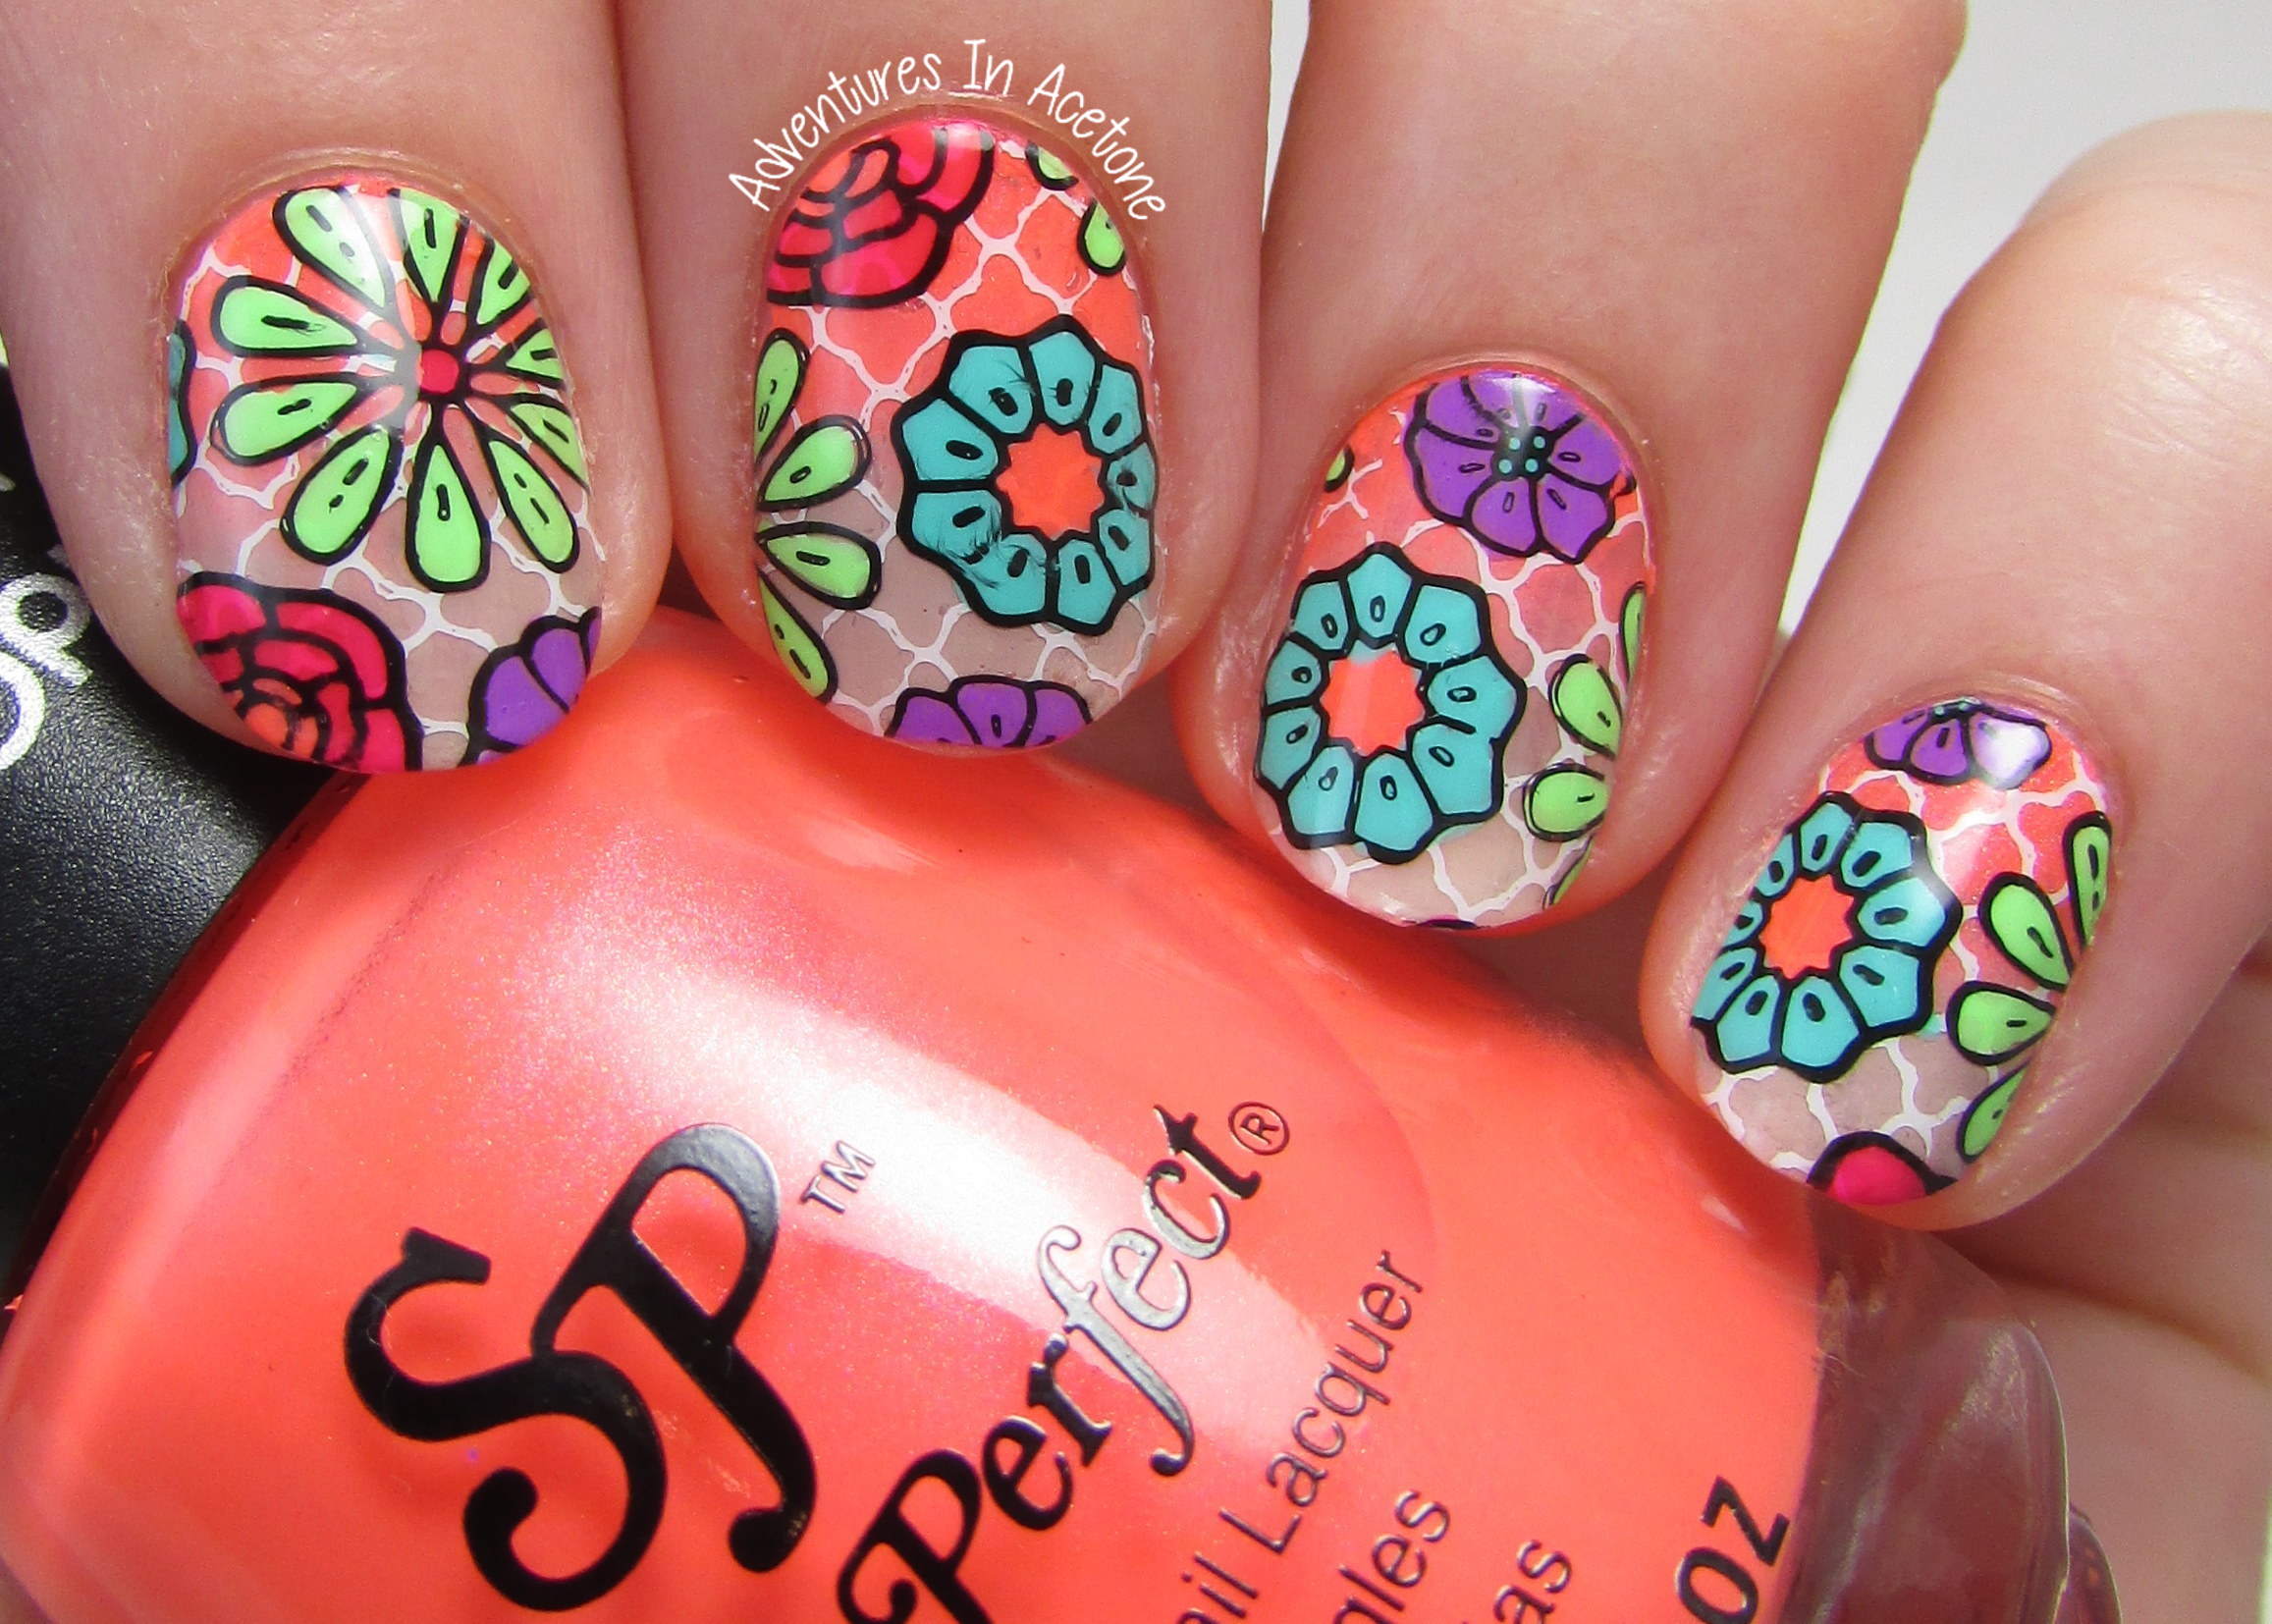
I’m still gushing over my new ÜberChic Über Mat and this was my first attempt at double stamping decals. I’m no stamp decal pro, but it was easy enough to take step by step pictures throughout the process of this mani so I’m throwing in a tutorial as well to better help you visualize. Before we start, let’s take a look at the mani!


Items needed:
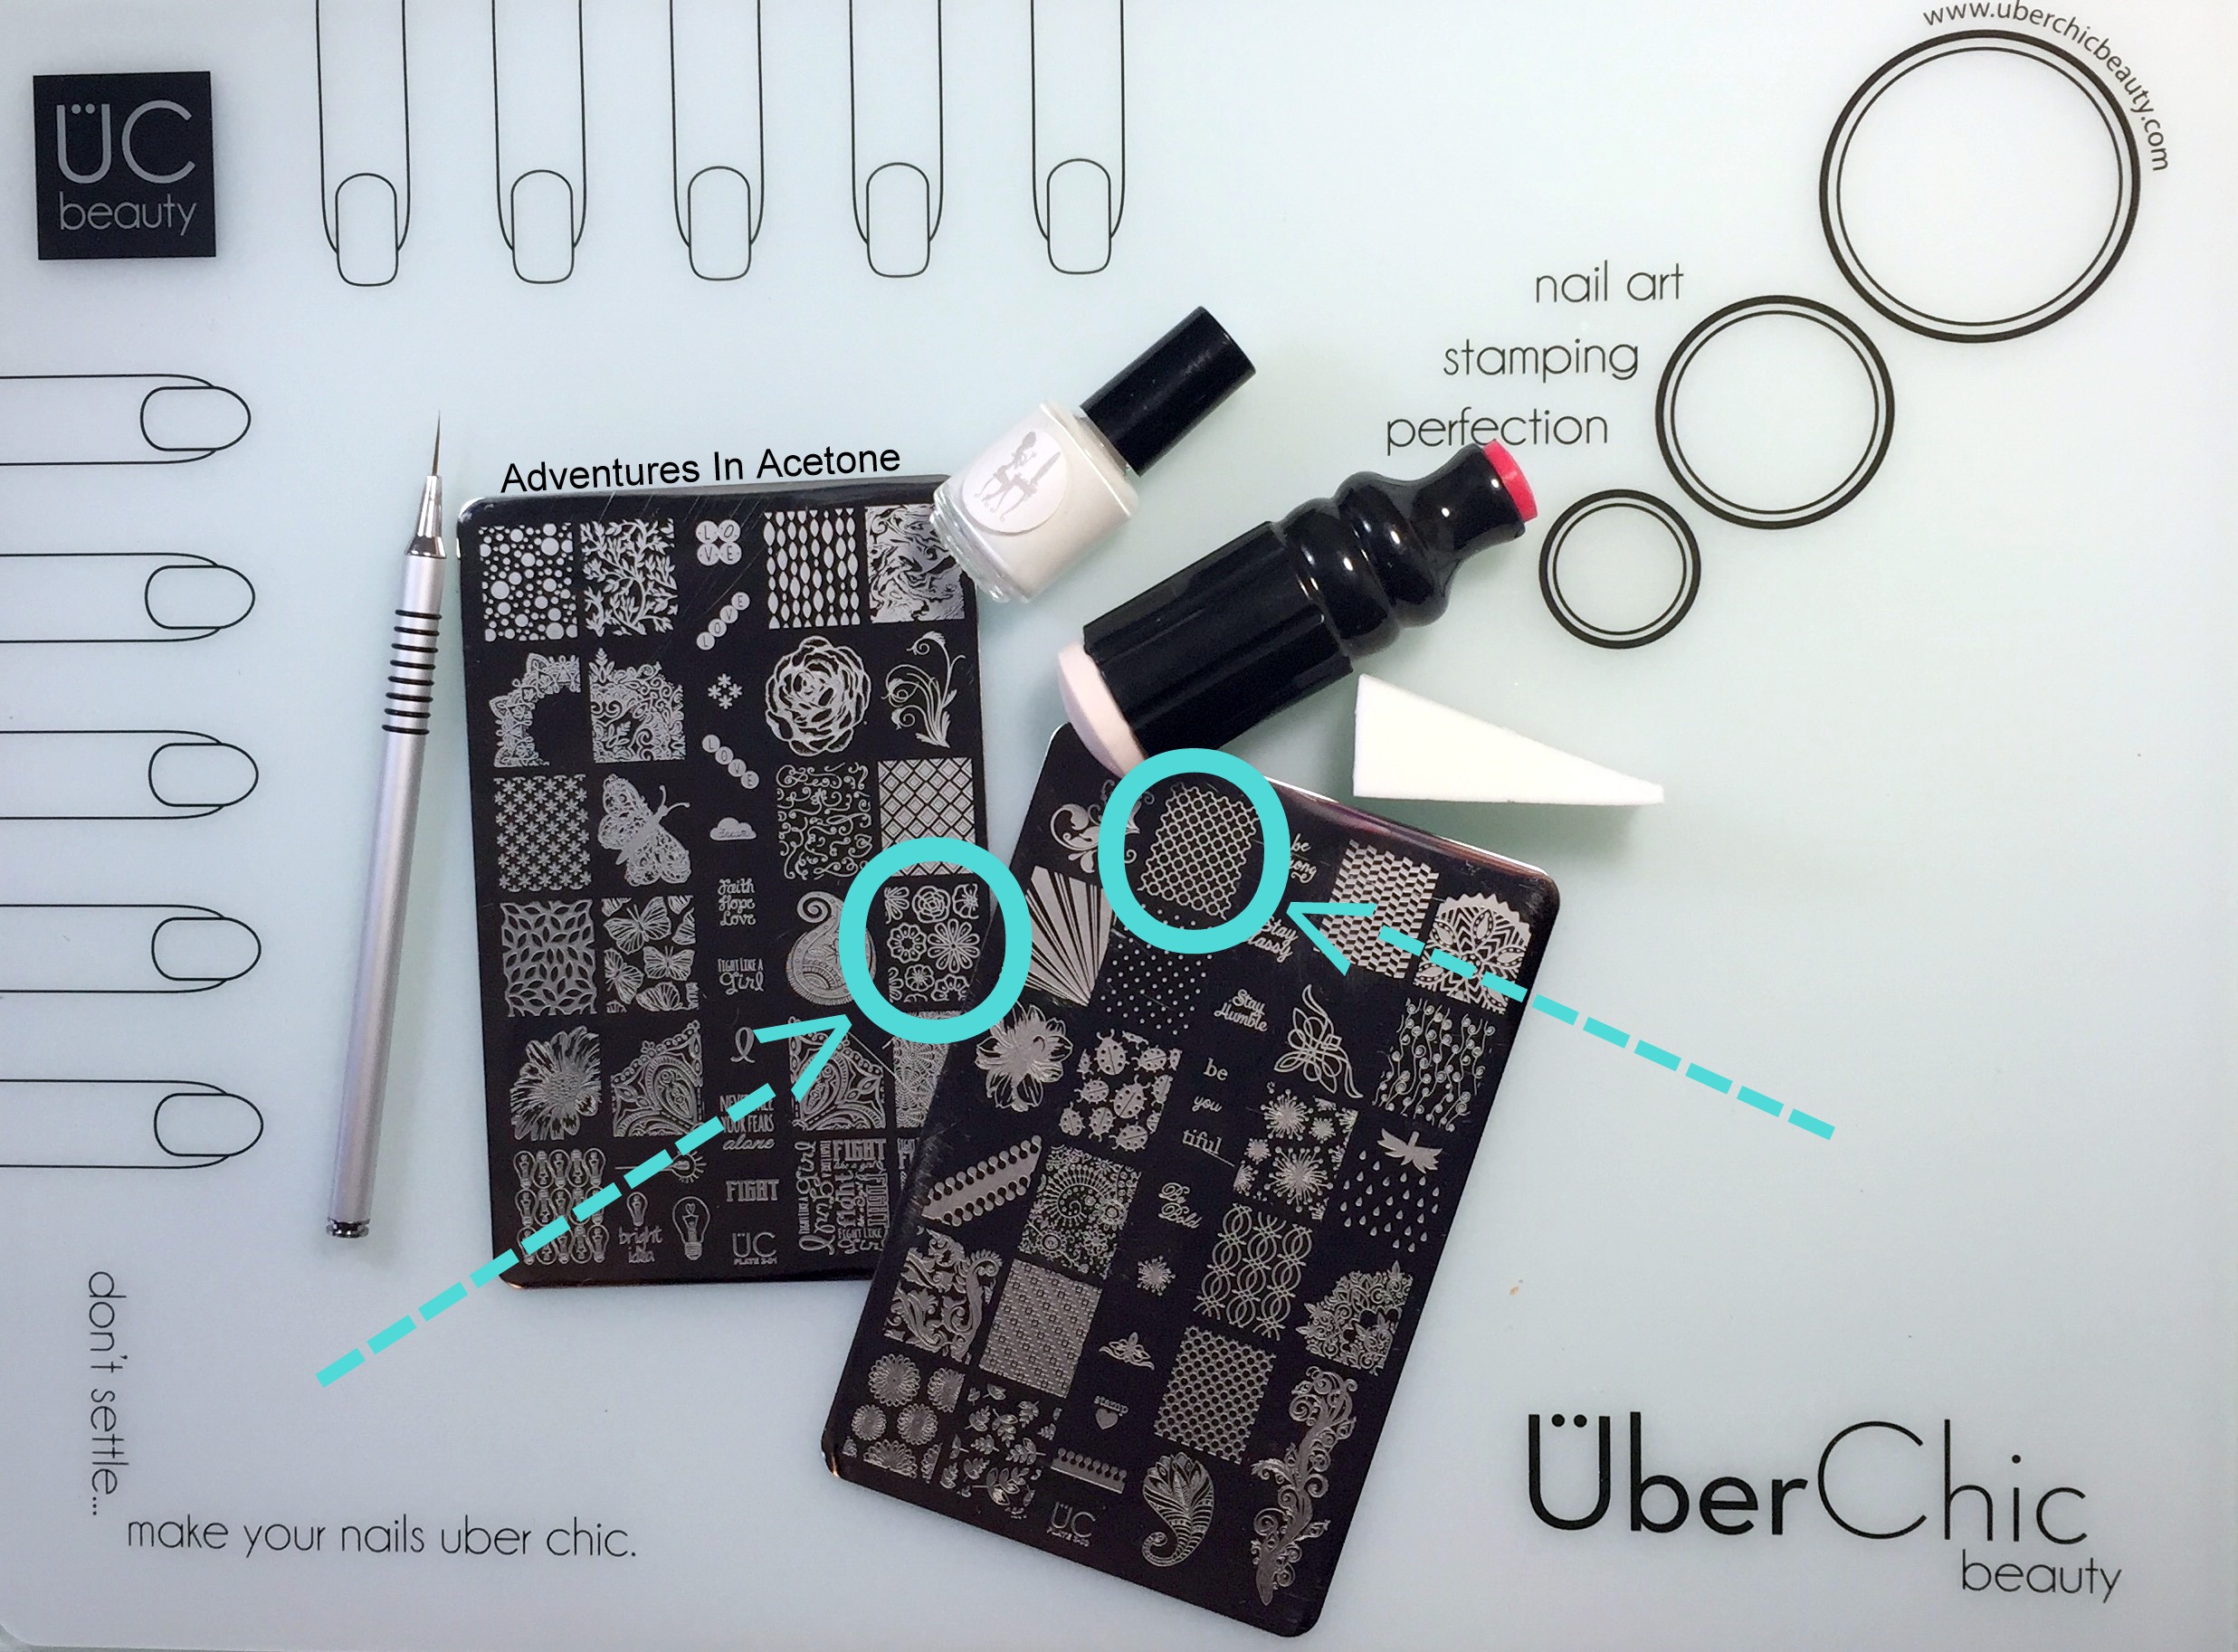 Items/tools used: ÜberChic Über Mat, ÜberChic Stamping Plates ÜC 3-01 and 3-03, stamper and scraper (scraper not shown), Pure Color No.9 nail art brush, triangle makeup sponge, and Girly Bits Border Patrol latex barrier.
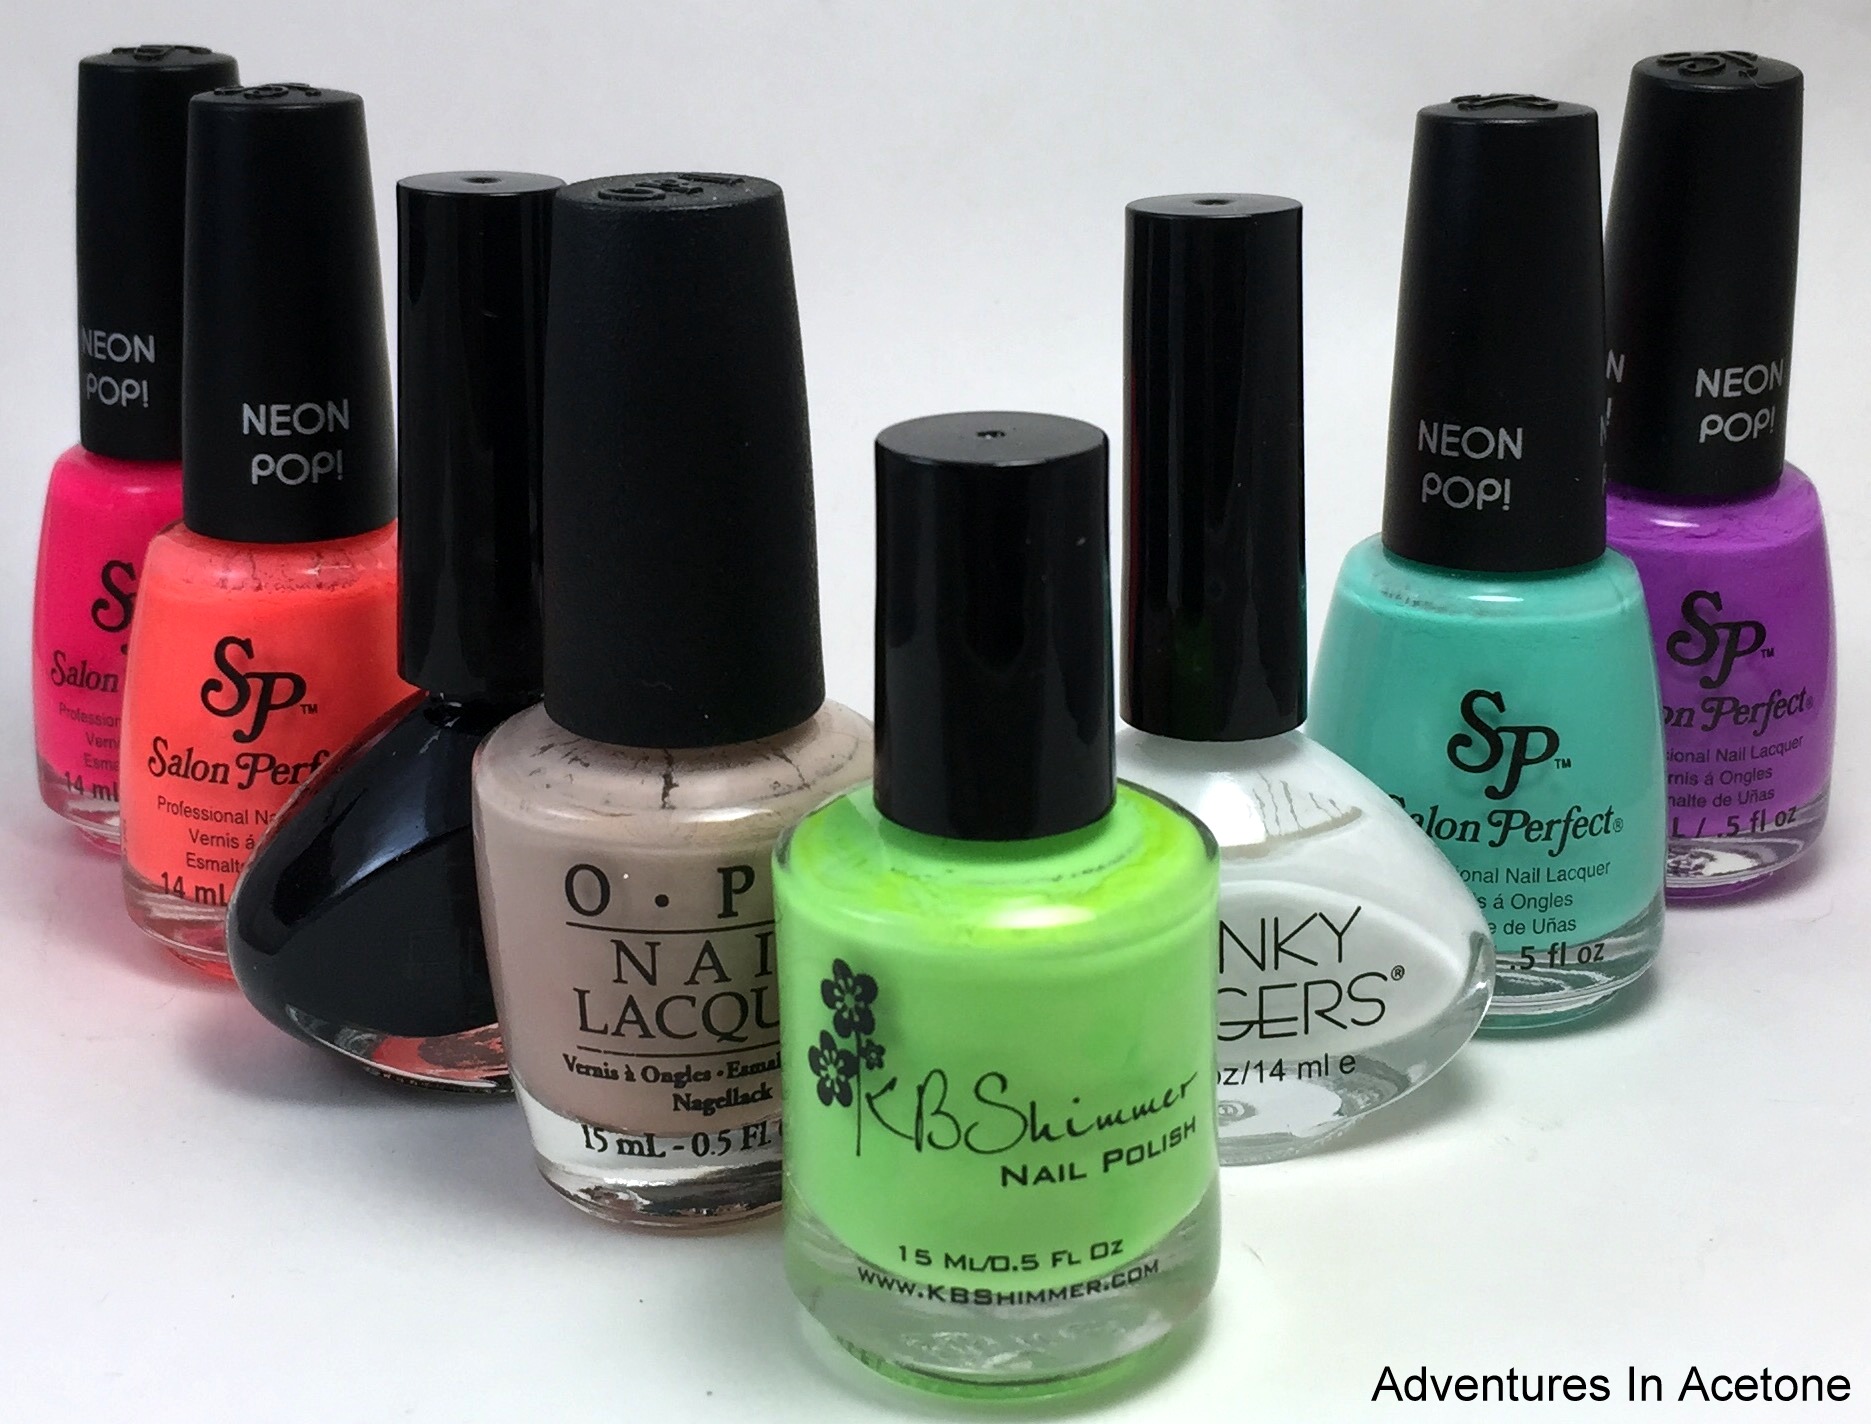 Polishes used: Salon Perfect Oh Snap!, Salon Perfect Copacabana Girl, Funky Fingers Dark Knight, OPI Do You Take Lei Away?, KBShimmer For Sail By Owner, Funky Fingers Gesso, Salon Perfect Mer-Made of Money, and Salon Perfect Purple POP! Not shown are Qtica Extending Top Coat and KBShimmer Clearly on Top.
Let’s get started!
Step 1) Paint one coat of Qtica Extending Top Coat onto the nail sections of the Über Mat and let dry. This is not a quick drying top coat and worked better for me, one or two quick drying ones popped off of the mat before I could finish the decals. Find out which works for you. 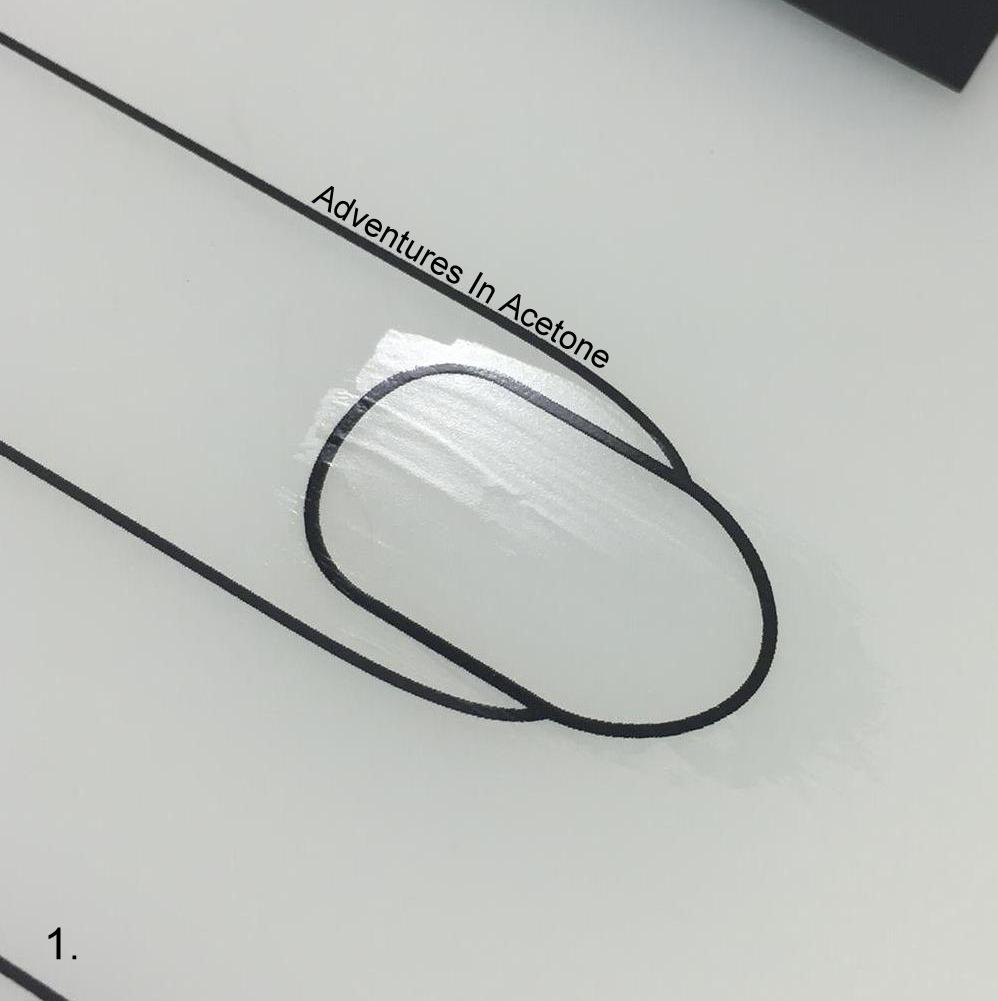
Step 2) Using your stamper, scraper, Funky Fingers Dark Knight, and floral stamp image from ÜC Plate 3-01, roll the stamp design onto each finger section of the Mat that has dried top coat. The stamp image won’t stick to the Mat itself, so the top coat gives it something to adhere to. Let dry.
Step 3) Now for the fun part! Grab your nail art brush and colors to fill in the florals. I used KBShimmer For Sail By Owner, Salon Perfects: Purple POP!, Mer-made of Money, Oh Snap!, and Copacabana Girl. I found it was easiest to dab puddles of each color directly onto the mat close to the finger sections and fill in one color on all of the nails before moving onto the next color. You want to overlap the black outlines a bit but try to keep from painting in between each flower. Be careful with your paint strokes, I smeared a bit of that teal flower by pressing down too hard. Let these dry completely before moving on.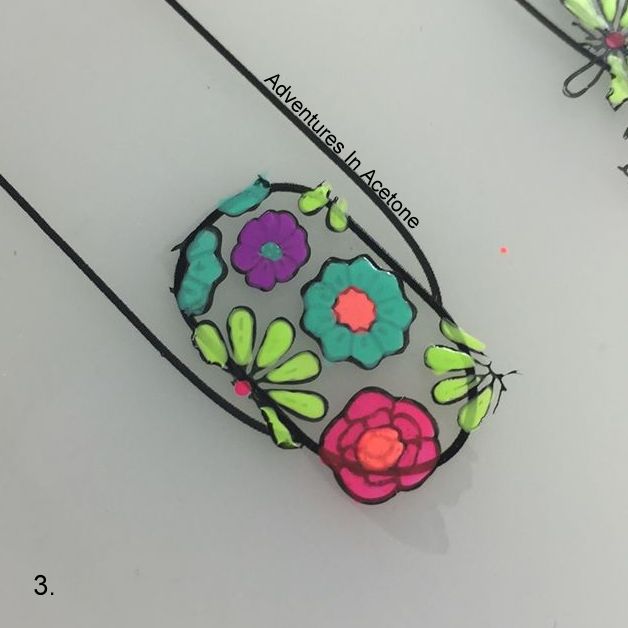
Step 4) Once your colors are completely dry from Step 3, you are ready for the double stamp! I chose a small pattern that would be noticeable behind the flowers and a lighter color. Using your stamper, scraper, Funky Fingers Gesso, and quatrefoil stamp image from ÜC Plate 3-03, roll the stamp design onto each finger section of the Mat covering the florals you already did. ROLLING is the key here, if you press down, the florals will come off onto the stamper. We want the decals to stay on the Mat for right now.
Step 5) While you are letting your decals dry, move onto your actual finger nails. I went with a gradient base of a neon and a neutral. I applied Girly Bits Border Patrol latex barrier around my nails (to help with cleanup). Then, I painted swipes onto my makeup sponge with Salon Perfect Copacabana Girl and OPI Do You Take Lei Away? overlapping a bit in the middle to “blend” on the nail. I dabbed it over my bare nails and repeated the process multiple times until it was opaque enough. 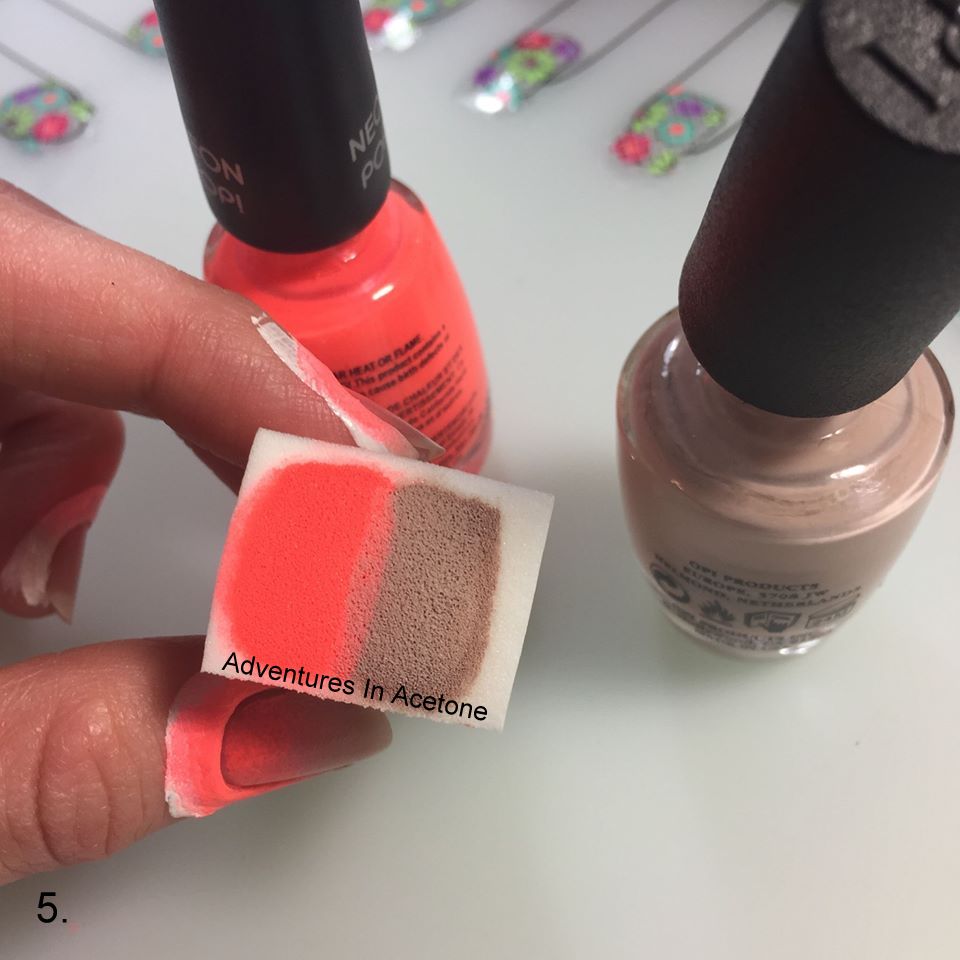
Step 6) Apply one coat of KBShimmer Clearly On Top to seal in the gradient. You want to keep the latex barrier around the nail, so if you removed it to cleanup from the gradient, apply a new layer.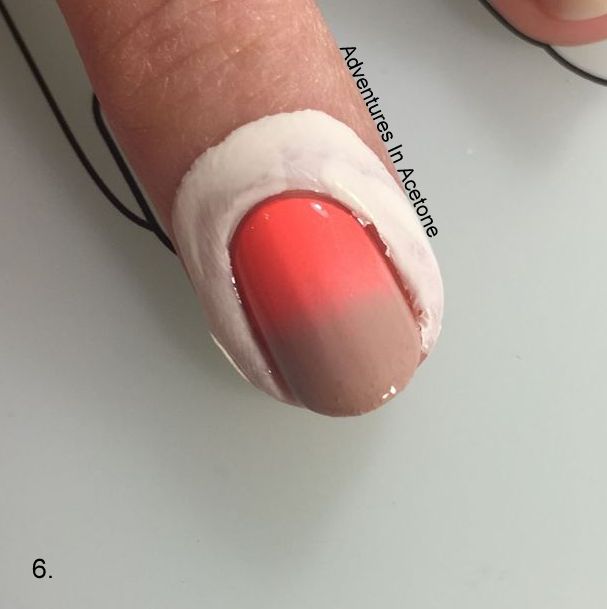
Step 7) Use an orange stick to gently peel the decal up from the mat. I applied a coat of top coat to the decal before I peeled it up on some decals, but found that it made application a lot harder so I don’t recommend it. 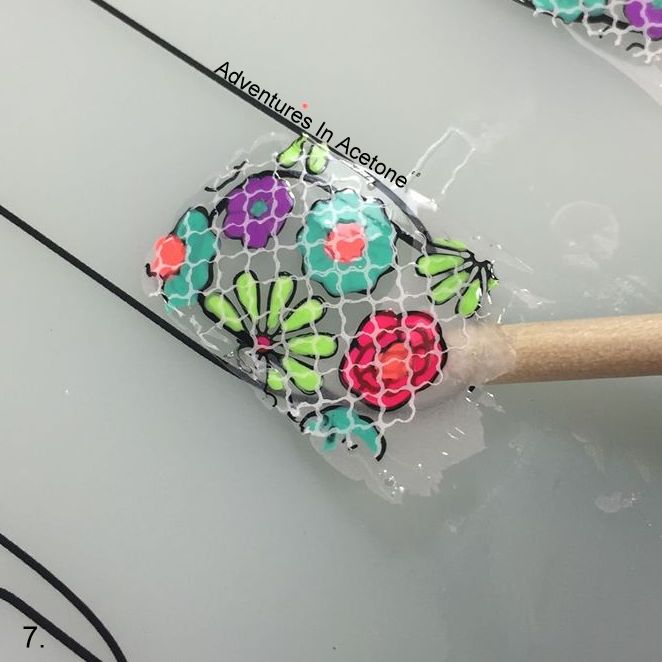
Step 8) While your top coat is still wet, flip the decal over to reveal the florals and press onto the nail and latex barrier. 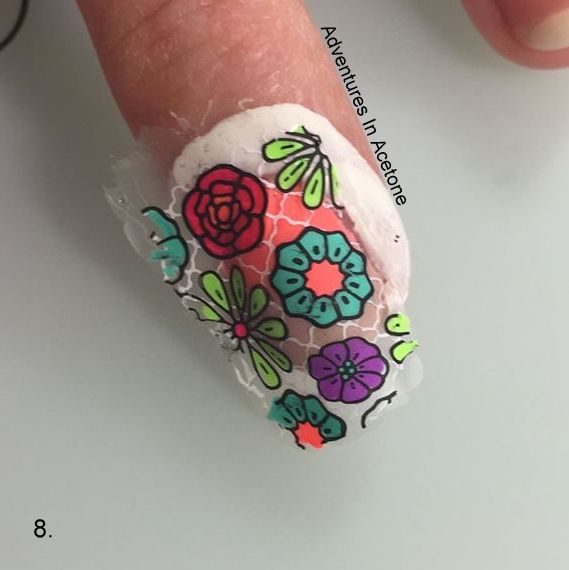
Step 9) Use a cleanup brush and acetone to wipe along the cuticle line on the decal to separate the nail and latex barrier. Press the decal easier onto the edges of the nail and use acetone to wipe away the excess on the tips.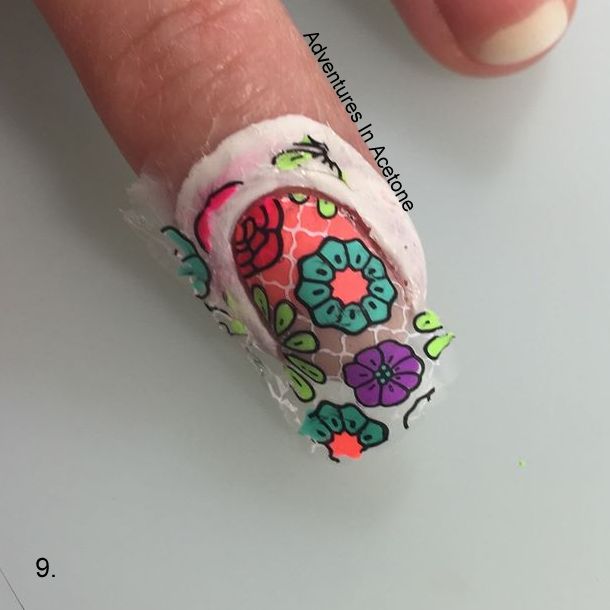
Step 10) Grab the edge of your Girly Bits Border Patrol and peel it up from around the nail, bringing the excess decal off with it.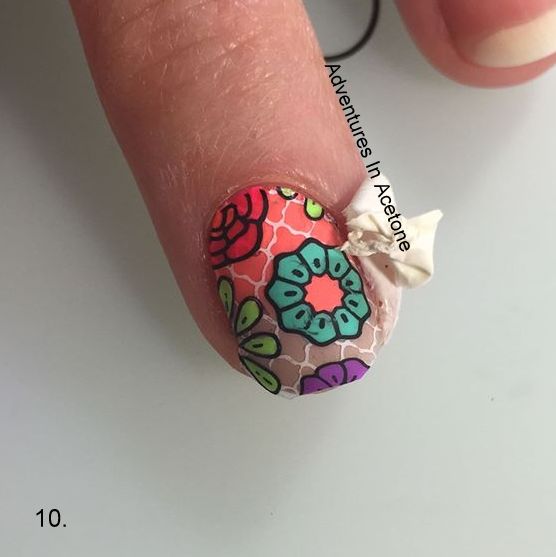
Step 11) Apply a coat of KBShimmer Clearly On Top to seal in the decal and add back shine.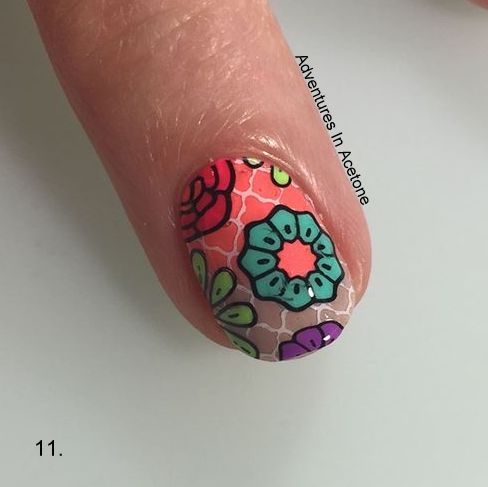
What are your thoughts? I am still learning what works best for me so these are far from perfect, but I loved wearing this full mani for a few days. Stamping decals are a new direction for me and my nail art, and I am having a great time trying them out with my ÜberChic Über Mat. They are still out of stock, but they should be restocking on August 28th at both http://uberchicbeauty.com and http://www.girlybitscosmetics.com.
If you enjoyed this post, please Sign Up for email updates and you will have the latest news, reviews, nail art, and tutorials delivered right to your inbox! Never miss a post from Adventures In Acetone again. Thank you so much for reading.
– Let’s paint something amazing! –

Comments
Oh my god I love this mani so so so much!!
Gorgeous mani! Question though – what is the mat made of? Is it silicone?
Beautiful… you make it look so easy!
I just found you today and I’m so glad I did. Your step by step tutorials are very helpful..thank you for doing that! This double stamping flower design decals came out beautiful!!