Sponsored
Good morning, readers! It’s time to start planning your looks for the upcoming holiday parties! Today’s manicure is an idea for a
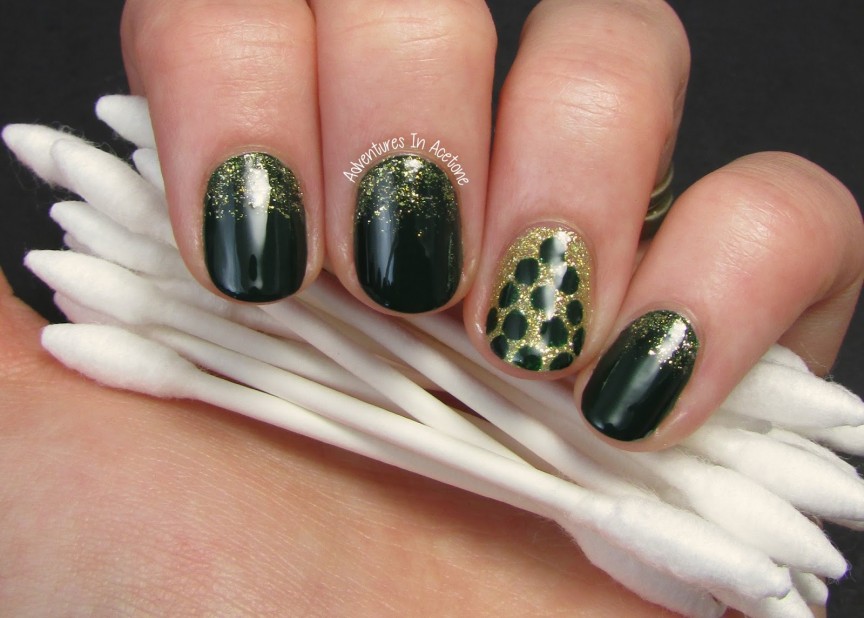
holiday glam look for your nails! It will go perfectly with your holiday dress, or even work well at your ugly sweater celebration! Read on for a step by step, you may be surprised to see how I used
Q-tips Precision Tips to create this look!
• The ultimate beauty tool, with tapered ends specially designed for precise application and touch-ups for nails, eyes, lips and more – perfect for achieve the
ultimate holiday makeup look.
• Gentle and soft to use on delicate areas of the face, including around the eyes
• Made with 100% pure cotton for soft and gentle use
• “Q” stands for quality
• Affordable alternative to expensive makeup brushes
• Offers a clean and fresh application every time
• Flexible stick
• Light and portable for beauty on-the-go
• Convenient
• Disposable
I have been using Q-tips Precision Tips for a long time to help clean up the cuticles around my nail art. They are really great if you are doing a gradient or watermarble (or any of those super messy looks!). The tapered edges help with some other uses, too!
To create my Q-tips Holiday Look:
Step 1) I first painted almost all of my nails with a deep evergreen creme. I wanted some accent nails, so my ring fingers were painted with a gold glitter base. I let all of my nails dry before moving on to the next step.
Step 2) For some added glam on my green nails, I dabbed the gold glitter onto a piece of wax paper and dipped my Q-tips Precision Tip into it. I then dabbed the Q-tips Precision Tip around the cuticle line of my nail and dabbed about 1/3 of the way up to the nail tip. I wanted to create a gradient so I dabbed with the gold glitter again at the cuticle line to have it more dense.
Step 3) Did you know that you can use
Q-tips Precision Tips as dotting tools in a pinch? That’s exactly what I did here! I put a dab of the dark green creme on the wax paper and dipped the
Q-tips Precision Tip into it. I then created a “tree” shape with dots on the gold accent nail. (If you see a few stray strings at the end of your
Q-tips Precision Tip, you can roll it in the polish before dabbing it onto the nail.)
Step 4) Time for the most well-known use of
Q-tips Precision Tips when it comes to nail art:
EASY CLEANUP! I just dipped the
Q-tips Precision Tip into acetone remover and rubbed it around on the cuticle to remove any stray glitter on the skin. They work so well for glitter removal because the glitter grabs onto the
Q-tips Precision Tip instead of just moving the glitter around on the skin like can happen with a cleanup brush.
Step 5) Apply top coat and you are good to go! You can even use a Q-tips Precision Tip dipped in lotion/cuticle oil to rub around the cuticle and bring the moisture back after using the polish remover.
*Many thanks to Q-tips for sponsoring today’s discussion!

If you enjoyed this post, please Sign Up for email updates and you will have the latest news, reviews, nail art, and tutorials delivered right to your inbox! Never miss a post from Adventures In Acetone again. Thank you so much for reading.
– Let’s paint something amazing! –


Comments
Great post Jacki!