Hello, readers! Today’s Tutorial Tuesday post is my design I posted yesterday: Pond Pumpkins Halloween nail art. I’m actually STILL wearing this mani from Sunday, I love it THAT much! I hope you will recreate it and love it as well!
This is a variation on my earlier Pond Hearts Nail Art Tutorial, which was inspired by this original post by Olive View Fashion. I just wanted to show how versatile this pond mani technique can be by showing a “halloween version.”
A few tips before I begin the tutorial:
- For this technique, you have to use a jelly polish(I’ve used OPI Ya’ll Come Back Ya Hear? from the Texas Collection). It just really won’t work the right way with non-jelly polishes. If you don’t have any, you can always add some colored polish to a clear polish bottle and mix together to make a jelly.
- You have a lot of waiting in between steps to let the layers dry. Don’t rush it or you will smear your pumpkins. So I recommend turning on Netflix and catching up on some Doctor Who or The Vampire Diaries while you wait in between each layer. 😉
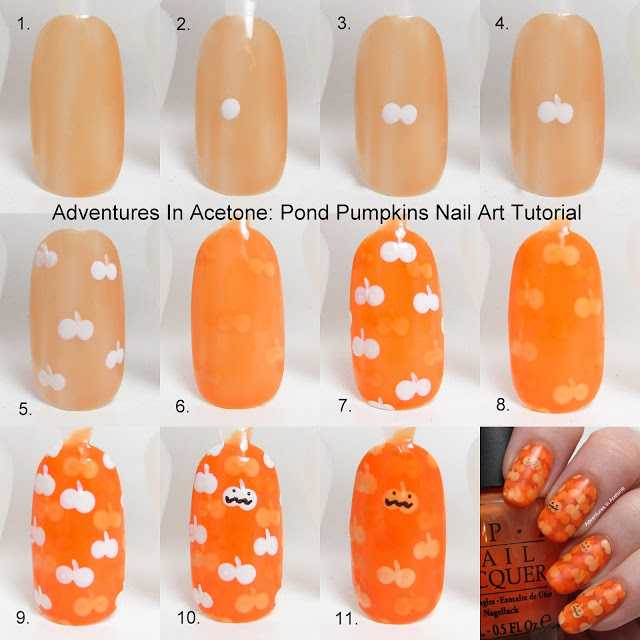
Here is a preview of the tutorial. You will find bigger pictures and step by step instructions further down in this post:
Here is a picture of the original mani:
Let’s get started!
Things needed for this tutorial:
OPIs Ya’ll Come Back Ya Hear?, Alpine Snow, Black Onyx.
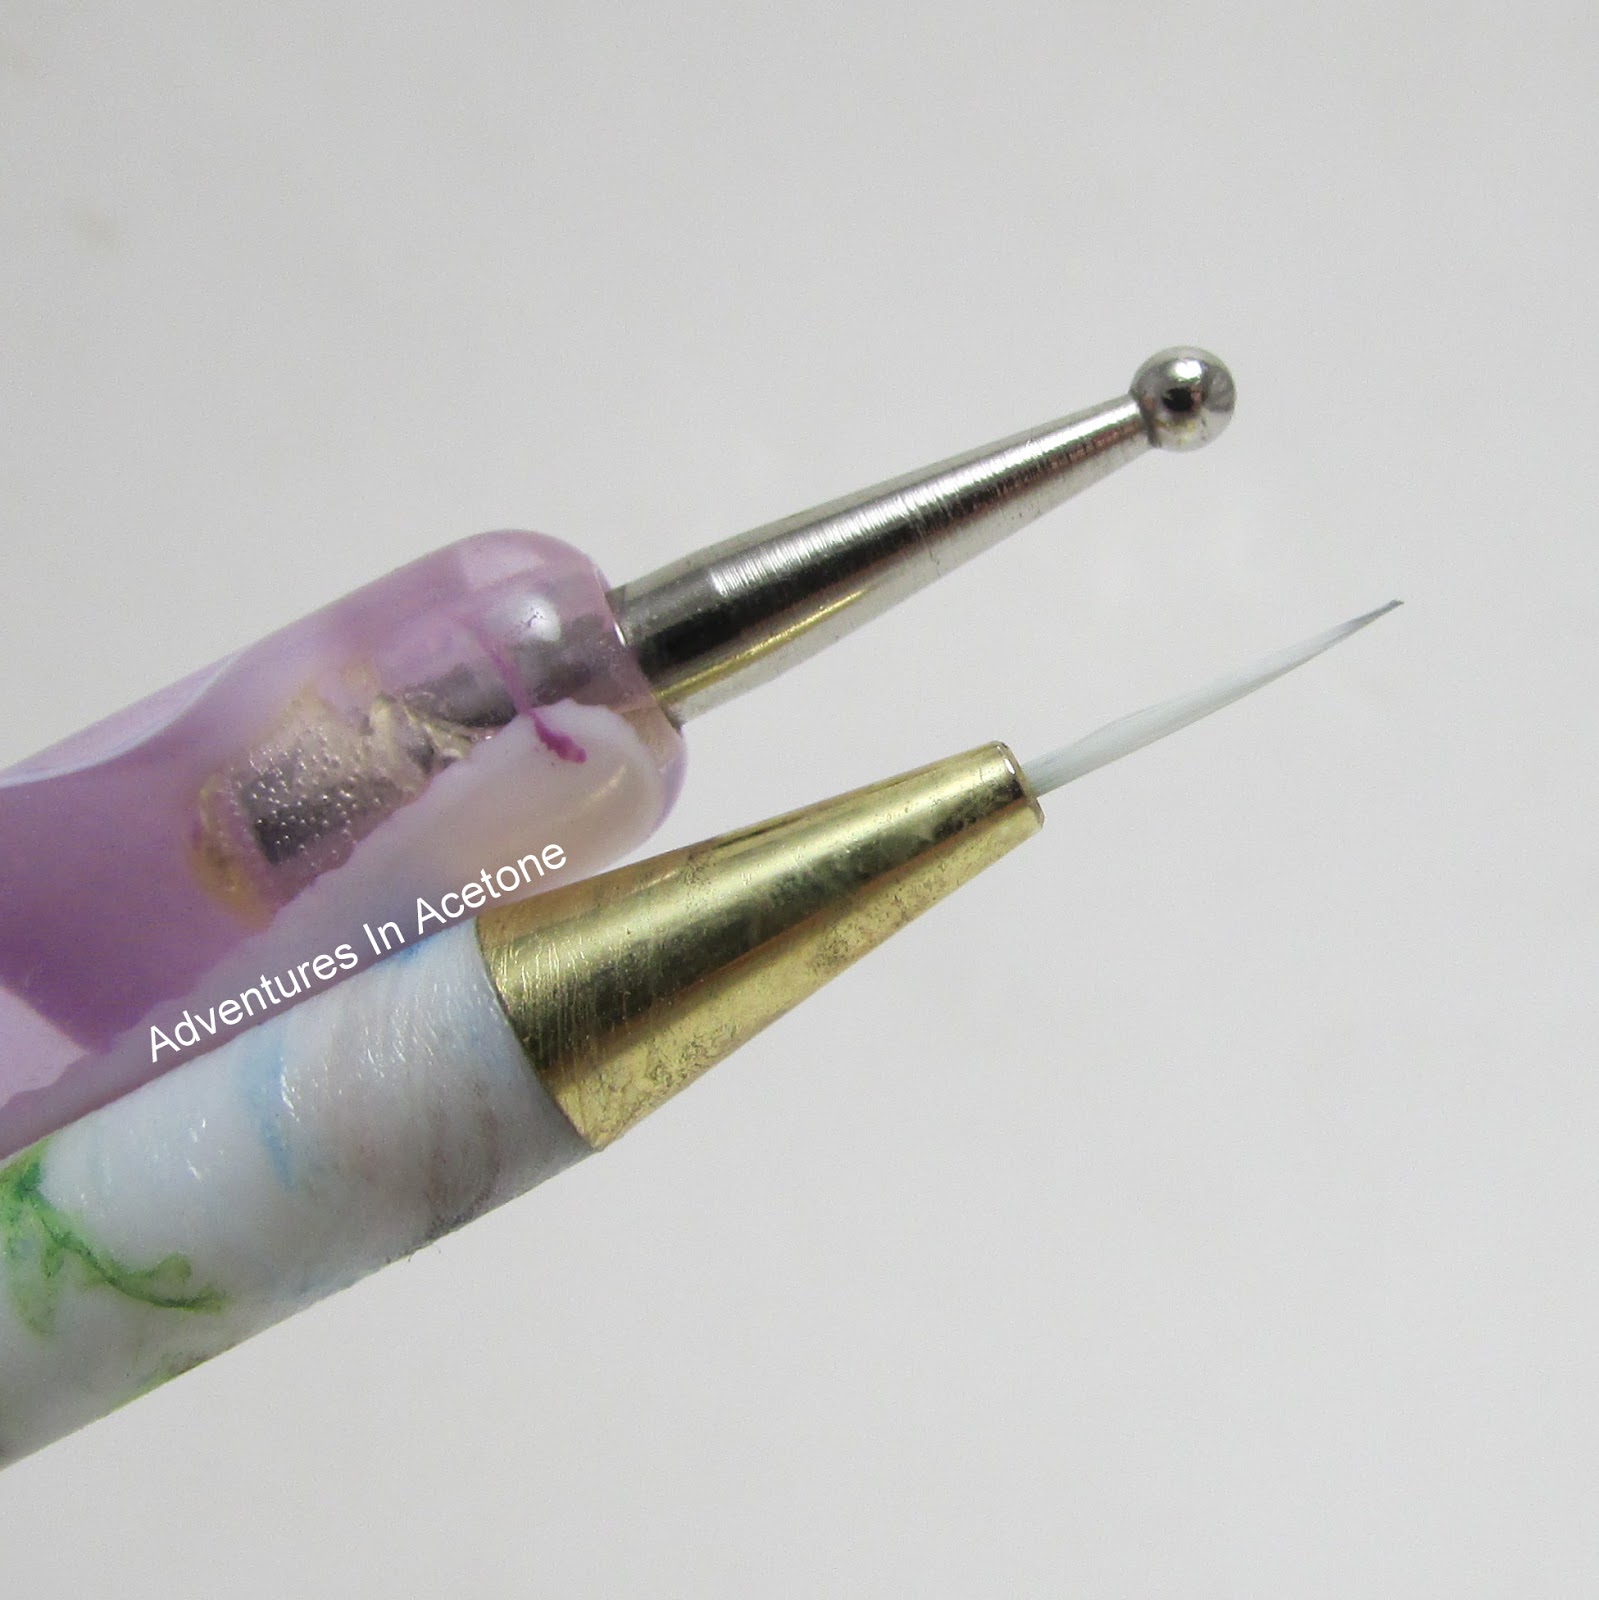
Medium dotting tool, detail brush.
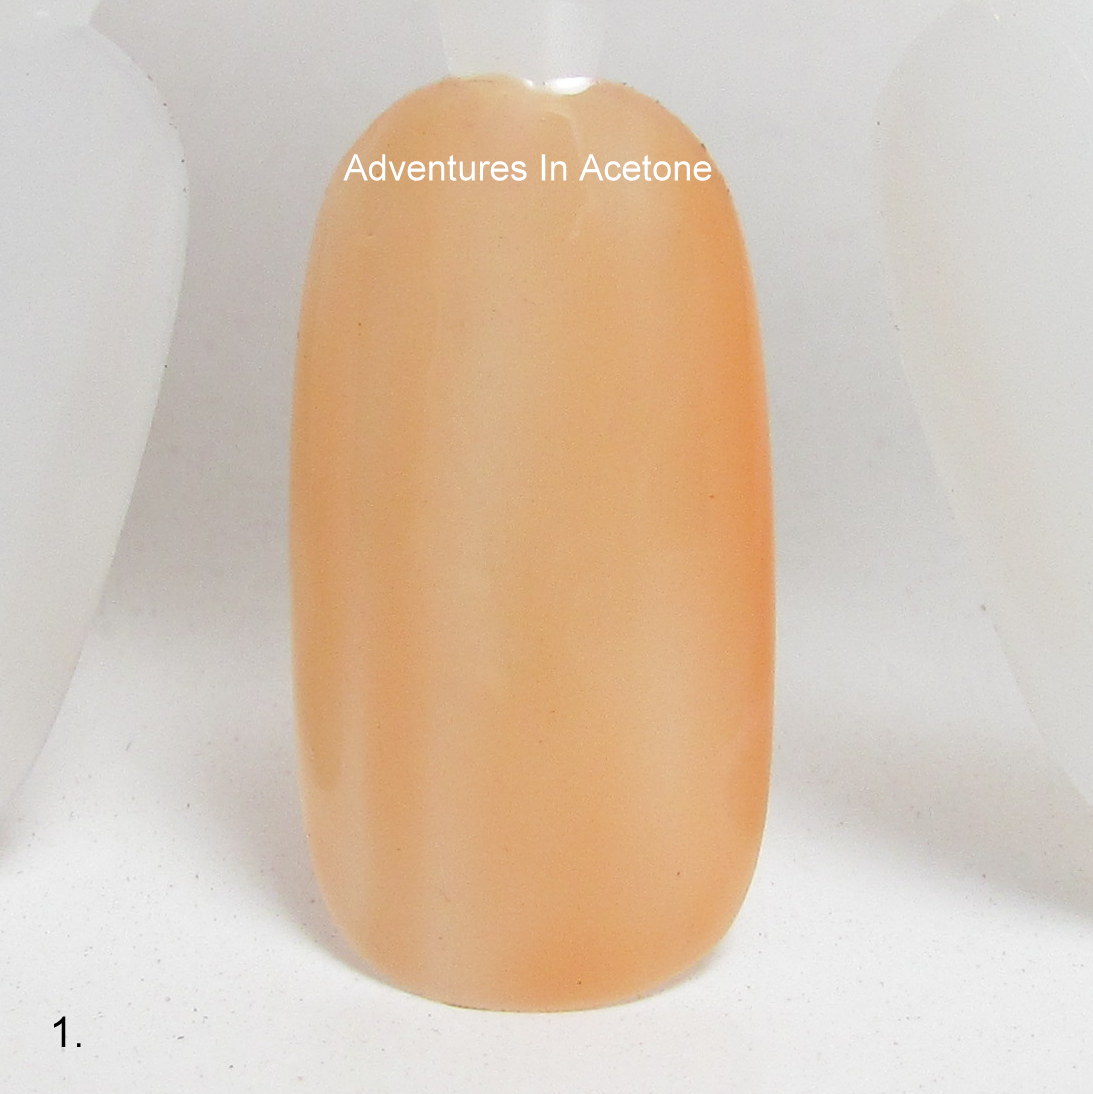
Step 1) Paint one thin coat of OPI Ya’ll Come Back Ya Hear? on your nail and let dry.
Step 2) Use your dotting tool and OPI Alpine Snow to make a dot.
Step 3) Use your dotting tool and OPI Alpine Snow to make a second dot, right next to the first dot, touching in the middle.
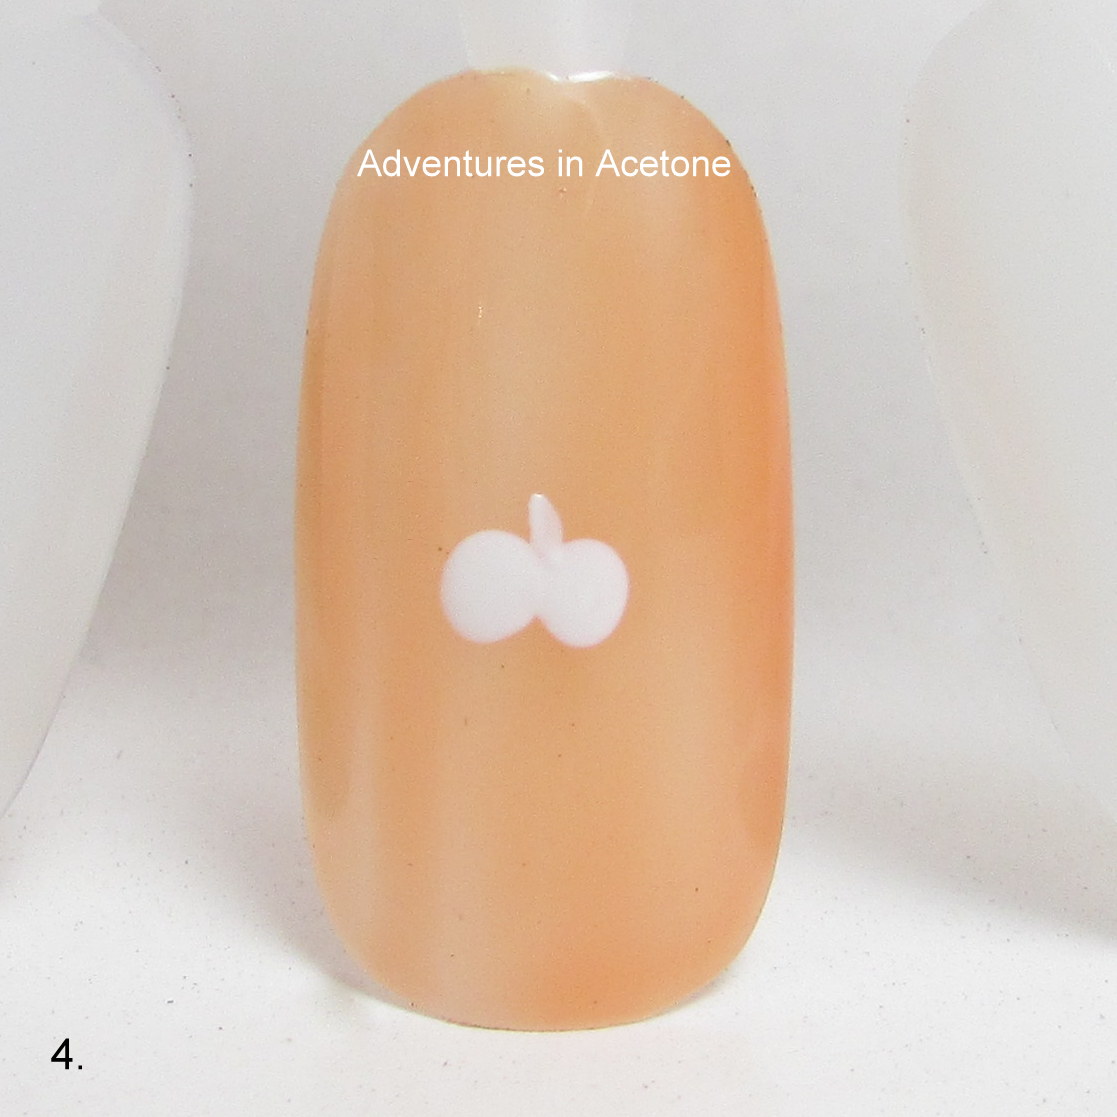
Step 4) Use your detail brush and OPI Alpine Snow to make a simple line on the top center of the pumpkin for the stem.
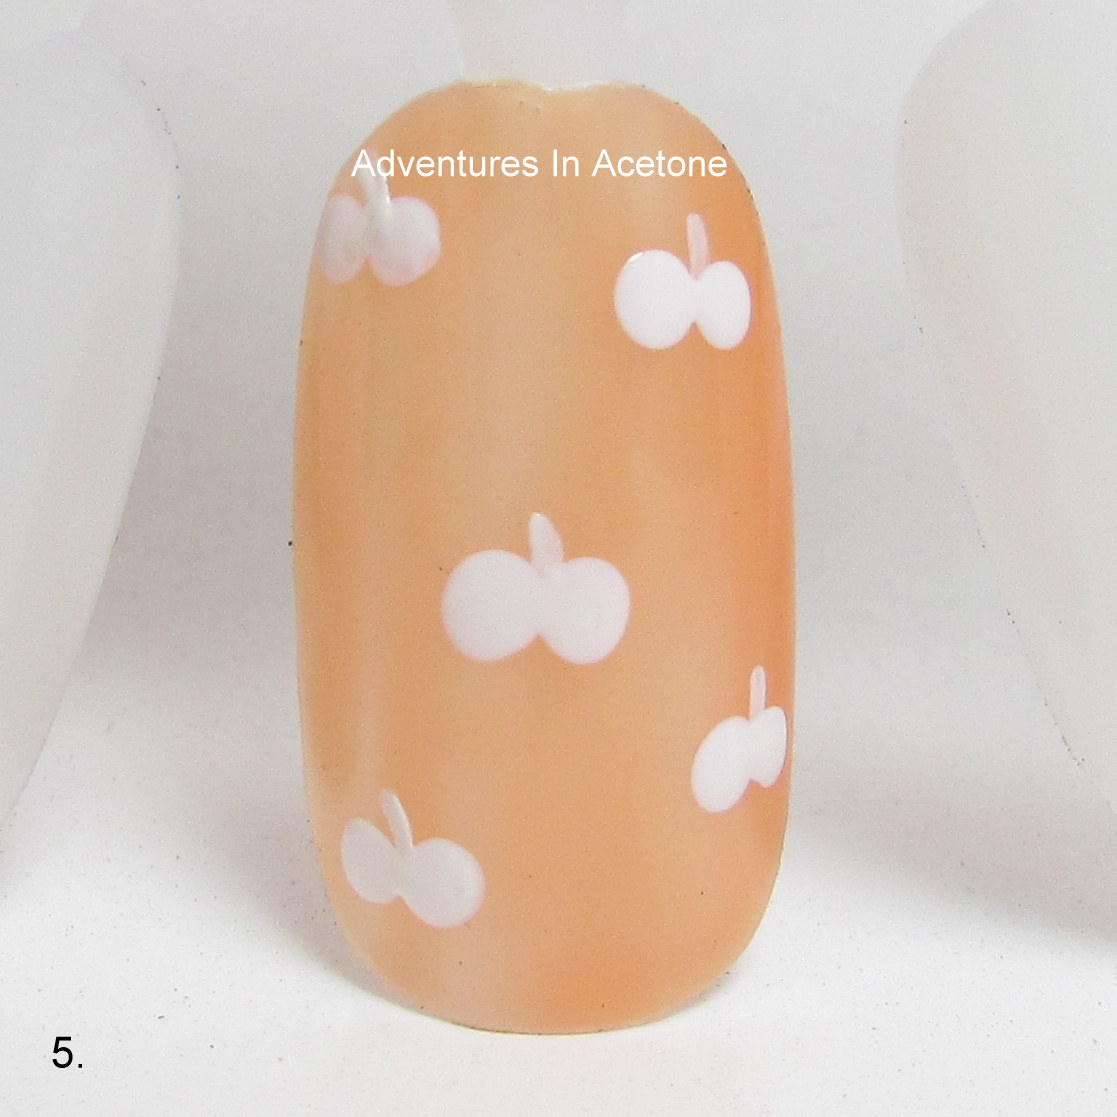
Step 5) Repeat your simple pumpkin shape a handful of times over your nail. Place them randomly as you have a few layers to fill in the open spaces. Let dry.
Step 6) Once your pumpkins have DRIED, do another thin coat of OPI Ya’ll Come Back Ya Hear? over the entire nail and let dry.
Step 7) Do another layer of white pumpkin shapes with your dotting tool, detail brush, and OPI Alpine Snow. Cover up some of the open spaces left from the first pumpkin layer and add some partial pumpkins on the edges and tip of the nail. Let dry.
Step 8) Once your pumpkins have DRIED, do another thin coat of OPI Ya’ll Come Back Ya Hear? over the entire nail and let dry.
Step 9) Use OPI Alpine Snow, dotting tool, and detail brush to do to your final layer of pumpkins. Remember, it’s okay to overlap the earlier layers. Let dry.
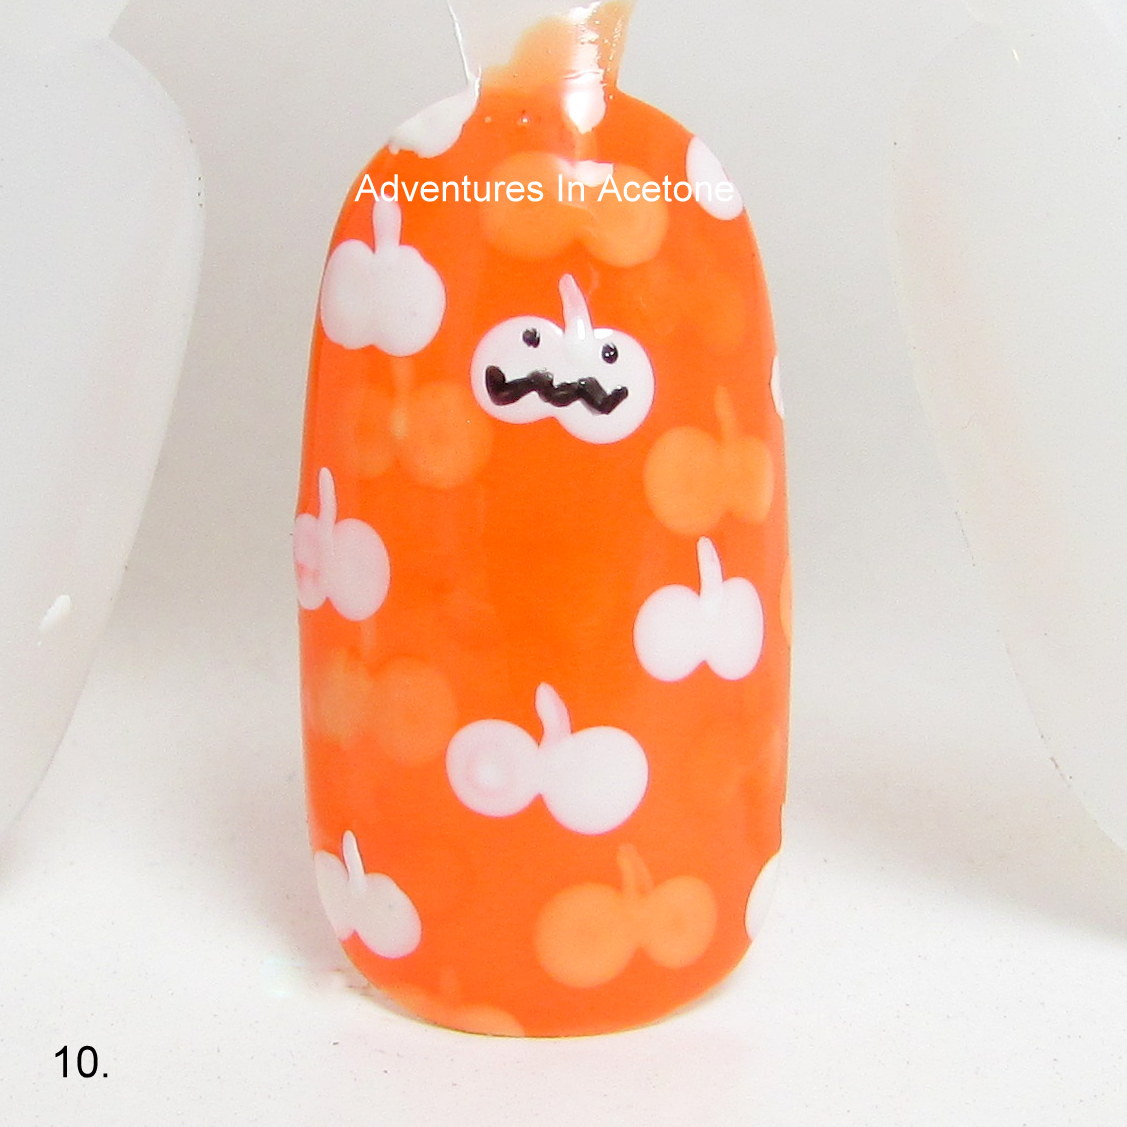
Step 10) This step is optional. Use your detail brush and OPI Black Onyx to do a simple Jack O’ Lantern face on a pumpkin. I did these very simple because they are so tiny on your nails that you don’t have to get very detailed.
Step 11) Once your pumpkins and face are completely dry, do your final thin coat of OPI Ya’ll Come Back Ya Hear?
Don’t forget to add a thick, quick drying top coat to protect and seal in your design! I prefer Seche Vite, H K Girl Top Coat, or Poshe. Put a thick bead of top coat on the brush and gently spread it toward the tips and sides, taking great care to not let the bristles touch the polish underneath. Thinner top coats can cause streaking or bleeding of the colors and the bristles drag lines through the design. YOU’RE DONE!
What do you think of this simple Halloween nail art tutorial? Will you be trying it? If you try this, or any of my other tutorials, please share your pic on my Facebook page or tag me on instagram (@adventuresinacetone)! I’d love to see them! Thanks for reading!
If you enjoyed this post, please Sign Up for email updates and you will have the latest news, reviews, nail art, and tutorials delivered right to your inbox! Never miss a post from Adventures In Acetone again. Thank you so much for reading.
– Let’s paint something amazing! –


Comments
beautiful mani 🙂
So cute! I am going to have to try this!
Cute as can be. I think I might be doing this as my Halloween mani. I was thinking of using my stamping plates. But these are going to be so easy to paint that I am tempted to pull out my dotting tool and go for it.
omg these are so cute. nice tutorial
Definitely doing this one. Thank you!
This is a great design for a newbie like me to try!
This is such a Cute Nail art! Love it!
xx Julia
great manicure! 😀
thanks for the tutorial!
This is amazing. I have no words to describe how much I love it! You're an artist!!!
So cuuuuuuute!