Good morning, everyone! I have another tutorial for you today! This one is super easy and anyone can do it, even if you think you don’t have any nail art skills(I’m looking at you, Traci!). My friend Traci, from The Trace Face Philes, requested this Galaxy nails tutorial for you today!
Some things to note:
I’m just showing you what I used to do my design. You can use any colors, similar to mine or not, and make it how you want it. I just started pulling colors out of my drawers that I wanted to use.
I didn’t have any nails that looked the same because I sponged randomly all over the place.
I think it’s too hard to mess this up because there is no real technique here.
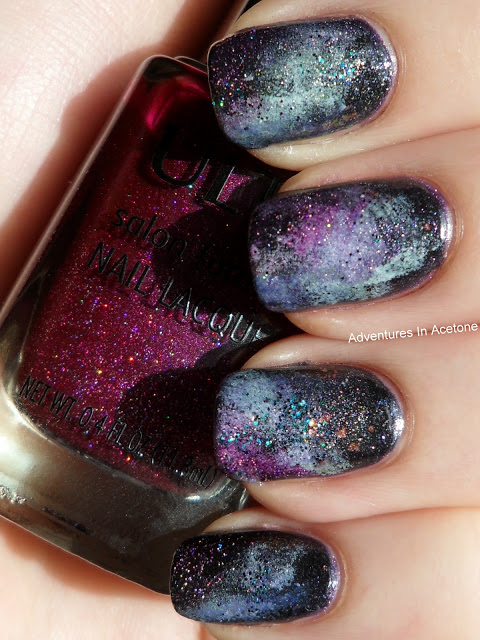
Here is a refresher photo to show you what I did for my full mani of Galaxy nails:
Onto the tutorial. Warning, there are a TON of pictures.
Here are the polishes I used:
Pure Ice Electric!, OPI I Juggle…Men, OPI Alpine Snow, piCture pOlish denim, Ulta Material Girl, a-england Lady of the Lake, Wet n Wild Jungle Fever, Ozotic 528, China Glaze White Cap, and Nubar 2010.
This is the only tool you will need:
Make up sponges. (sorry this is out of focus. Couldn’t tell until I cropped it. At least you can tell what I am showing you)
Step 1) Paint your nail with the dark shimmer color. This is Pure Ice Electric! and was only $2 a walmart. A plain black would work, I was just going for more shimmer since I didn’t do stars in my design.
Step 2) Add one layer of OPI I Juggle…Men. This added a blue and purple shimmer to the black.
I wanted to show this picture of my workspace. I use an old placemat(i’ve also used those bendy cutting boards you can get at the dollar store) to mix colors.
Once you have the dark base ready and dry, you will want to rip some pieces of the makeup sponge to use.
Make drops of color and then dip the sponge in it. Make sure to sponge a few times on the placemat before you put it on your nail so you get all of the excess polish off.
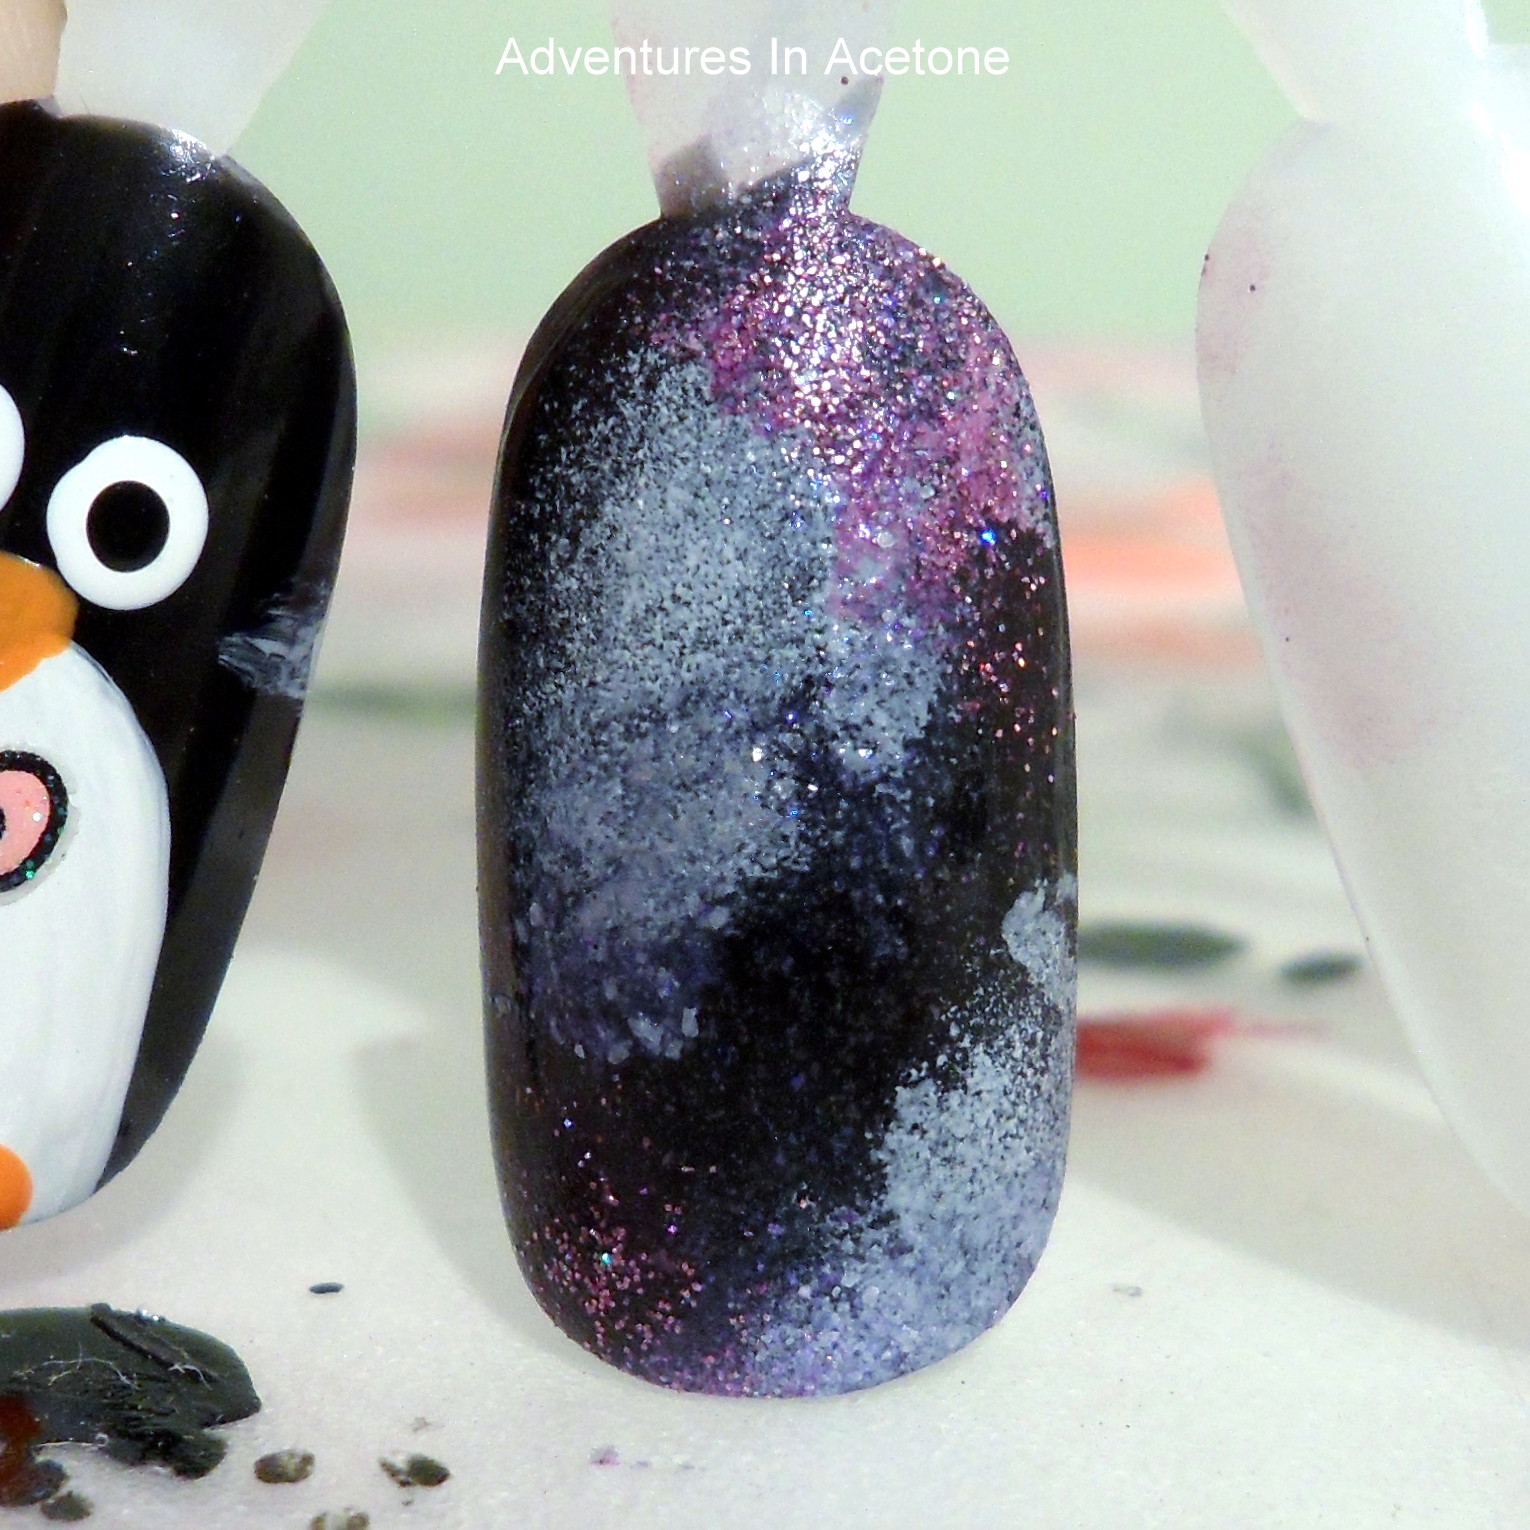
Step 3) Sponge on a bit of your white. I did this randomly on all of the nails in different shapes and locations. Don’t try to be too perfect with it because a lot of it gets covered by other colors.
Step 4) Dab on your next color. This was Ulta Material Girl. I loved this color because it has holo sparkles in it. Again, we are just doing it in random spots on the nail.
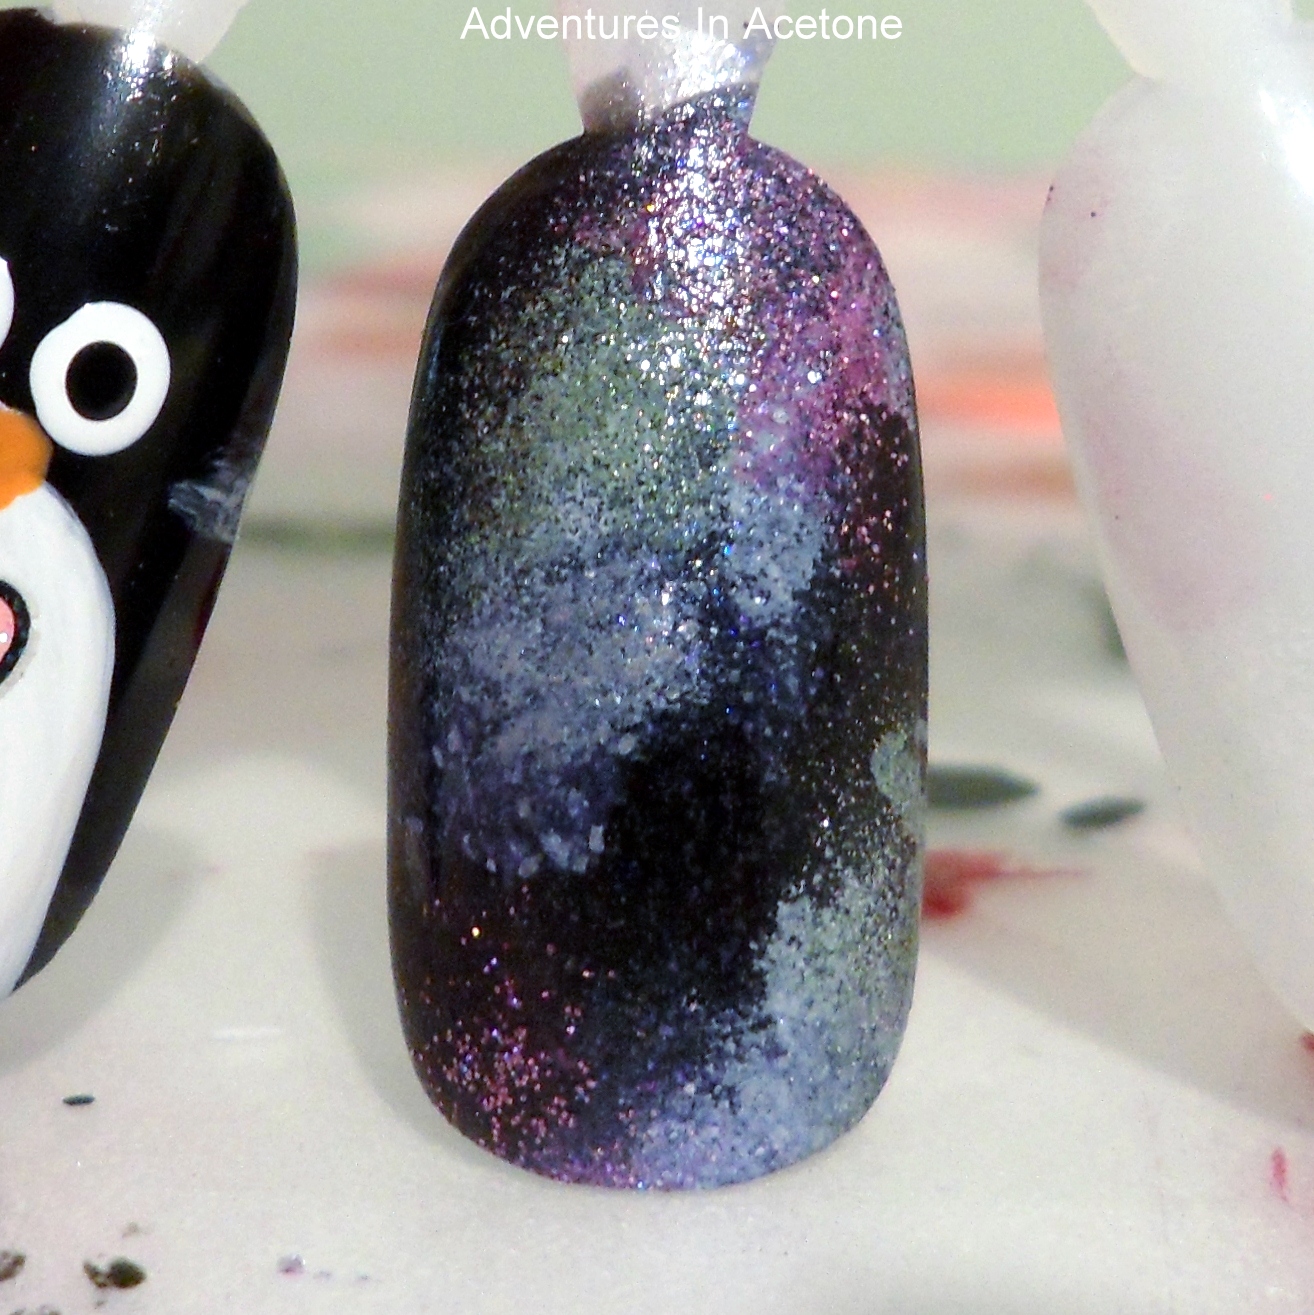
Step 5) Add your next color. This time was piCture pOlish denim. This one was kind of sheer but it has some great flakies in it that transfer onto the nail.
Step 6) Add your next color. This was Wet n Wild Jungle Fever(green).
Step 7) Add another color. This was a-england Lady of the Lake. (purple with holo sparkles). This one wasn’t as sheer as some of the colors so I did it in between the white sections on the black so it broke up the black stripe that was showing.
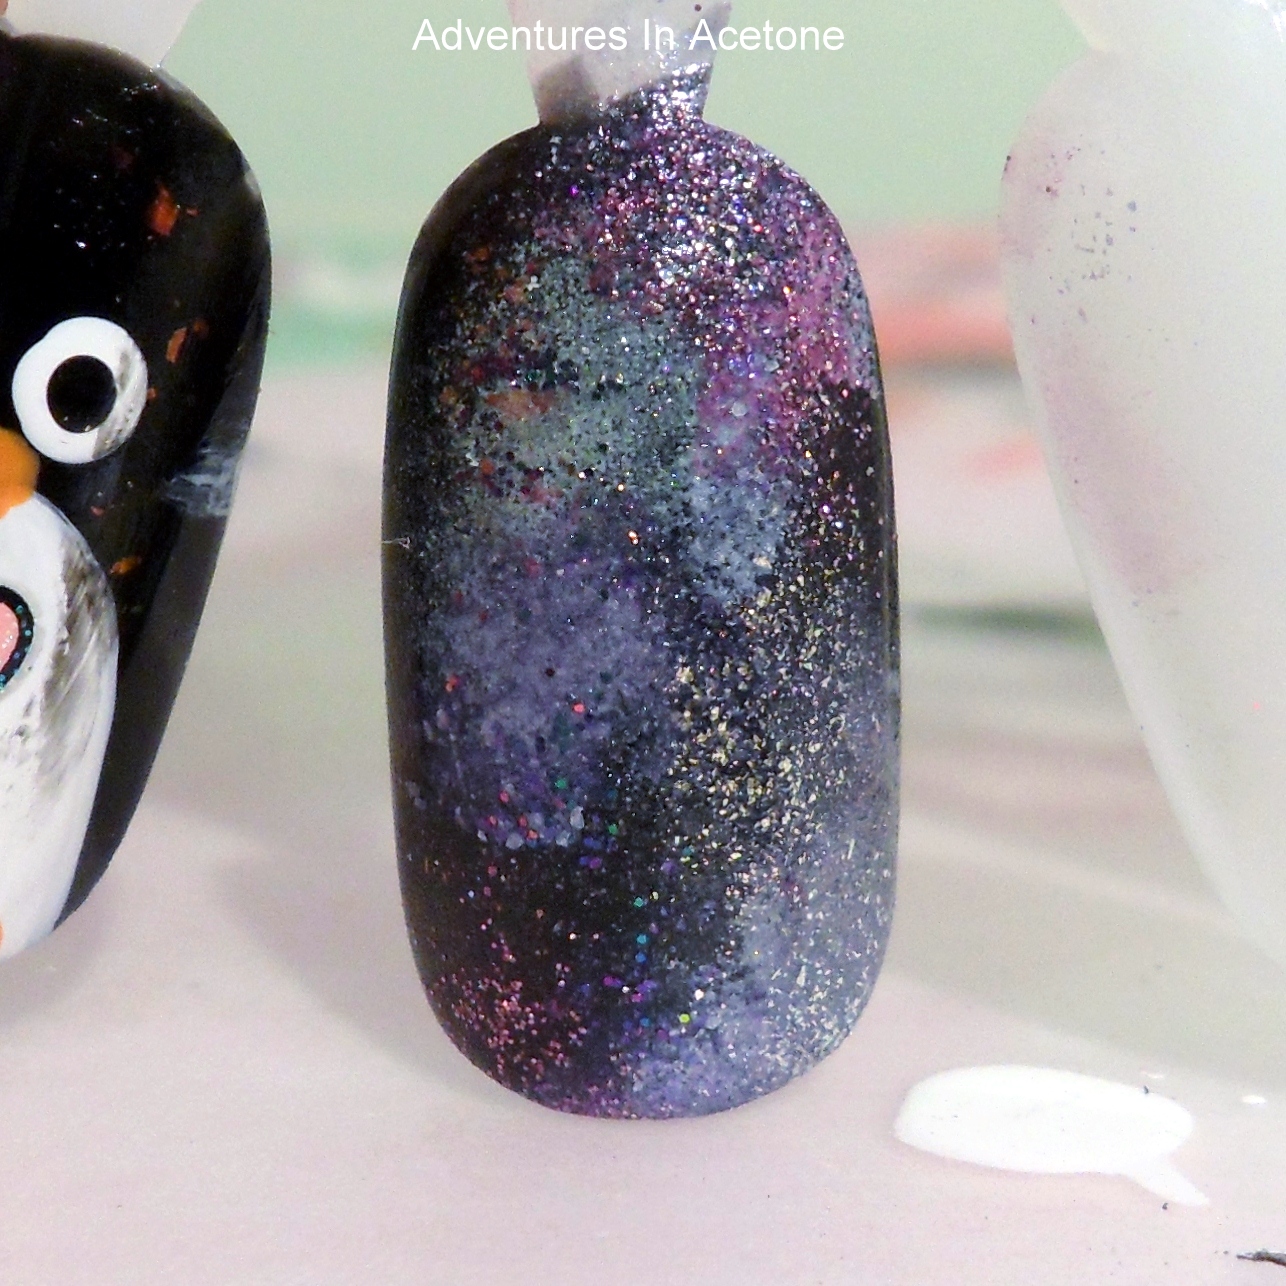
Step 8) Add your shimmer. This was China Glaze White Cap. It’s a sheer shimmery white with gold in it. I only did this up the right side of the nail. When it comes to these last 3 glitter/flakie toppers, I like to do them in separate spots on the nail so you catch the different glitters when you turn your nails in the light.
Step 9 and 10) I apparently forgot or accidentally deleted step 9. So this shows the last 2 toppers I added. on the bottom left we had the Ozotic 528 glitter(teal) and at the top left you can see the Nubar 2010 flakies that are a copper color.
Don’t forget to add a top coat. 🙂
This shows my color drops and dab marks with my used sponge pieces. Thought it may be helpful.
So there you have it! I hope it wasn’t too difficult to follow all of my picture steps. Are you going to try it? I’d love a link or picture posted on my fb page if you try any of my tutorials!! Please give me more tutorial requests to post on here for you.
Also, did you notice my new layout and 2 new tabs at the top of the screen? 31 Day Challenge and Tutorials tabs for easier navigation through my nail art.
What are your thoughts? Thanks for reading!!
If you enjoyed this post, please Sign Up for email updates and you will have the latest news, reviews, nail art, and tutorials delivered right to your inbox! Never miss a post from Adventures In Acetone again. Thank you so much for reading.
– Let’s paint something amazing! –


Comments
I LOVE sponging and think I could actually do this!! And so can Traci!!!
So beautiful! Never done sponging but am inspired!!!
Shweet! And nice Unicorn Puke on your thumb. 🙂
Really nice 🙂
Thank you so much Jacki!!!!! I dunno tho….. I still might screw it up hahahahaha <3
This looks awesome! A great combination of colors!
And I just checked out your 31 Day Challenge tab and all the pictures together look amazing!!!
Thanks for the tutorial! The end result is fantastic. I will be trying this soon 🙂
Jacki this is awesome! <3
I just adore these nails and great tutorial too!
Great job! Thanks for the tutorial!
xoxox
Thanks everyone!! 🙂 Tutorials are super fun to write up! And yes, that is Unicorn Puke still on my thumb haah
I love this! (And I'm guessing that you're wearing Unicorn Puke in the demonstration photos. *grin*)
omg this is awesome >.<
This obviously could be done with as little or as many products as you want to mess with, and you could change the colors, products, etc as long as you use the sponge and a dark color for the background.
this is great!! thanks for the tutorial
I love this design!!! 😀 I tried it on my nails after seeing in on a tutorial Andrea from Anreaschoice on youtube, it was pretty neat. It's actually one of my favorite nail designs. It's quick and easy!!!
Check it out on my Instagram: GracieJ1
– Gracie
http://sweettobegracie.blogspot.com/p/pics-and-flicks.html
ADOREI ESTA NAIL ART! PARABENS PELO BLOG…
http://www.lupapodemulher.com.br
http://www.lupapodeblog.com.br
Thanks so much for this fantastic tute on galaxy nails 🙂