Hello readers! After that 31 Day Challenge with changing my nail designs every day, I feel like I need a little break and plan to wear my manis at least 2 days. That being said, I don’t want to have a bunch of days without posts for you, so I think I’ll be filling them with some tutorials and swatches.
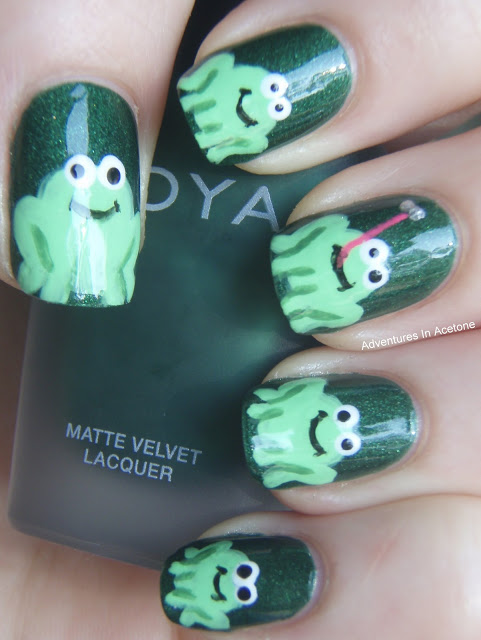
This tutorial was requested on my FB page, from Ashley at Ashley is Polish Addicted(her blog is new, go check it out because she is the sweetest person ever and has some great nail ideas!). If you didn’t get to see, I did this frog mani on green day of the 31 Day Challenge:
Are you ready to see how I did it? Here we go!
These are the polishes I used:
Zoya Veruschka, China Glaze Starboard, Color Club Twiggie, OPI Alpine Snow, and Sinful Colors Black on Black.
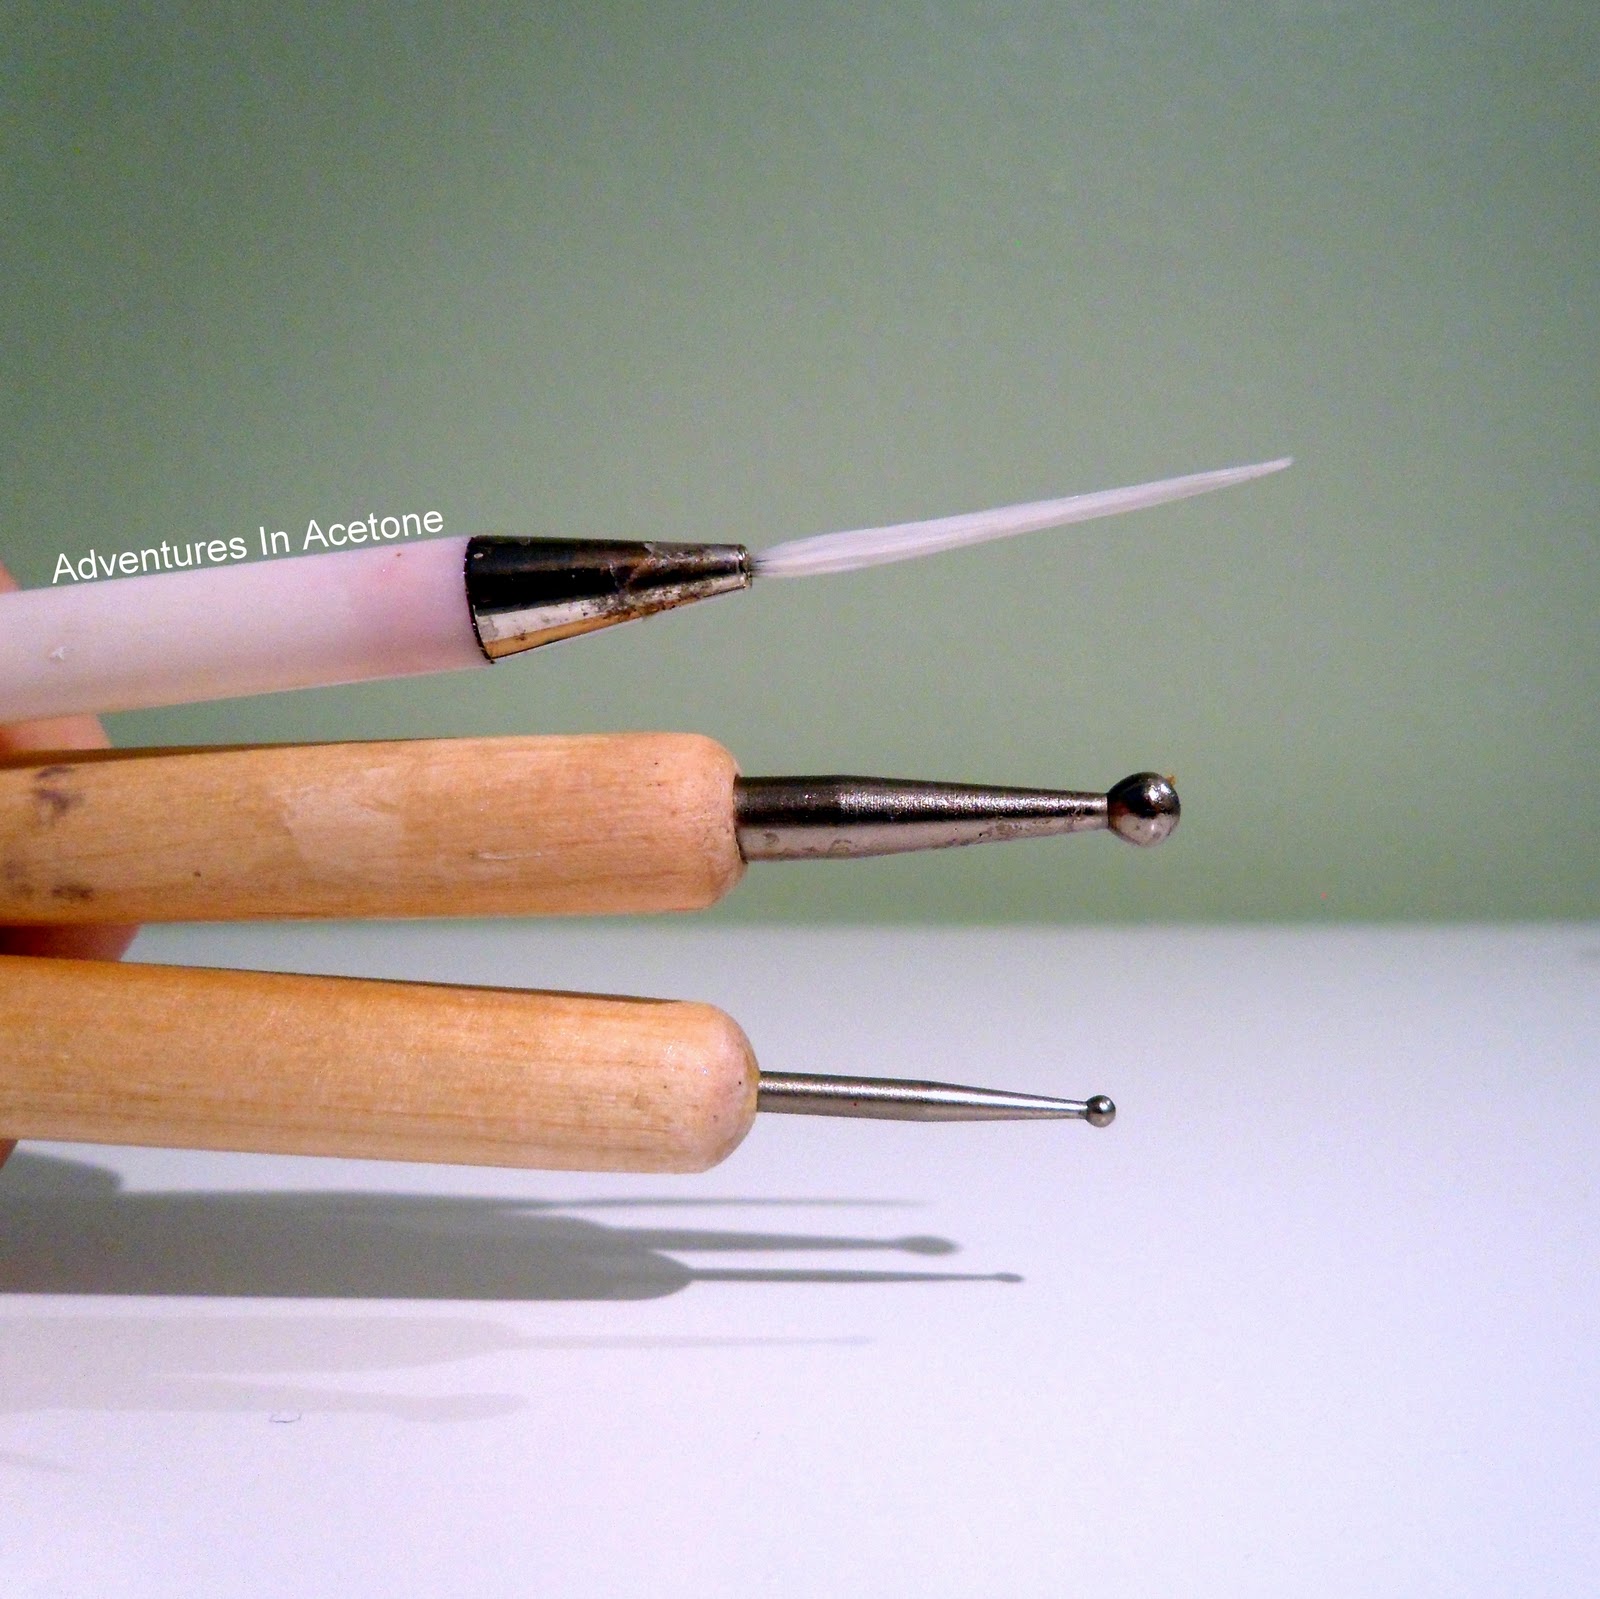
The tools I used:
A striper brush, big dotting tool, and medium dotting tool.
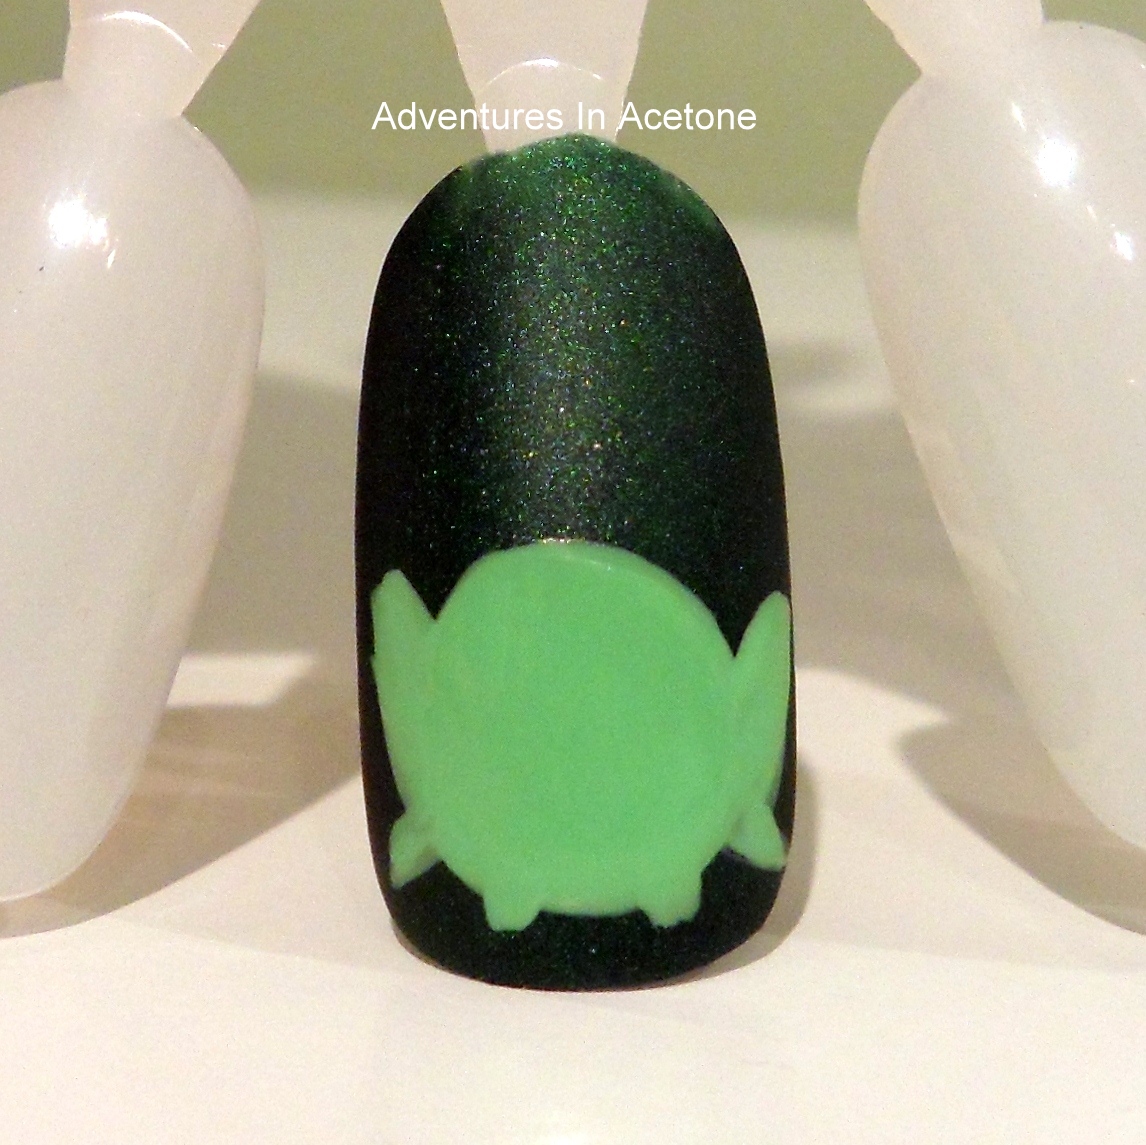
Step 1) Paint your nails dark green.
Step 2) Using your light green, make a rough circle. I used the actual polish brush here and not the striper.
Step 3) Using your striper and the same light green polish, add front and back leg shapes. Make sure you do the back legs so they look like they are folded and not straight out.
Step 4) Using your big dotting tool and white, make two dots for the eyes on the center of the top of the head.
Step 5) Using black polish and the medium dotting tool, make smaller dots in the white dots for the pupils(or irises? what would that be considered? lol)
Step 6) Using your striper brush and black polish, make a mouth. This didn’t come out as steady as I’d hoped, but unless you are looking this close, you can’t tell that it’s not a perfect line anyway.
Step 7) Using you medium green, add some leg line details to make it more obvious where the legs are bent and attached to the body of the frog.
Once it’s dried, gently apply your top coat. If you use a bigger bead of top coat and then gently smooth it out onto the nail without the bristles touching your design, you have a better chance of it not smearing your artwork. I like Seche Vite and Poshe so far the best for nail art because they are thicker.
There you have it! Will you be trying it? If you do, please post your picture on my facebook page! I’d love to see! Also, please write me your requests for more tutorials! Thanks for reading!
If you enjoyed this post, please Sign Up for email updates and you will have the latest news, reviews, nail art, and tutorials delivered right to your inbox! Never miss a post from Adventures In Acetone again. Thank you so much for reading.
– Let’s paint something amazing! –


Comments
Soooo cute. I will be pinning this to my Pinterest page 😀
awe, thanks, Sarah! 🙂
Wow! This reminds me of a game I used to play as a kid. I love it!
You do an AMAZING tutorial! I have been asking a few bloggers to be more elaborate with their tutorials. And you hit the nail on the head. You have a new fan!!!! Free hand nail artists are awesome! Well, not all of them….LOL!!!
This is so cute! I really want to try this. Thanks for the tutorial!
sooo cute! 😀
thanks for this tuto! I was also in love with this mani!
Amazing frog design!! love it!
Oh my goodness that is so adorable – especially the nail with the tongue! Well done, and thanks for sharing.
This is just too freaking cute! I really need to try this!
Thanks for the tutorial! I am going to have to give it a go!
xoxox
Love this tutorial and thanks so much for the mention!! You are so sweet! 🙂
gj hook – im proud!
i have a request – pls do a tutorial on your "Day 20: Water Marbled" nails! i LOVE these and the shapes on them!
'; )
woww thats easy and so cute 🙂
ohmygodd, just saw this at Kayla Shevonne's site.. You are amazing!
Awh, this is so cute! I am going to try this some time. Thanks for sharing this with us:)
cute 🙂