
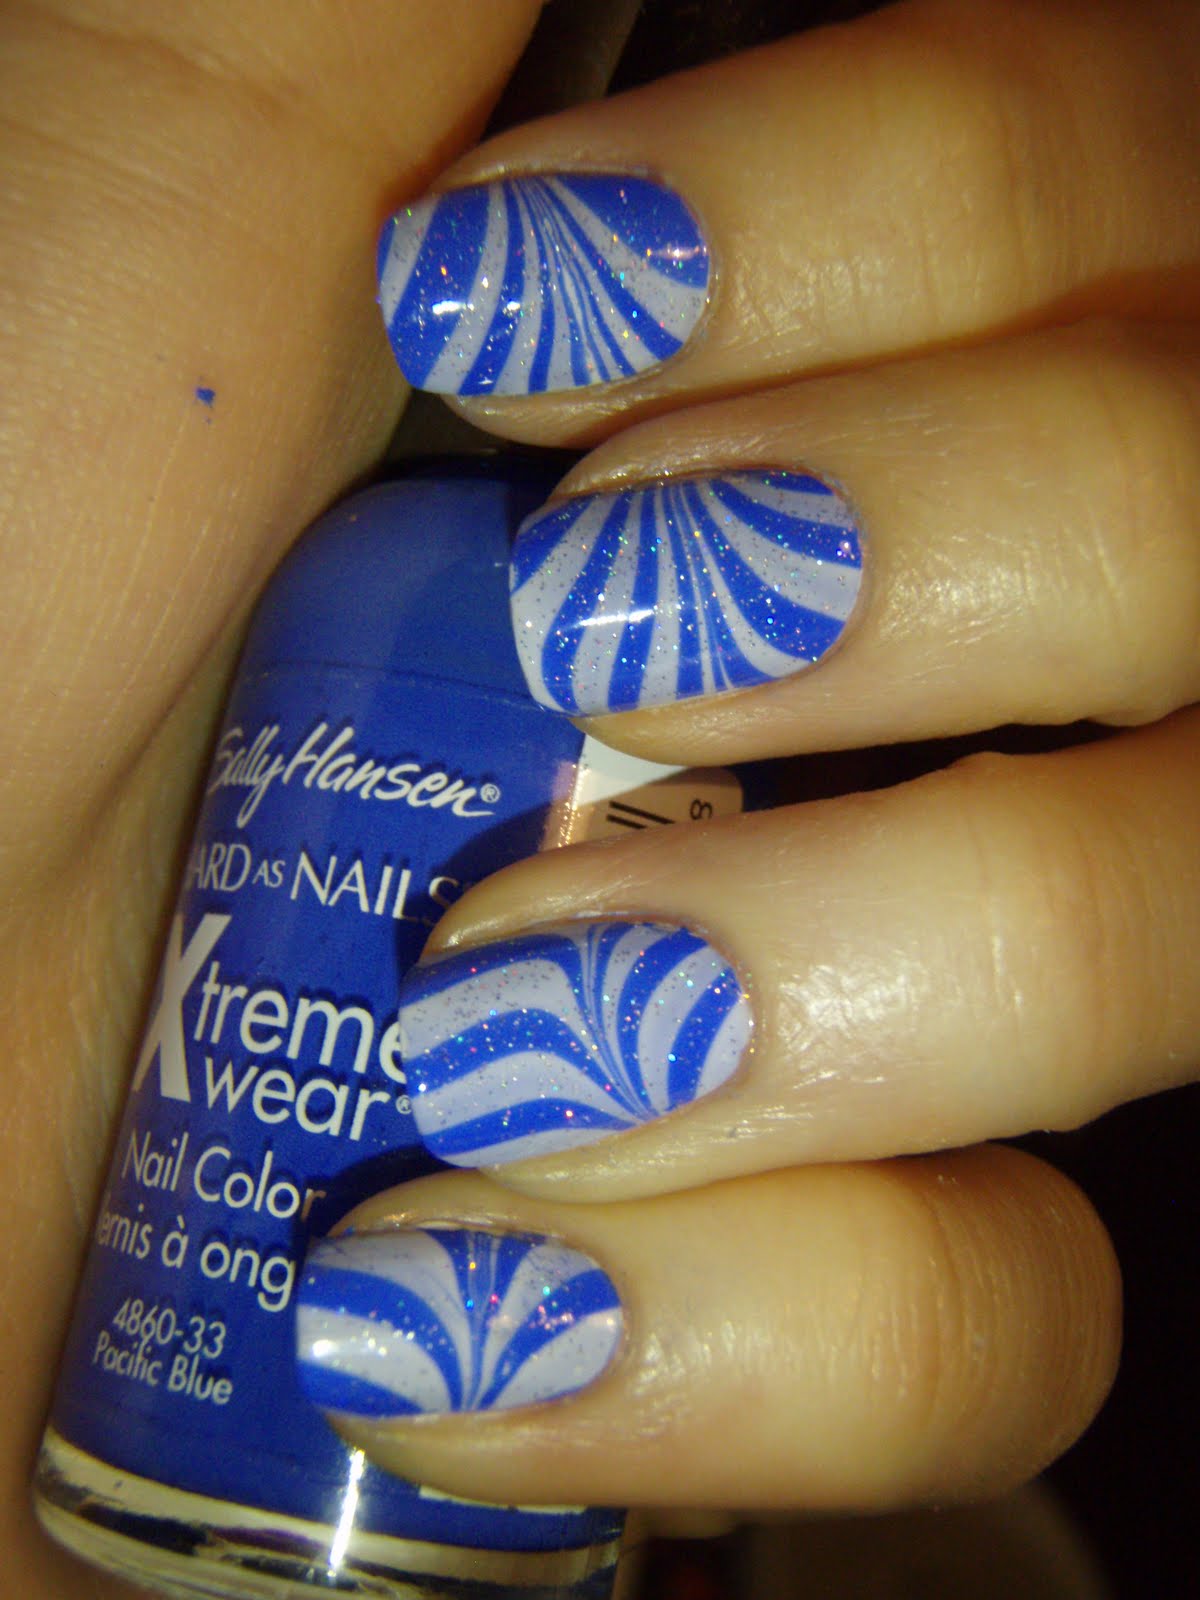
 This is my 4th attempt at water marbling. I really like how you can achieve different types of designs with the same technique! I’ve done the random swirling, actual swirls, and a star burst design. I was trying to get stripes in this design to make it look more like a zebra, but I don’t have super long nails so this is how they turned out. I really like them, though! I’m going to show you how I did them in case you’ve never heard of water marbling!
 First of all, paint all of your nails a white base color. During the marbling, the polish colors are much more sheer than if you were painting them on your nails and the white helps show the different colors. Next, I suggest you tape around your nail or cover your finger in vaseline to help with clean up later. I like taping better because I don’t like the greasy feeling of vaseline but it’s just a personal choice. I know the picture is crappy of the taping and I apologize. Not the best camera and it couldn’t focus in the darker room. Basically, you do a straight piece of tape under your cuticles and a second piece that goes up one side of the finger, over the tip, and down to the other side.
 Here, you can see my taped finger, shallow bowl filled with room temperature water, polishes, orange stick(or anything to clean up the excess polish in the bowl), and my dotting tool(to make designs in the polish. tooth picks work, too). I chose to use Sally Hansen Xtreme Wear Pacific Blue and Chine Glaze Peri-wink-le for the alternate color rings.
 Not the best picture, but this shows how you need to alternate drops from each polish bottle(do the drops as quickly as you can so it doesn’t dry before you can put your finger in it). The drops spread out on the top of the water and make co-centric circles.
 Do enough drops so it starts to look like this.
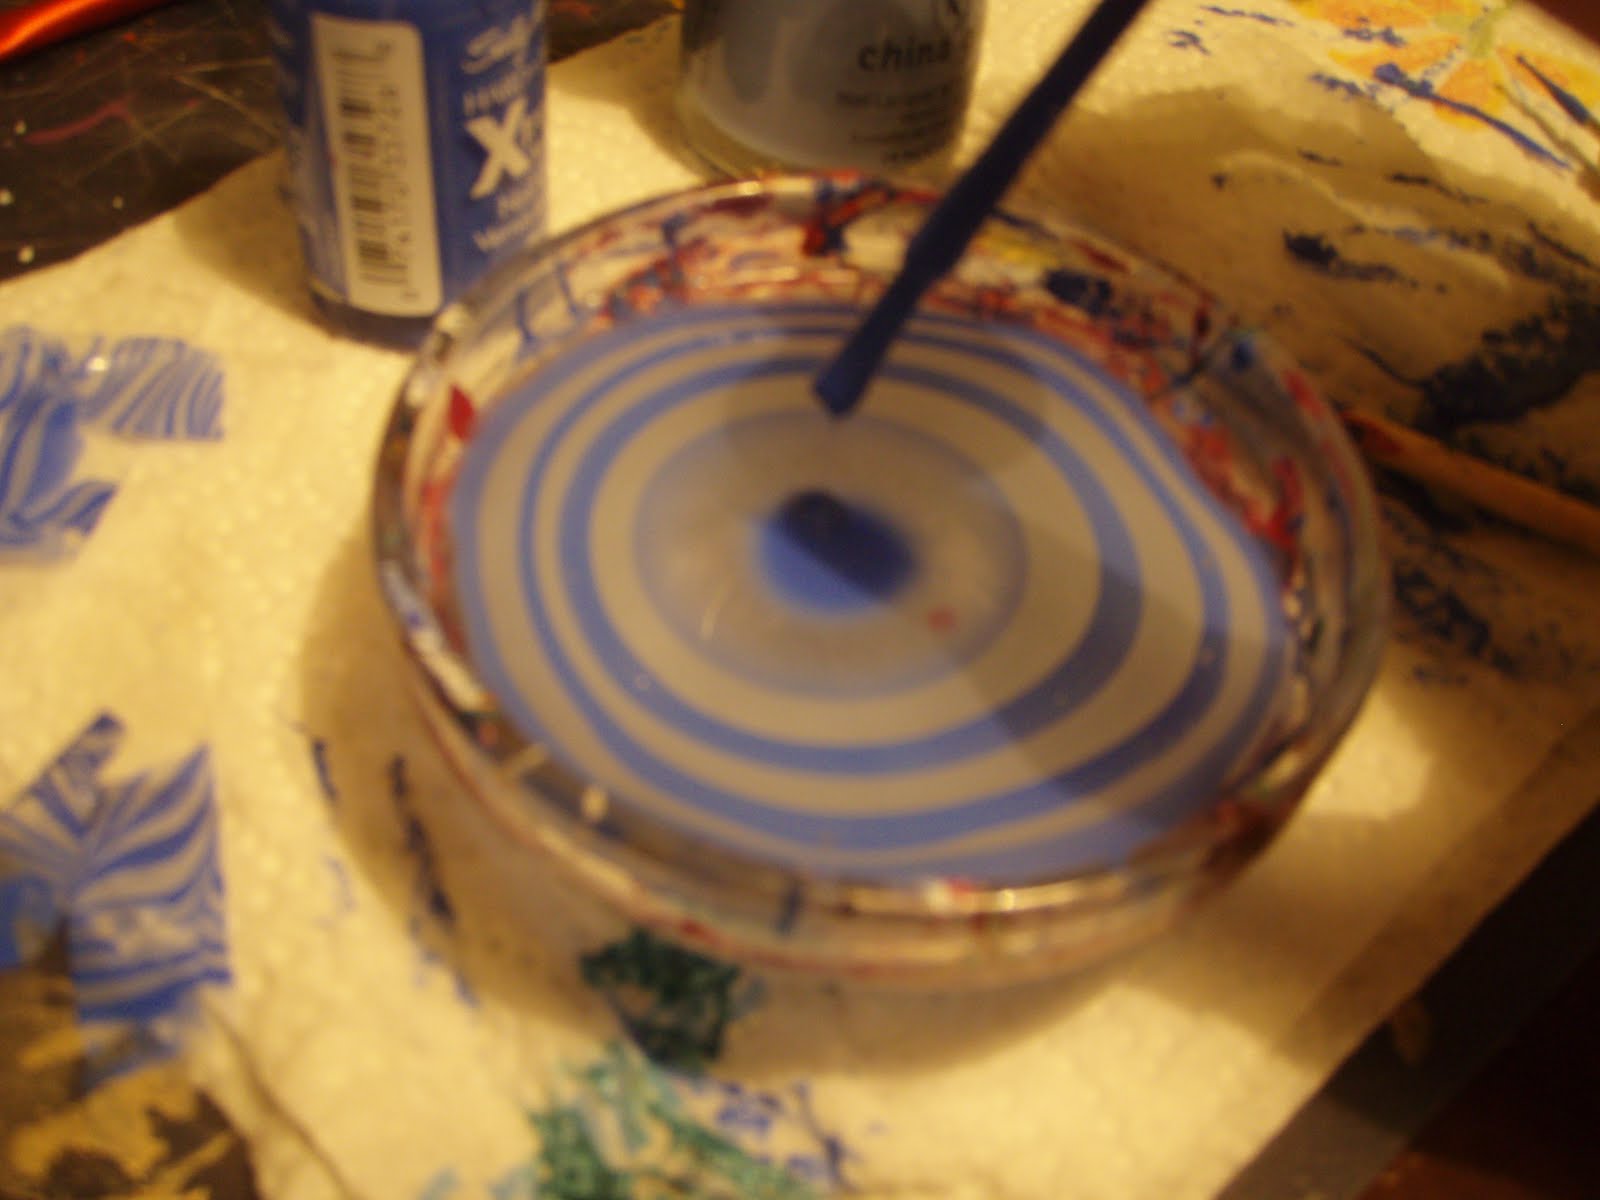
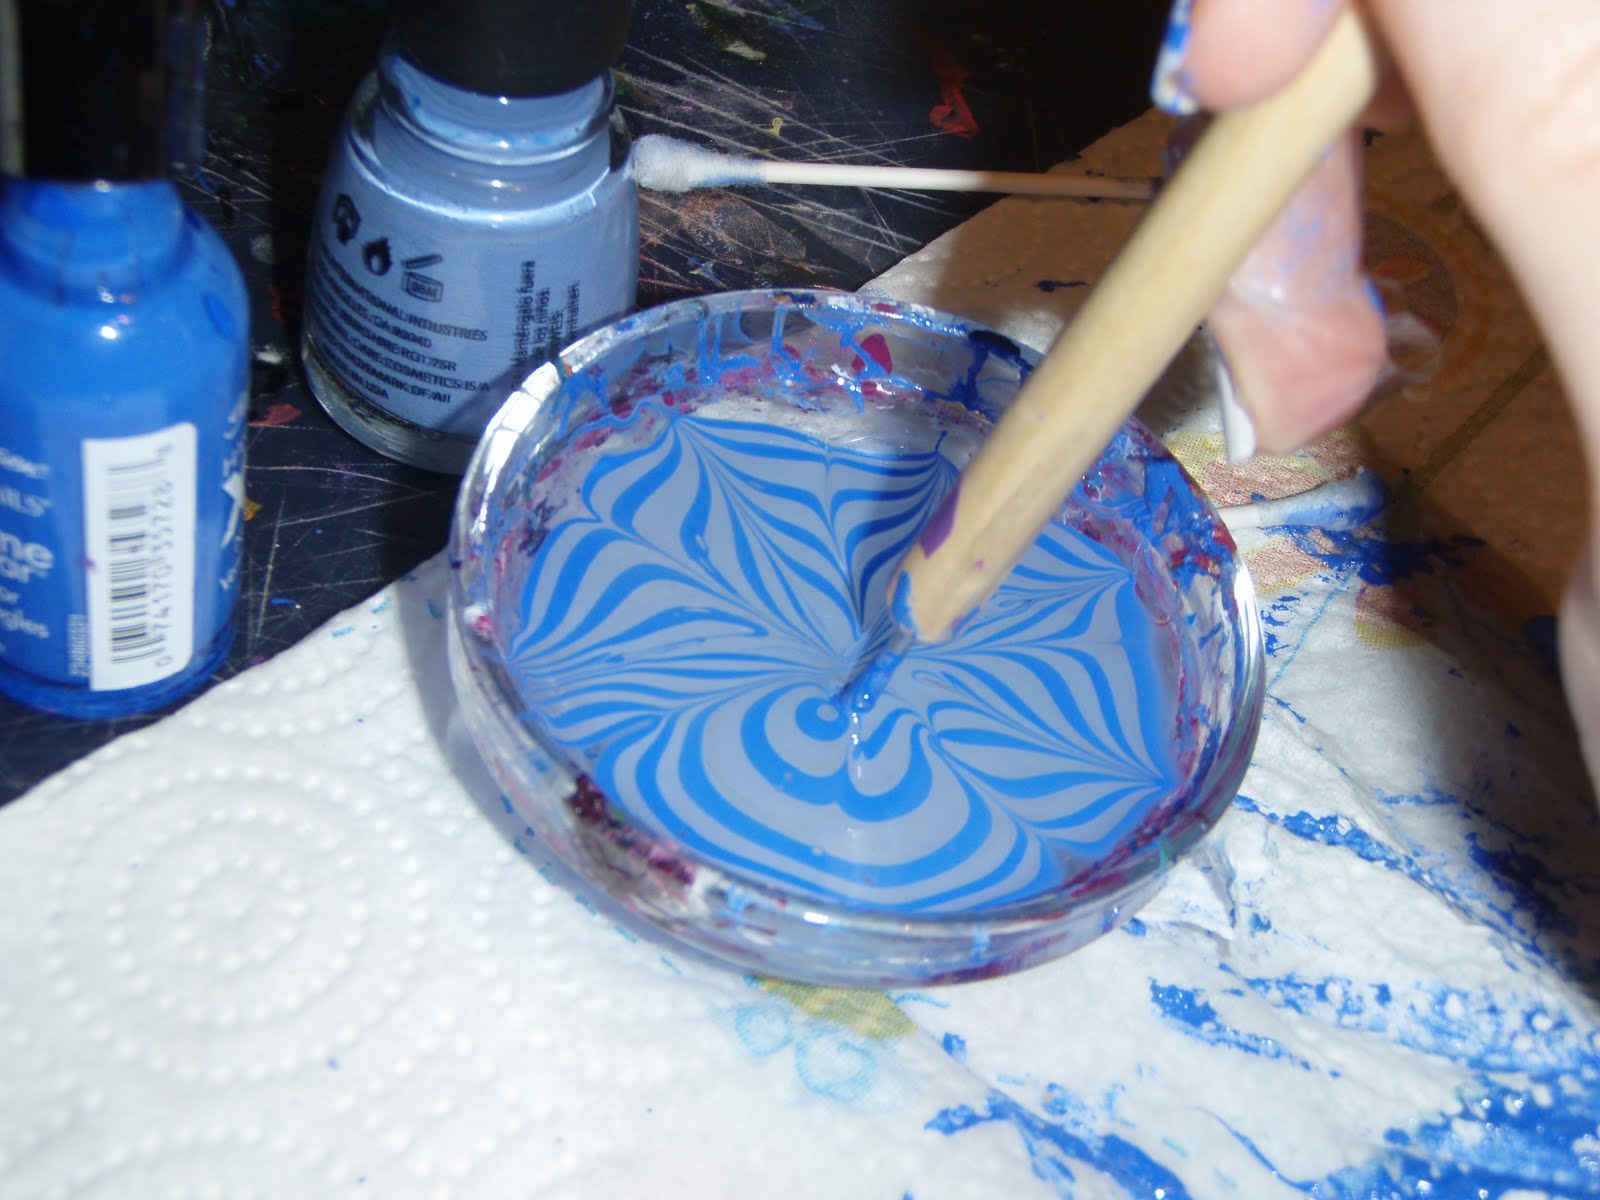 Now, you are ready to use your dotting tool to make designs in the polish. I was dragging from the outer bands to the center, and then vise versa to get the “V” designs. You can do any kind of designs in this step like swirls, etc.
 This is how it looked before I put my finger in it.
 Next, you dip your finger in the place that you want the design to show up on your nail. Try to put your nail face down onto the surface of the water and not pointing your finger tip downward so you don’t mess up the design. Next, it’s very important that you leave your finger just under the surface and use your orange stick to grab all of the left over polish on the surface of the water. I couldn’t take a picture since it requires both hands for this step. Basically, just stick your orange stick in the water and twist and swirl it around your finger until the bowl looks clean of polish. Once you don’t see other polish near your finger, you can lift your nail out of the water.
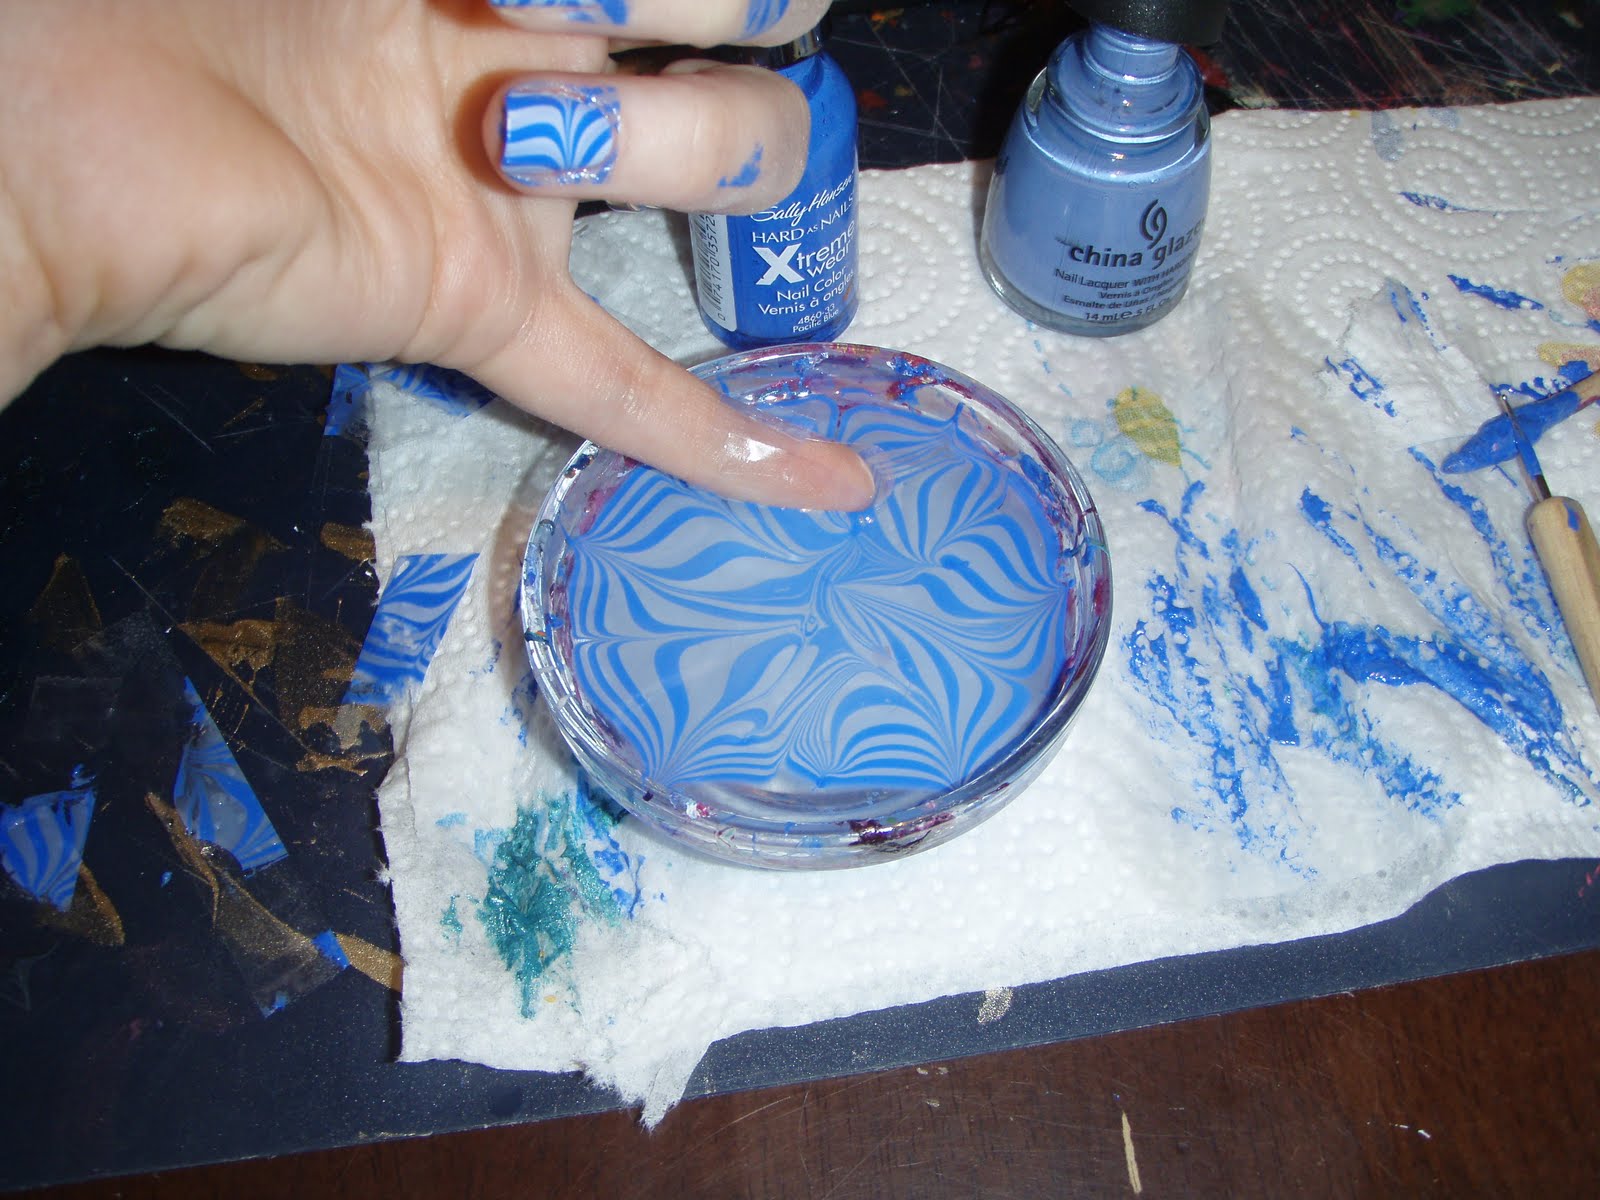
 It should look like this. Now, you can see why I like to use the tape.
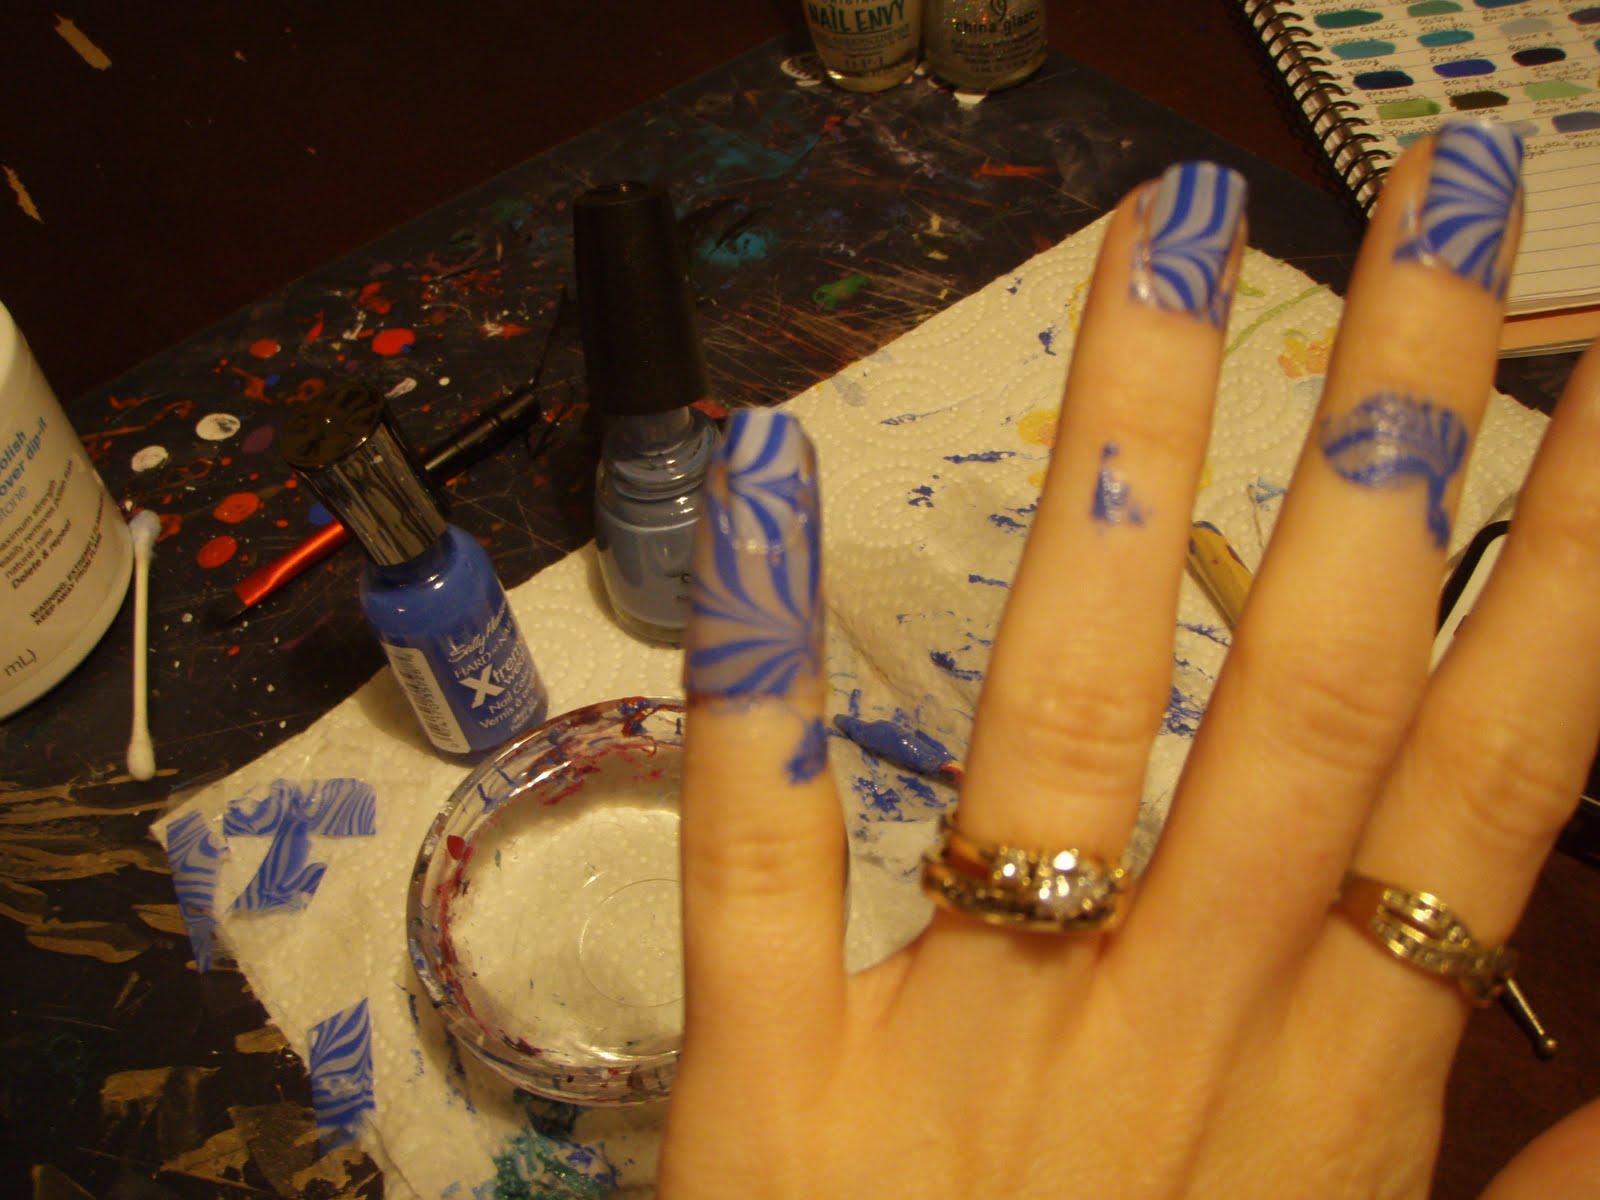
 Once you peel off the tape, you are left with much less cleanup around your nails! I prefer to use qtips in acetone along the finger but not right next to the nail. For the edges around the nail, I use a small makeup brush(either an angled eyeliner brush, concealer, or lip brush) dipped into acetone. You are pretty much painting the acetone on your finger where the polish is and wiping it off. Works great and makes for a very clean look in the end. 🙂
 I then did a coat of China Glaze Fairy Dust glitter polish and a top coat of Seche Vite. What do you think? Have you tried water marbling before? I hope this was helpful and not too confusing. You can always go to YouTube and watch a tutorial on water marbling if you want to see it in action. Thanks for reading!
If you enjoyed this post, please Sign Up for email updates and you will have the latest news, reviews, nail art, and tutorials delivered right to your inbox! Never miss a post from Adventures In Acetone again. Thank you so much for reading.
– Let’s paint something amazing! –

Comments
you're my hero.
Lol!! Thanks 🙂
Just gorgeous!!! I wanna do that next… Hint, hint!
Okay, come on over! haha
Awesome! Do you have favorite brands of polish?
@cwalker, I don't know that I have any favorite brands for the marbling specifically. Not all brands/colors marble well and it's trial an error. I find that the more opaque the color is in one coat on your nails(and how dark the color is), the better it will marble. I definitely always do the white base coat first so I can still get the thinner polish tints to show up.
I LOVE this one!!!
@Sara, thanks!! Me, too! Much better than I was expecting 🙂
oh AAAND…i rly must get that darn SH blue i keep eyeballing. it looks rly pretty on you!
Wow! You aren't messing around, Jacki! These designs are beautiful.
@Heidi, you should! I love that blue and at $2 something a bottle, you can't go wrong!
@Sarah, thank you!!! 🙂
Do you do more than one finger at a time? Seems like a lot of polish just for one finger!
@amber Michelle, you can dip two or three fingers at a time, but I was trying to position my nails on a specific part of the design so I did one at a time. It does use a lot more polish than normal painting, so I don't recommend doing this for every mani or at least using cheaper $2 bottles of polish rather than your expensive $8 ones.
THE BEST water marble i have ever seen. LOVE IT 😀
@Joy, WOW! Thanks SO much for the huge compliment!! 😀 You just made my day!
This is gorgeous! Love it! 🙂
This is awesome! Great job! Need to attempt this 🙂
I love doing water marble but Ive never done stripes like this. I always try to get it to swirl but next time i do water marble Im doing it this way! I love it!!
do you have to use certain type of nail polish brand?
So do u drip, swirl, dunk finger, EACH nail?
such a pretty color combo
This is amazing! I will definitely have to try this!
Cute.
Beautiful. You make it look so easy 🙂