
It’s time for another tutorial! Hope you are enjoying them! Have any requests? Please ask! This one was requested by my BFF, Heidi, because it wasn’t one of my designs she was at my house watching me do.
Sheesh, let me just say that it is a lot easier to water marble on your nails than a nail wheel!! I just didn’t want to take off my needle marble nails from yesterday to do it on my finger.
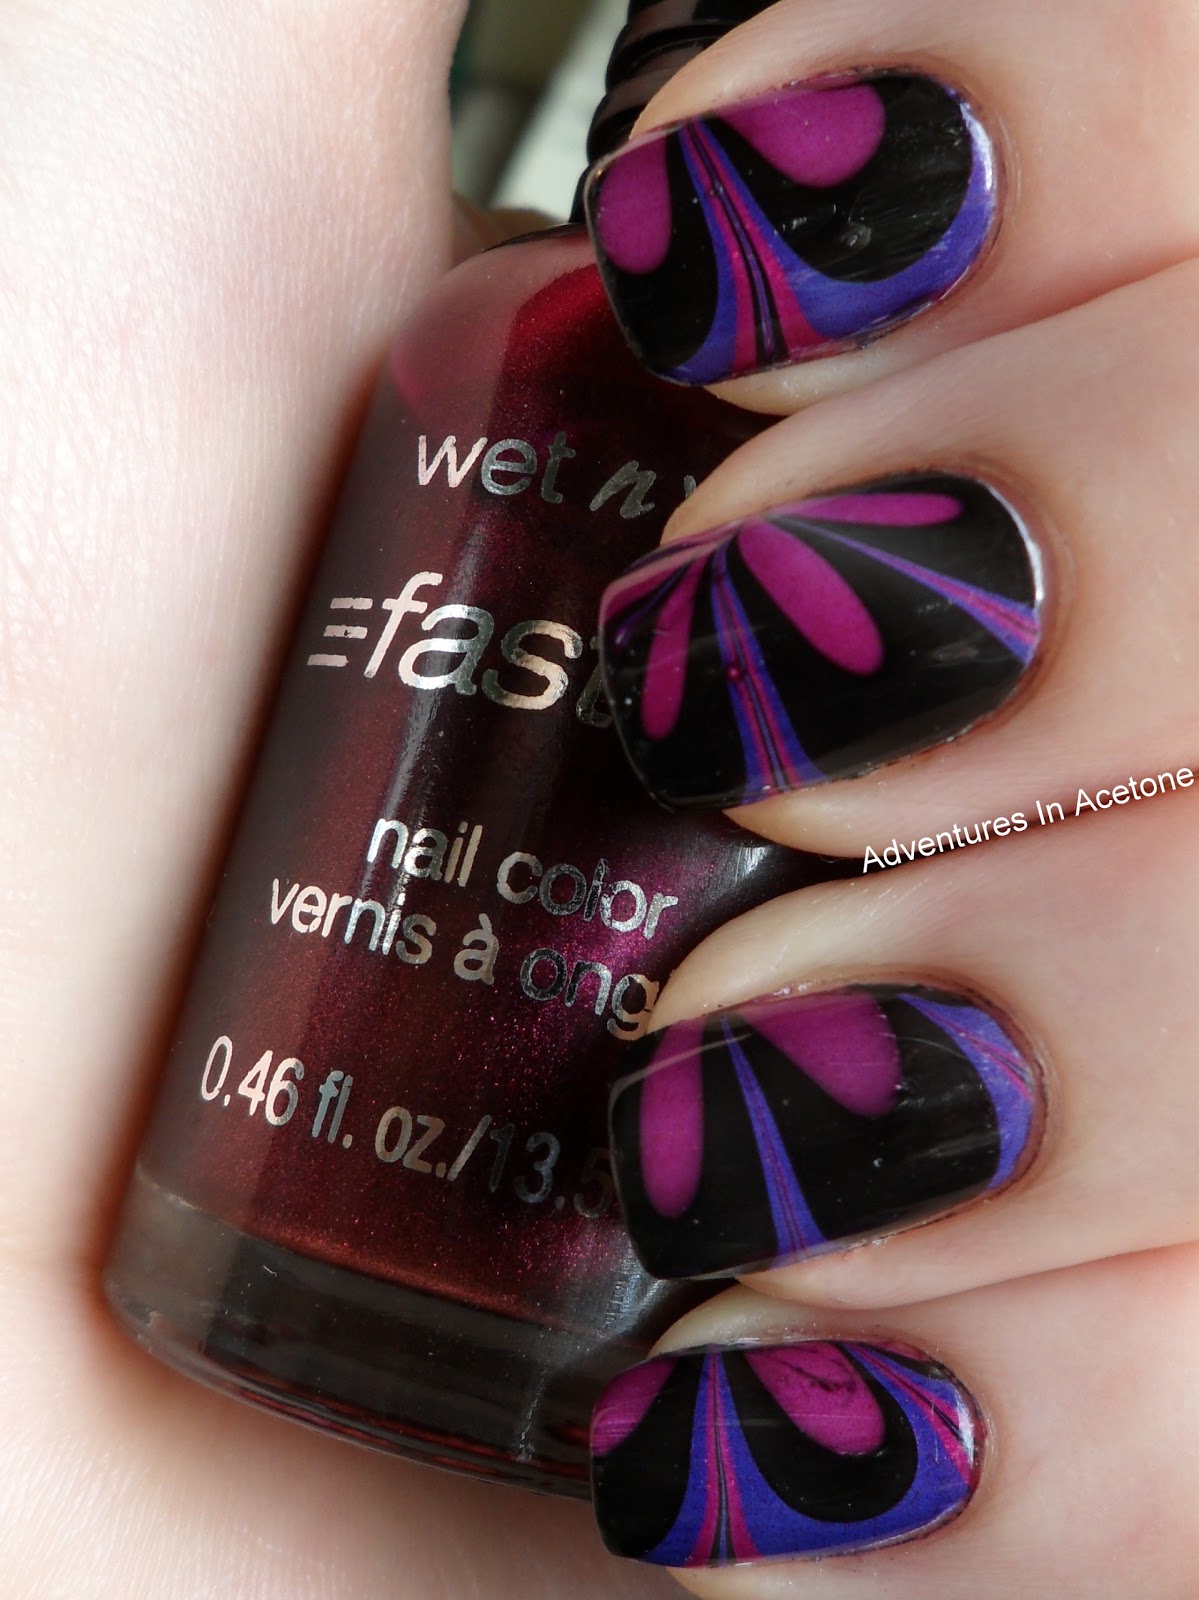
Here is a refresher of the water marble I did for the 31 Day Challenge:
Onto the tutorial:
The polishes I used:

OPI Alpine Snow, Wet n Wild Ink Well, Buy Me A Drink, and Ready to Pounce.
The tools you will need:

Something to collect the excess polish, something skinny to make the design on the water, and a cup or small bowl to do the marbling in.
Step 1) Paint your nails white.

Step 2) Fill your bowl with room temperature water. Then as quickly as you can, drop 3 alternating drops of each of your colors to make the concentric circles.

Step 3) Using your pin or small dotting tool, drag through from the outside to the inner circle from all directions to make it look like a flower.

Step 4) Dip your nail on one side of the center of the flower. You can place your nail in the very center if you want, but I was trying to get it close to my original design.

Step 5) While your nail is still under the water, use your other tool and “gather” up the rest of the polish on the surface of the water. Once it’s all clear again, remove your nail. It should look something like this. I didn’t go far enough to the side of the center(its hard to aim the nail wheel) so you can see the center of the flower on the nail. You get the idea though I hope!

Once it’s dried, add your topcoat. Don’t forget to tape around your nail or use vaseline to make clean up easier. You can see that in my original water marble tutorial.
What are your thoughts? I love seeing what designs I can come up with while water marbling and I hope you will try this one. Thanks for reading!
If you enjoyed this post, please Sign Up for email updates and you will have the latest news, reviews, nail art, and tutorials delivered right to your inbox! Never miss a post from Adventures In Acetone again. Thank you so much for reading.
– Let’s paint something amazing! –

Comments
These are beautiful! I find it so hard to create consistency between my nails when I water marble, so it's great to see this tutorial on how to make each nail look similar!
Thank you and so glad I could help! 🙂
Amazing! I've always been too scared to try this but now I'm totally going to! Thanks Jacki!!!
wow I had no idea you could do this….
Yay, Carly!! Go for it!! It's really not that hard!!
Kitty, Thanks!
beautiful!! ty for doing this! i love itttt!
<3 <333
Thanks for this tutorial, I've always wanted to try water marbling, but I just have the feeling like I would fail 🙁
This is really cool! I will have to try this soon 🙂
Water marbling is my new obsession! Thanks for sharing.
I love this color combination! Gorgeous!!
I water marbled my nails lastnight and messed em all up because I fell asleep on em! lol. You did a great job though!
Its beautiful, do you know a way of doing it on toes?
Oh Jacki….you make this look so easy!!! It turned out so well! I've tried twice and failed. Maybe someday I will be brave enough to try again.
This is really awesome…. I have tried this twice and failed miserably! Come do it for me LOL! But you know what. I might give it a go this weekend! Let's see how I do with your tutorial.
Ah-mazing! I myself have tried 2x and failed. This makes me wanna try again.
soo cool ! I tried to do marbling 2 times but it didn't worked. :/
http://myministyle.blogspot.com/
I had much better luck with a small vessel for my water, like a plastic shot glass, less mess
awesome, thanks for the tutorial!
This is the 1st time I've seen this look achievable, thank you, I will try when I get the chance xo
To do it on real nails, should I use the same technique you used or is there any other trick? My real nail are too beautiful to put fake ones on top, and I started trying this nail art stuff a few weeks ago, so i'm not that good at it… yet… I have to admit that it's not easy, but it's so gorgeous!
Yes, My hand photo is done with the same technique on my natural nails! I just used a nail wheel for easier photo taking steps! Sorry for the confusion!
Thank you for the quick answer! I always loved these art stuff but never thought it could be done without professional help! I love your blog, and the tutorial is great! I'll try it this weekend… of course I'll need a lot of training before I get them to be perfect like yours, but knowing it's doable is a great motivation! Thanks a lot
Thank you!! It just takes practice, I promise!! Good luck!
from sunny south ALABAMA cheekyDM60 says hello and helllppppp.
May I ask a few questions;I trust your answers.
Do you have any tips for the water marble design?!!! I am so blown away by it and so far have only had 1/10 nails to look right.
Are there polish brands that do better?
Is the A.C room temp ok or should the water be warmer?
Does the size of the cup matter?
It seems to dry way too fast and when I try to make a design in my circles it all comes up on my needle like a long sticky worm :~O
Does the clear flaky looking film on the water after a dip and excess removed prevent spreading of the next application?
Why would a polish spread one time but not another?
What brand of WHITE gives FULL coverage in 2 coats?
I know; practice,practice but a few "heads up" would keep me sane for one more try LOL
I thank you very much for yyour input, and guidance.
be blessed cheekyDM60/Deborah
I find that china glaze and opi cremes work pretty well! its kind of hit or miss and trial and error to find polishes that will marble well.
i usually put the water in the shot glass(shot glasses are easier than cups! ive just discovered!) and let it sit out a bit so its room temperature.
the outer rings tend to dry the quickest so i never really grab through those with the needle. if you are fast enough, the other rings shouldn't be too dry to pull through.
I hate the little floaters left behind after each nail so ill take about 3 drops of one of the colors and let it completely dry on the surface to collect those and clear it out before i do the next nail.
my favorite white that is enough coverage in ONE coat is Milani White on the spot!
Good luck!
Jackie; please accept my deepest apology and bad manner in not thanking you for your help sooner.
Your tips are greatly appreciated and give me incentive to try again.
THANK YOU and I admire your talent!!
So so mesh to do but incredibly EASY and looks so so awesome! Thank you for sharing this I feel I have learned a new skill.
wow. beautiful mani. I tried water marble couple of times but failed 🙁